Table of Contents [expand]
Last updated February 18, 2025
Terms of Use govern the ways in which customers can use your add-on. You may want to replace the Heroku Elements Terms of Use (Default) with your own terms on your Heroku Elements Marketplace listing.
Adding Terms of Use
To add a link to your Terms of Use on your Heroku Elements Marketplace listing:
- Login to the Partner Portal.
- Click the desired add-on tile.
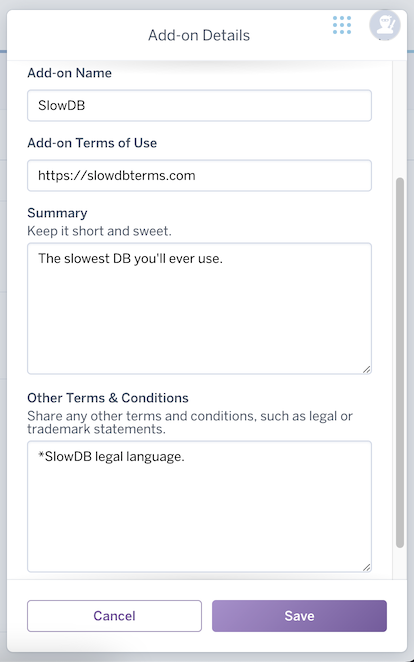
- From the
Marketplace Listingtab, scroll to theBasic Infosection. - Click
Edit Info. - In the
Add-on Terms of Usefield, enter a link to your add-on’s Terms of Use. - Click
Save.
Update your Terms of Use by repeating the above steps.
Adding Other Terms & Conditions
You can also add legal or trademark statements to your listing by following these steps:
- Login to the Partner Portal.
- Click the desired add-on tile.
- From the
Marketplace Listingtab, scroll to theBasic Infosection. - Click
Edit Info. - In the
Other Terms & Conditionsfield, enter your legal or trademark statements. - Click
Save.
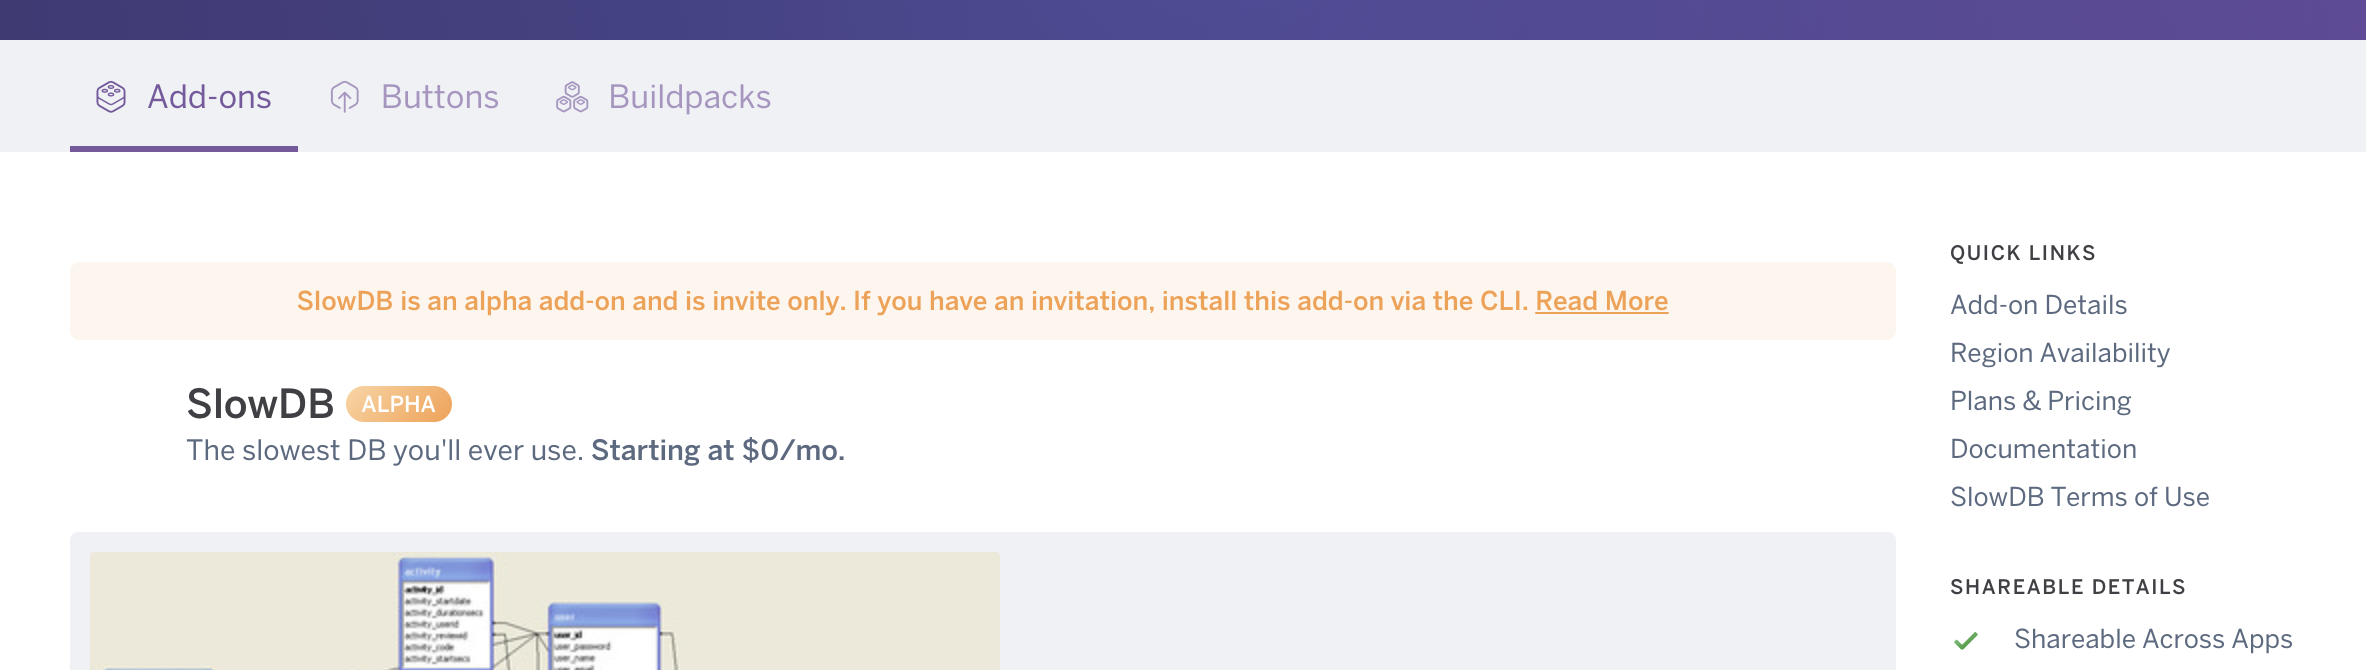
When users view your Heroku Elements listing, they will see any statements you’ve added at the bottom of the listing, below the Documentation section.
Showing Terms of Use
When users view your Heroku Elements listing, they will see a link to the terms listed under Quick Links. The link naming convention is <Add-on Name> Terms of Use.
Default behavior
Adding your Terms of Use to your add-on listing is optional. The Heroku Elements Terms of Use (Default) governs the use of your add-on unless you provide your own Terms of Use.
If you choose not to add your Terms of Use, users will see a link to the Heroku Elements Terms of Use (Default) under Quick Links on your listing.
If you currently present additional terms to customers via your dashboard, discontinue this practice. Instead, add a link to your Terms of Use in the Partner Portal.