Skip Navigation
Show nav
Dev Center
  • Get Started
  • Documentation
  • Changelog
  • Search
  • Get Started
    • Node.js
    • Ruby on Rails
    • Ruby
    • Python
    • Java
    • PHP
    • Go
    • Scala
    • Clojure
    • .NET
  • Documentation
  • Changelog
  • More
    Additional Resources
    • Home
    • Elements
    • Products
    • Pricing
    • Careers
    • Help
    • Status
    • Events
    • Podcasts
    • Compliance Center
    Heroku Blog

    Visit the Heroku Blog

    Find news and updates from Heroku in the blog.

    Visit Blog
  • Log inorSign up
Hide categories

Categories

  • Heroku Architecture
    • Compute (Dynos)
      • Dyno Management
      • Dyno Concepts
      • Dyno Behavior
      • Dyno Reference
      • Dyno Troubleshooting
    • Stacks (operating system images)
    • Networking & DNS
    • Platform Policies
    • Platform Principles
  • Developer Tools
    • Command Line
    • Heroku VS Code Extension
  • Deployment
    • Deploying with Git
    • Deploying with Docker
    • Deployment Integrations
  • Continuous Delivery & Integration (Heroku Flow)
    • Continuous Integration
  • Language Support
    • Node.js
      • Working with Node.js
      • Troubleshooting Node.js Apps
      • Node.js Behavior in Heroku
    • Ruby
      • Rails Support
      • Working with Bundler
      • Working with Ruby
      • Ruby Behavior in Heroku
      • Troubleshooting Ruby Apps
    • Python
      • Working with Python
      • Background Jobs in Python
      • Python Behavior in Heroku
      • Working with Django
    • Java
      • Java Behavior in Heroku
      • Working with Java
      • Working with Maven
      • Working with Spring Boot
      • Troubleshooting Java Apps
    • PHP
      • PHP Behavior in Heroku
      • Working with PHP
    • Go
      • Go Dependency Management
    • Scala
    • Clojure
    • .NET
      • Working with .NET
  • Databases & Data Management
    • Heroku Postgres
      • Postgres Basics
      • Postgres Getting Started
      • Postgres Performance
      • Postgres Data Transfer & Preservation
      • Postgres Availability
      • Postgres Special Topics
      • Migrating to Heroku Postgres
    • Heroku Key-Value Store
    • Apache Kafka on Heroku
    • Other Data Stores
  • AI
    • Model Context Protocol
    • Vector Database
    • Working with AI
    • Heroku Inference
      • Quick Start Guides
      • AI Models
      • Inference Essentials
      • Inference API
  • Monitoring & Metrics
    • Logging
  • App Performance
  • Add-ons
    • All Add-ons
  • Collaboration
  • Security
    • App Security
    • Identities & Authentication
      • Single Sign-on (SSO)
    • Private Spaces
      • Infrastructure Networking
    • Compliance
  • Heroku Enterprise
    • Enterprise Accounts
    • Enterprise Teams
    • Heroku Connect (Salesforce sync)
      • Heroku Connect Administration
      • Heroku Connect Reference
      • Heroku Connect Troubleshooting
  • Patterns & Best Practices
  • Extending Heroku
    • Platform API
    • App Webhooks
    • Heroku Labs
    • Building Add-ons
      • Add-on Development Tasks
      • Add-on APIs
      • Add-on Guidelines & Requirements
    • Building CLI Plugins
    • Developing Buildpacks
    • Dev Center
  • Accounts & Billing
  • Troubleshooting & Support
  • Integrating with Salesforce
  • Extending Heroku
  • App Webhooks
  • App Webhooks Tutorial

App Webhooks Tutorial

English — 日本語に切り替える

Last updated January 31, 2025

Table of Contents

  • Pre-requisites
  • Step 1: Set up Webhooks Viewer
  • Step 2: Create a webhook subscription using the Heroku CLI
  • Step 3: Test your subscription
  • Advanced webhooks usage

We recommend using our low-cost plans to complete this tutorial. Eligible students can apply for platform credits through our new Heroku for GitHub Students program.

This tutorial walks you through subscribing to an app webhook that notifies you whenever your Heroku app is deployed.

After you complete the tutorial, see the full webhooks documentation for more information on subscribing to webhooks and supported event types.

Pre-requisites

  • A verified Heroku Account
  • You are subscribed to the Eco dynos plan (recommended)

Step 1: Set up Webhooks Viewer

Using dynos to complete this tutorial counts towards your usage. Scale your dynos to 0 as soon as you are done to control costs.


By default, apps use Eco dynos if you are subscribed to Eco. Otherwise, it defaults to Basic dynos. The Eco dynos plan is shared across all Eco dynos in your account and is recommended if you plan on deploying many small apps to Heroku. Learn more here. Eligible students can apply for platform credits through our Heroku for GitHub Students program.

The Webhooks Viewer sample app provides an easy way to view webhook notifications as they’re sent. Deploy the Webhooks Viewer app with this Heroku Button:

If you aren’t logged in or don’t have a Heroku account, you’ll progress through the login flow before deploying.

When you reach the setup page for the app, scroll down and click Deploy. There’s no need to change any of the app’s settings.
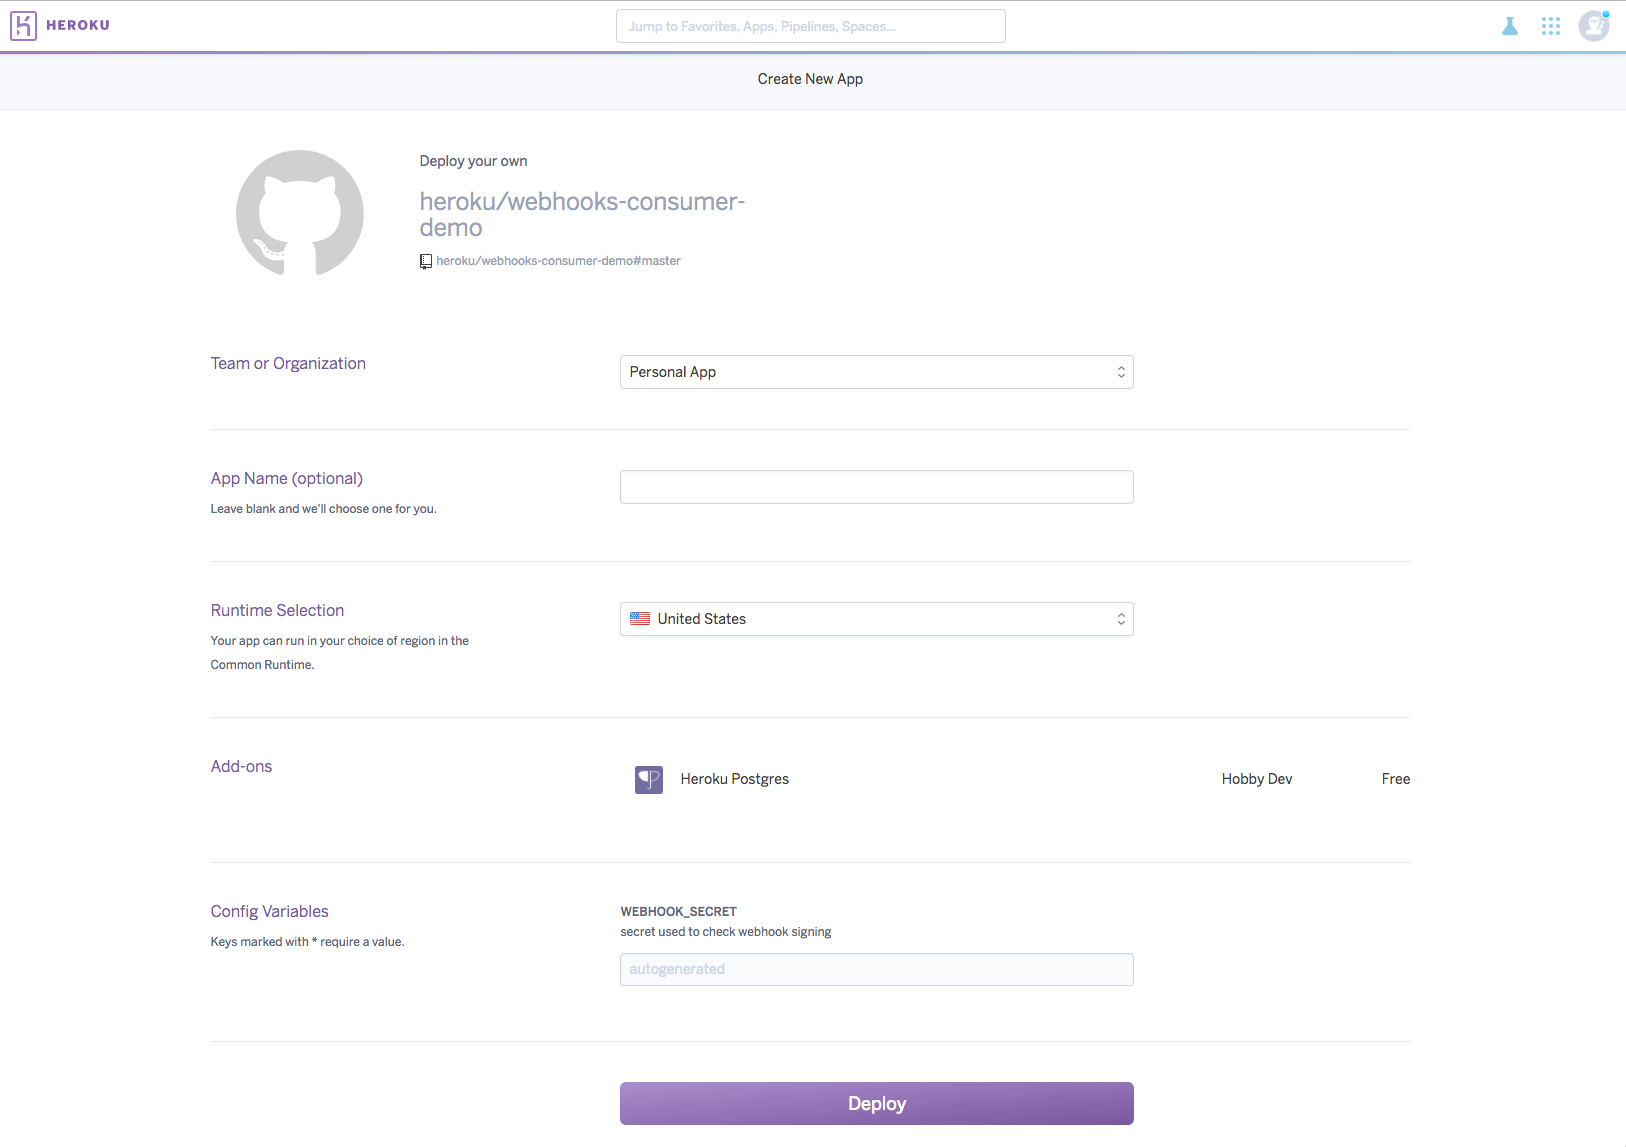
Deploy to Heroku

After your app is successfully deployed, all of the checkboxes below the Deploy button turn green:
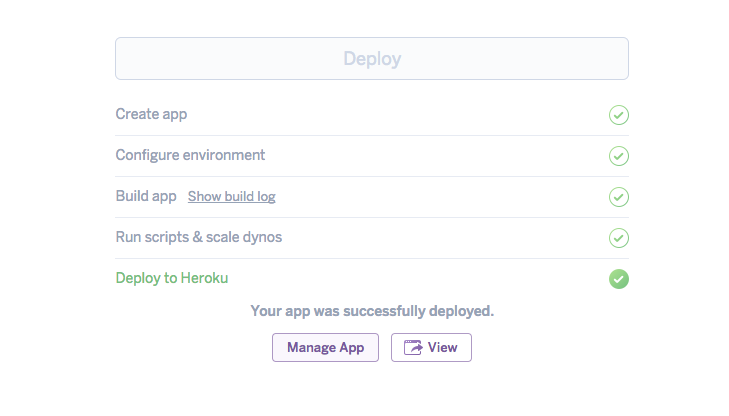
App deploy screen

Now, click View to open the Webhooks Viewer app:
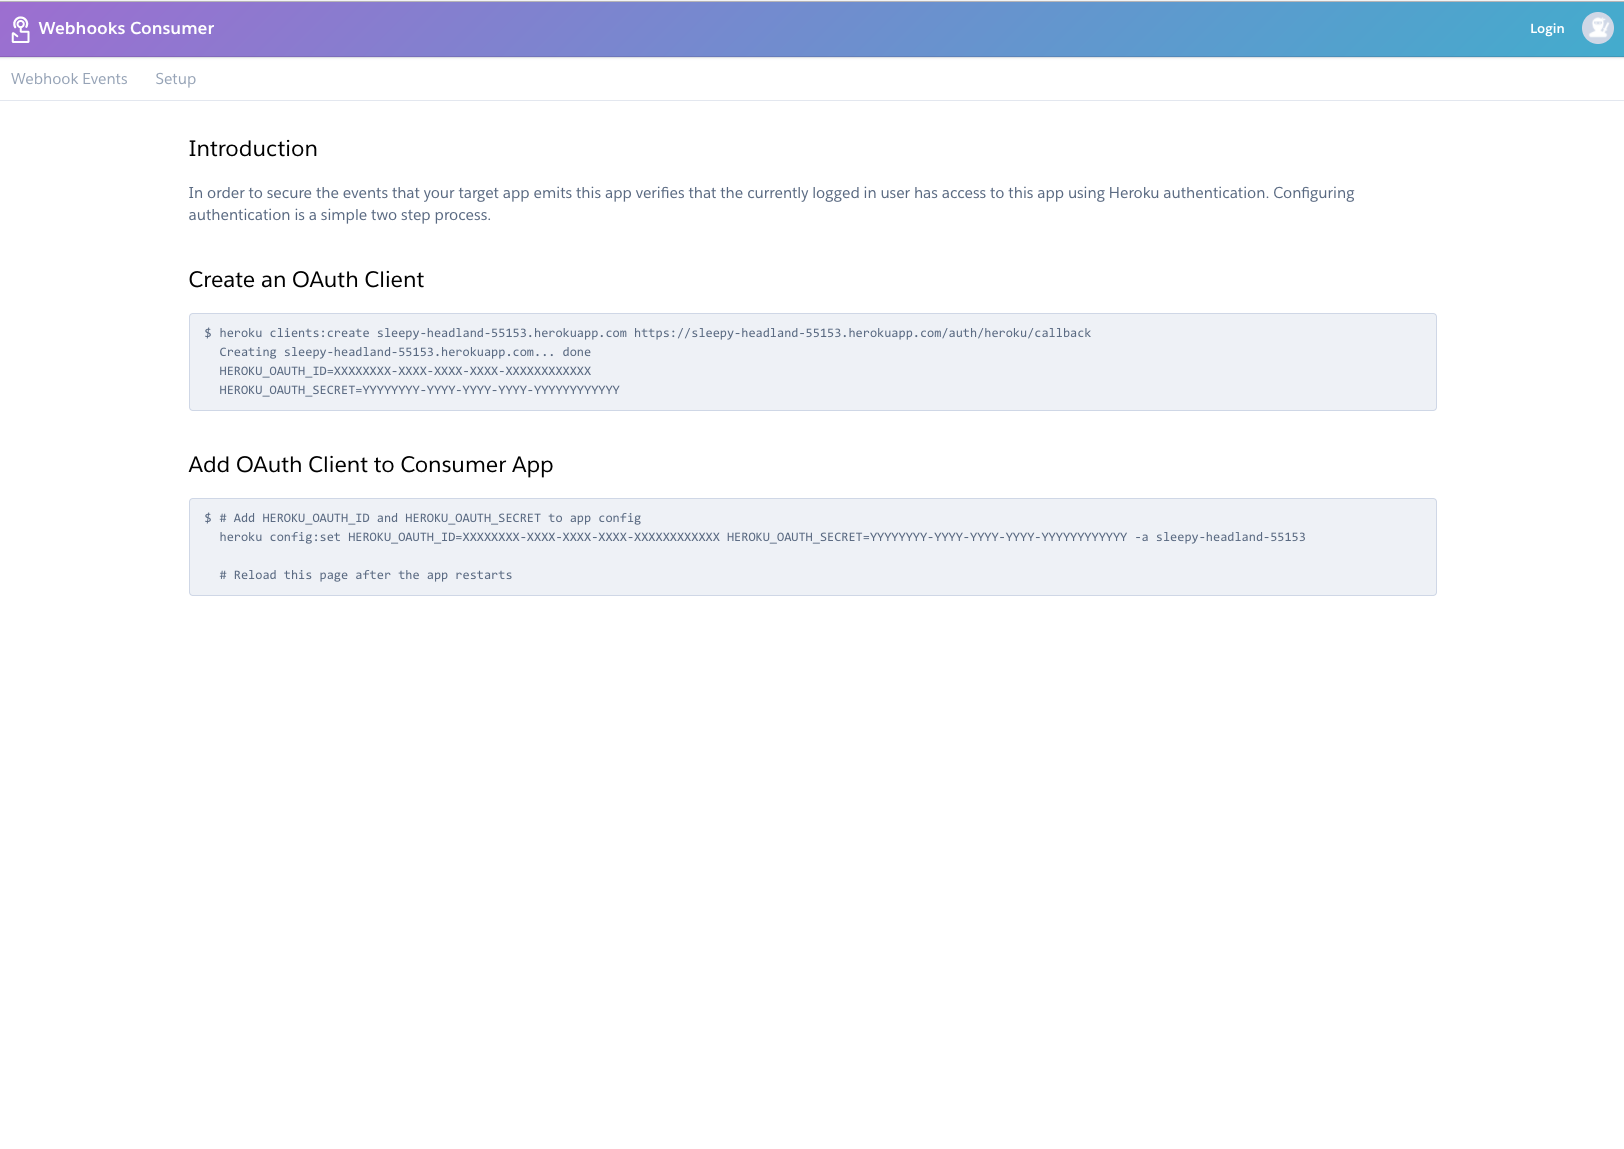
Creating an OAuth Client for the Webhooks Viewer

Follow the instructions shown in the app to authenticate. You’ll be prompted to grant Webhooks Viewer read access to your apps.

After you authenticate, the instructions are replaced by the following content:
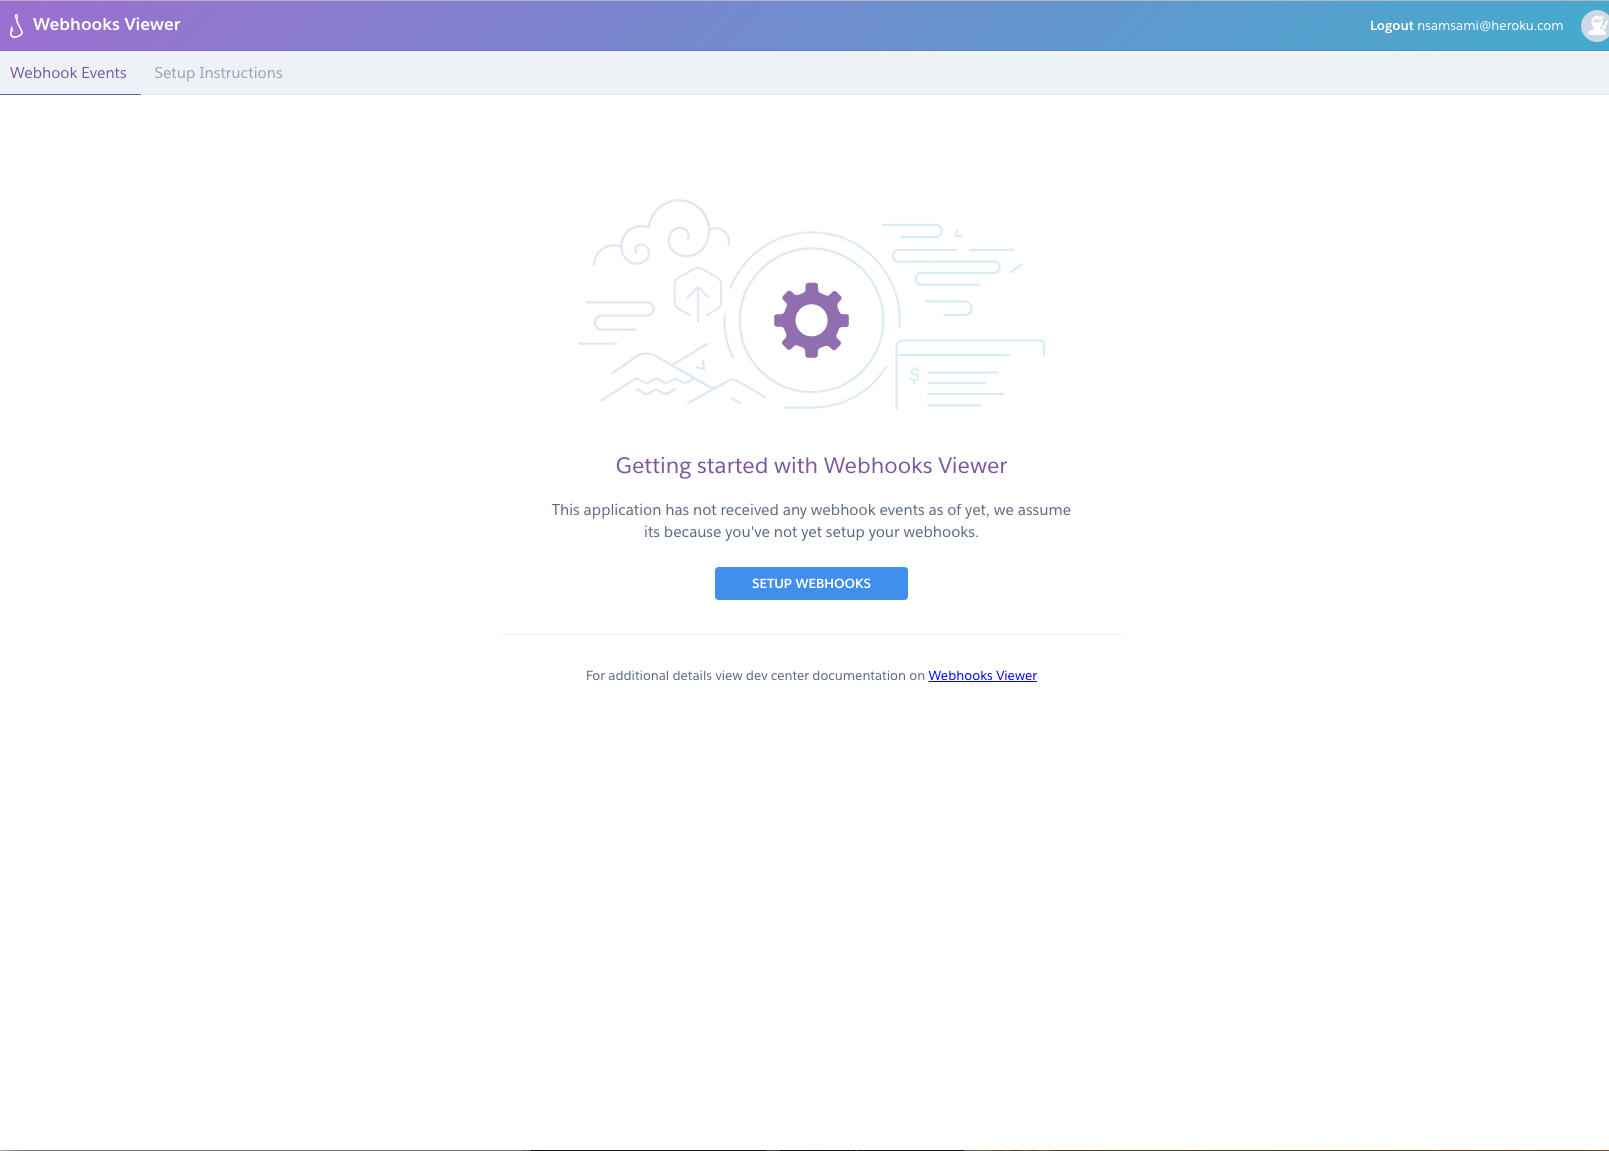
Completed setup confirmation in Webhooks Viewer

Step 2: Create a webhook subscription using the Heroku CLI

Next, you subscribe to webhook notifications using the Heroku CLI. Navigate to the Setup Instructions tab of Webhooks Viewer and follow its instructions.

Your webhook subscription will notify you whenever an app of your choice is deployed. You can choose one of your existing Heroku apps or create a new one.

Step 3: Test your subscription

To test that your webhook subscription works, initiate a release for the app you’ve subscribed to. (You can set a dummy config var value for the app to initiate a release for it easily.)

Shortly after you initiate the release, you should see the details of the notification arrive in Webhooks Viewer.
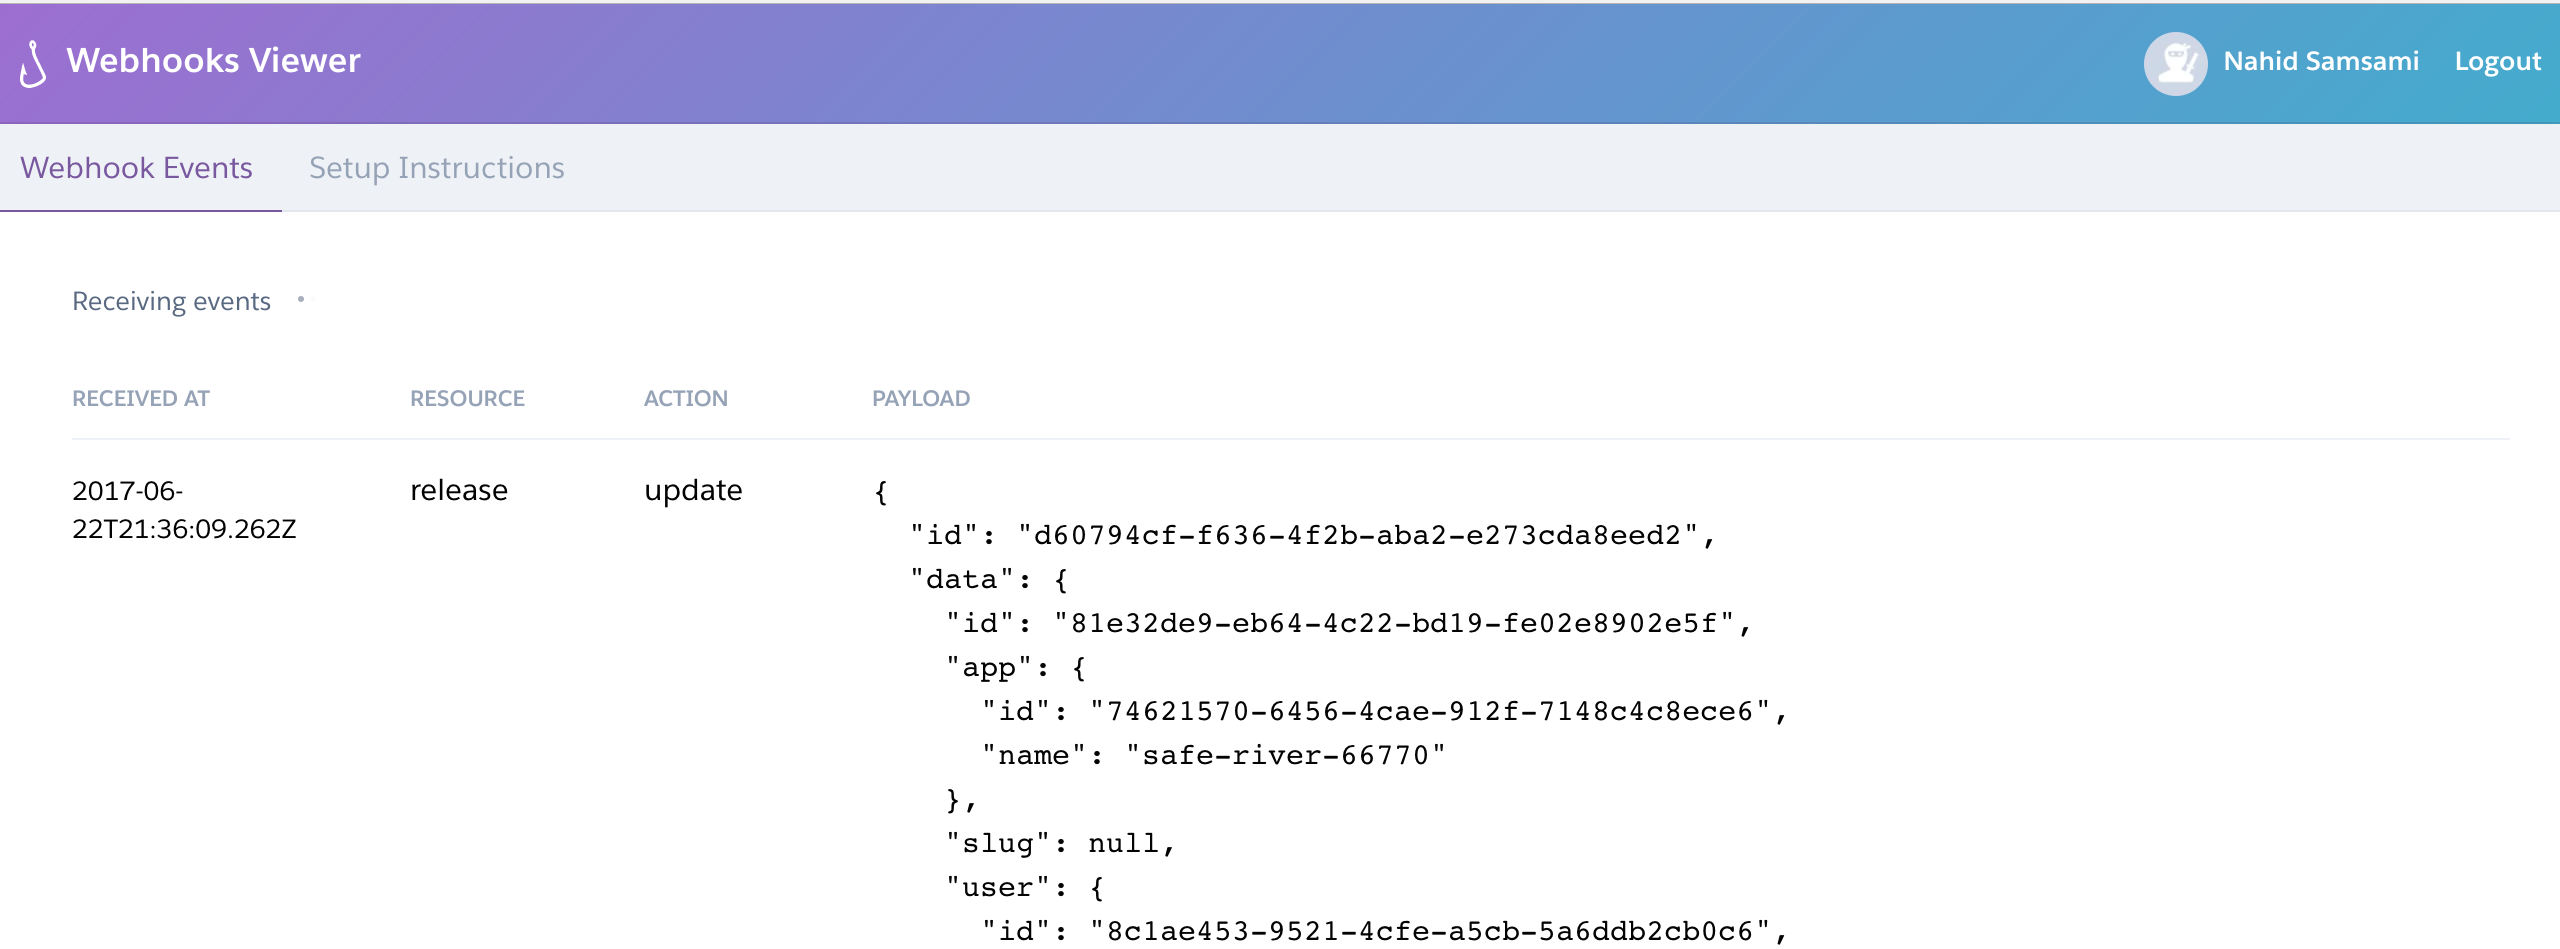
Webhooks Viewer showing received notification metadata

Advanced webhooks usage

Now that you’ve successfully subscribed to webhook notifications, see the full app webhooks documentation for more information on subscription options and supported event types.

Keep reading

  • App Webhooks

Feedback

Log in to submit feedback.

Webhook Dyno Events Webhook Dyno Events

Information & Support

  • Getting Started
  • Documentation
  • Changelog
  • Compliance Center
  • Training & Education
  • Blog
  • Support Channels
  • Status

Language Reference

  • Node.js
  • Ruby
  • Java
  • PHP
  • Python
  • Go
  • Scala
  • Clojure
  • .NET

Other Resources

  • Careers
  • Elements
  • Products
  • Pricing
  • RSS
    • Dev Center Articles
    • Dev Center Changelog
    • Heroku Blog
    • Heroku News Blog
    • Heroku Engineering Blog
  • Twitter
    • Dev Center Articles
    • Dev Center Changelog
    • Heroku
    • Heroku Status
  • Github
  • LinkedIn
  • © 2025 Salesforce, Inc. All rights reserved. Various trademarks held by their respective owners. Salesforce Tower, 415 Mission Street, 3rd Floor, San Francisco, CA 94105, United States
  • heroku.com
  • Legal
  • Terms of Service
  • Privacy Information
  • Responsible Disclosure
  • Trust
  • Contact
  • Cookie Preferences
  • Your Privacy Choices