Deep-dive on the Next Gen Platform. Join the Webinar!

Skip Navigation
Show nav
Dev Center
  • Get Started
  • Documentation
  • Changelog
  • Search
  • Get Started
    • Node.js
    • Ruby on Rails
    • Ruby
    • Python
    • Java
    • PHP
    • Go
    • Scala
    • Clojure
    • .NET
  • Documentation
  • Changelog
  • More
    Additional Resources
    • Home
    • Elements
    • Products
    • Pricing
    • Careers
    • Help
    • Status
    • Events
    • Podcasts
    • Compliance Center
    Heroku Blog

    Heroku Blog

    Find out what's new with Heroku on our blog.

    Visit Blog
  • Log inorSign up
Hide categories

Categories

  • Heroku Architecture
    • Compute (Dynos)
      • Dyno Management
      • Dyno Concepts
      • Dyno Behavior
      • Dyno Reference
      • Dyno Troubleshooting
    • Stacks (operating system images)
    • Networking & DNS
    • Platform Policies
    • Platform Principles
  • Developer Tools
    • Command Line
    • Heroku VS Code Extension
  • Deployment
    • Deploying with Git
    • Deploying with Docker
    • Deployment Integrations
  • Continuous Delivery & Integration (Heroku Flow)
    • Continuous Integration
  • Language Support
    • Node.js
      • Working with Node.js
      • Troubleshooting Node.js Apps
      • Node.js Behavior in Heroku
    • Ruby
      • Rails Support
      • Working with Bundler
      • Working with Ruby
      • Ruby Behavior in Heroku
      • Troubleshooting Ruby Apps
    • Python
      • Working with Python
      • Background Jobs in Python
      • Python Behavior in Heroku
      • Working with Django
    • Java
      • Java Behavior in Heroku
      • Working with Java
      • Working with Maven
      • Working with Spring Boot
      • Troubleshooting Java Apps
    • PHP
      • PHP Behavior in Heroku
      • Working with PHP
    • Go
      • Go Dependency Management
    • Scala
    • Clojure
    • .NET
      • Working with .NET
  • Databases & Data Management
    • Heroku Postgres
      • Postgres Basics
      • Postgres Getting Started
      • Postgres Performance
      • Postgres Data Transfer & Preservation
      • Postgres Availability
      • Postgres Special Topics
      • Migrating to Heroku Postgres
    • Heroku Key-Value Store
    • Apache Kafka on Heroku
    • Other Data Stores
  • AI
    • Working with AI
  • Monitoring & Metrics
    • Logging
  • App Performance
  • Add-ons
    • All Add-ons
  • Collaboration
  • Security
    • App Security
    • Identities & Authentication
      • Single Sign-on (SSO)
    • Private Spaces
      • Infrastructure Networking
    • Compliance
  • Heroku Enterprise
    • Enterprise Accounts
    • Enterprise Teams
    • Heroku Connect (Salesforce sync)
      • Heroku Connect Administration
      • Heroku Connect Reference
      • Heroku Connect Troubleshooting
  • Patterns & Best Practices
  • Extending Heroku
    • Platform API
    • App Webhooks
    • Heroku Labs
    • Building Add-ons
      • Add-on Development Tasks
      • Add-on APIs
      • Add-on Guidelines & Requirements
    • Building CLI Plugins
    • Developing Buildpacks
    • Dev Center
  • Accounts & Billing
  • Troubleshooting & Support
  • Integrating with Salesforce
  • Add-ons
  • All Add-ons
  • ButterCMS
ButterCMS

This add-on is operated by ButterCMS

ButterCMS is an API-first headless CMS marketers + developers love.

ButterCMS

Last updated February 25, 2022

Table of Contents

  • Pages CMS Demo
  • Blog Engine Demo
  • Provisioning the add-on
  • Local setup
  • Integration Guides
  • Dashboard
  • Removing the add-on
  • Support

ButterCMS is an API-First CMS and blogging platform. It makes setting up your CMS and company blog insanely easy. ButterCMS’ Heroku add-on provides you with push-button functionality that is designed to integrate right into your existing application, regardless of tech stack.

With ButterCMS, you will have things running in seconds. There’s nothing to host so you don’t need to apply any patches or upgrades which helps to improve security. Butter takes advantage of Fastly for advanced caching and Amazon CDN to deliver your content instantly and comes built-in with SEO features.
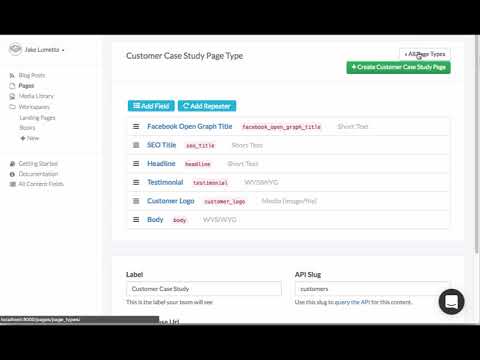
Pages CMS Demo

ButterCMS Full CMS

Blog Engine Demo

ButterCMS Blog Engine

Click the button below to deploy an example Node.JS application using ButterCMS

Deploy

Provisioning the add-on

ButterCMS can be attached to a Heroku application via the CLI:

A list of all plans available can be found here.

$ heroku addons:create butter
-----> Adding butter to sharp-mountain-4005... done, v18 (free)

Once ButterCMS has been added a BUTTER_TOKEN (used to talk to the Butter API) setting will be available in the app configuration. This can be confirmed using the heroku config:get command.

$ heroku config:get BUTTER_TOKEN

Local setup

Environment setup

After provisioning the add-on it’s necessary to locally replicate the config vars so your development environment can operate against the service.

Use the Heroku Local command-line tool to configure, run and manage process types specified in your app’s Procfile. Heroku Local reads configuration variables from a .env file. To view all of your app’s config vars, type heroku config. Use the following command to add the BUTTER_TOKEN values retrieved from heroku config to your .env file.

$ heroku config:get BUTTER_TOKEN -s  >> .env

If you already have an .env file, ensure that BUTTER_TOKEN appears on it’s own new line, otherwise your app won’t properly load the token.


Credentials and other sensitive configuration values should not be committed to source-control. In Git exclude the .env file with: echo .env >> .gitignore.

For more information, see the Heroku Local article.

Integration Guides

Check out our official docs for guides on getting up and running with Butter.

  • Rails
  • Ruby
  • NodeJS
  • PHP
  • Laravel
  • .NET
  • Python
  • Django
  • JavaScript
  • React
  • Vue.js
  • Other

Dashboard

The ButterCMS dashboard allows you to write and manage your blog posts.

The dashboard can be accessed via the CLI:

$ heroku addons:open butter
Opening butter for sharp-mountain-4005

or by visiting your dashboard, select the app for which you have installed the Butter add-on. Click on the ButterCMS icon in your list of Add-ons. You will be redirected via SSO to your account on ButterCms.com.

Removing the add-on

ButterCMS can be removed via the CLI.

This will destroy all associated data and cannot be undone!

$ heroku addons:destroy butter
-----> Removing butter from sharp-mountain-4005... done, v20 (free)

Support

All ButterCMS support and runtime issues should be submitted via one of the Heroku Support channels. Any non-support related issues or product feedback is welcome at support@buttercms.com.

Keep reading

  • All Add-ons

Feedback

Log in to submit feedback.

Zara 4 Cache To Go

Information & Support

  • Getting Started
  • Documentation
  • Changelog
  • Compliance Center
  • Training & Education
  • Blog
  • Support Channels
  • Status

Language Reference

  • Node.js
  • Ruby
  • Java
  • PHP
  • Python
  • Go
  • Scala
  • Clojure
  • .NET

Other Resources

  • Careers
  • Elements
  • Products
  • Pricing
  • RSS
    • Dev Center Articles
    • Dev Center Changelog
    • Heroku Blog
    • Heroku News Blog
    • Heroku Engineering Blog
  • Twitter
    • Dev Center Articles
    • Dev Center Changelog
    • Heroku
    • Heroku Status
  • Github
  • LinkedIn
  • © 2025 Salesforce, Inc. All rights reserved. Various trademarks held by their respective owners. Salesforce Tower, 415 Mission Street, 3rd Floor, San Francisco, CA 94105, United States
  • heroku.com
  • Legal
  • Terms of Service
  • Privacy Information
  • Responsible Disclosure
  • Trust
  • Contact
  • Cookie Preferences
  • Your Privacy Choices