Last updated May 18, 2026
Heroku Dataclips enable you to create SQL queries for your Heroku Postgres databases and share the results with colleagues, third-party tools, and the public. Recipients of a dataclip can view the data in their browser and also download it in JSON and CSV formats.
Dataclips can’t connect to Shield databases or Advanced (Limited GA) databases on Shield networking.
Quickstart
-
Visit data.heroku.com and click
New Dataclip:
-
Specify a title for your dataclip and a Heroku Postgres database to run it against. Type your SQL query into the main text area like so:
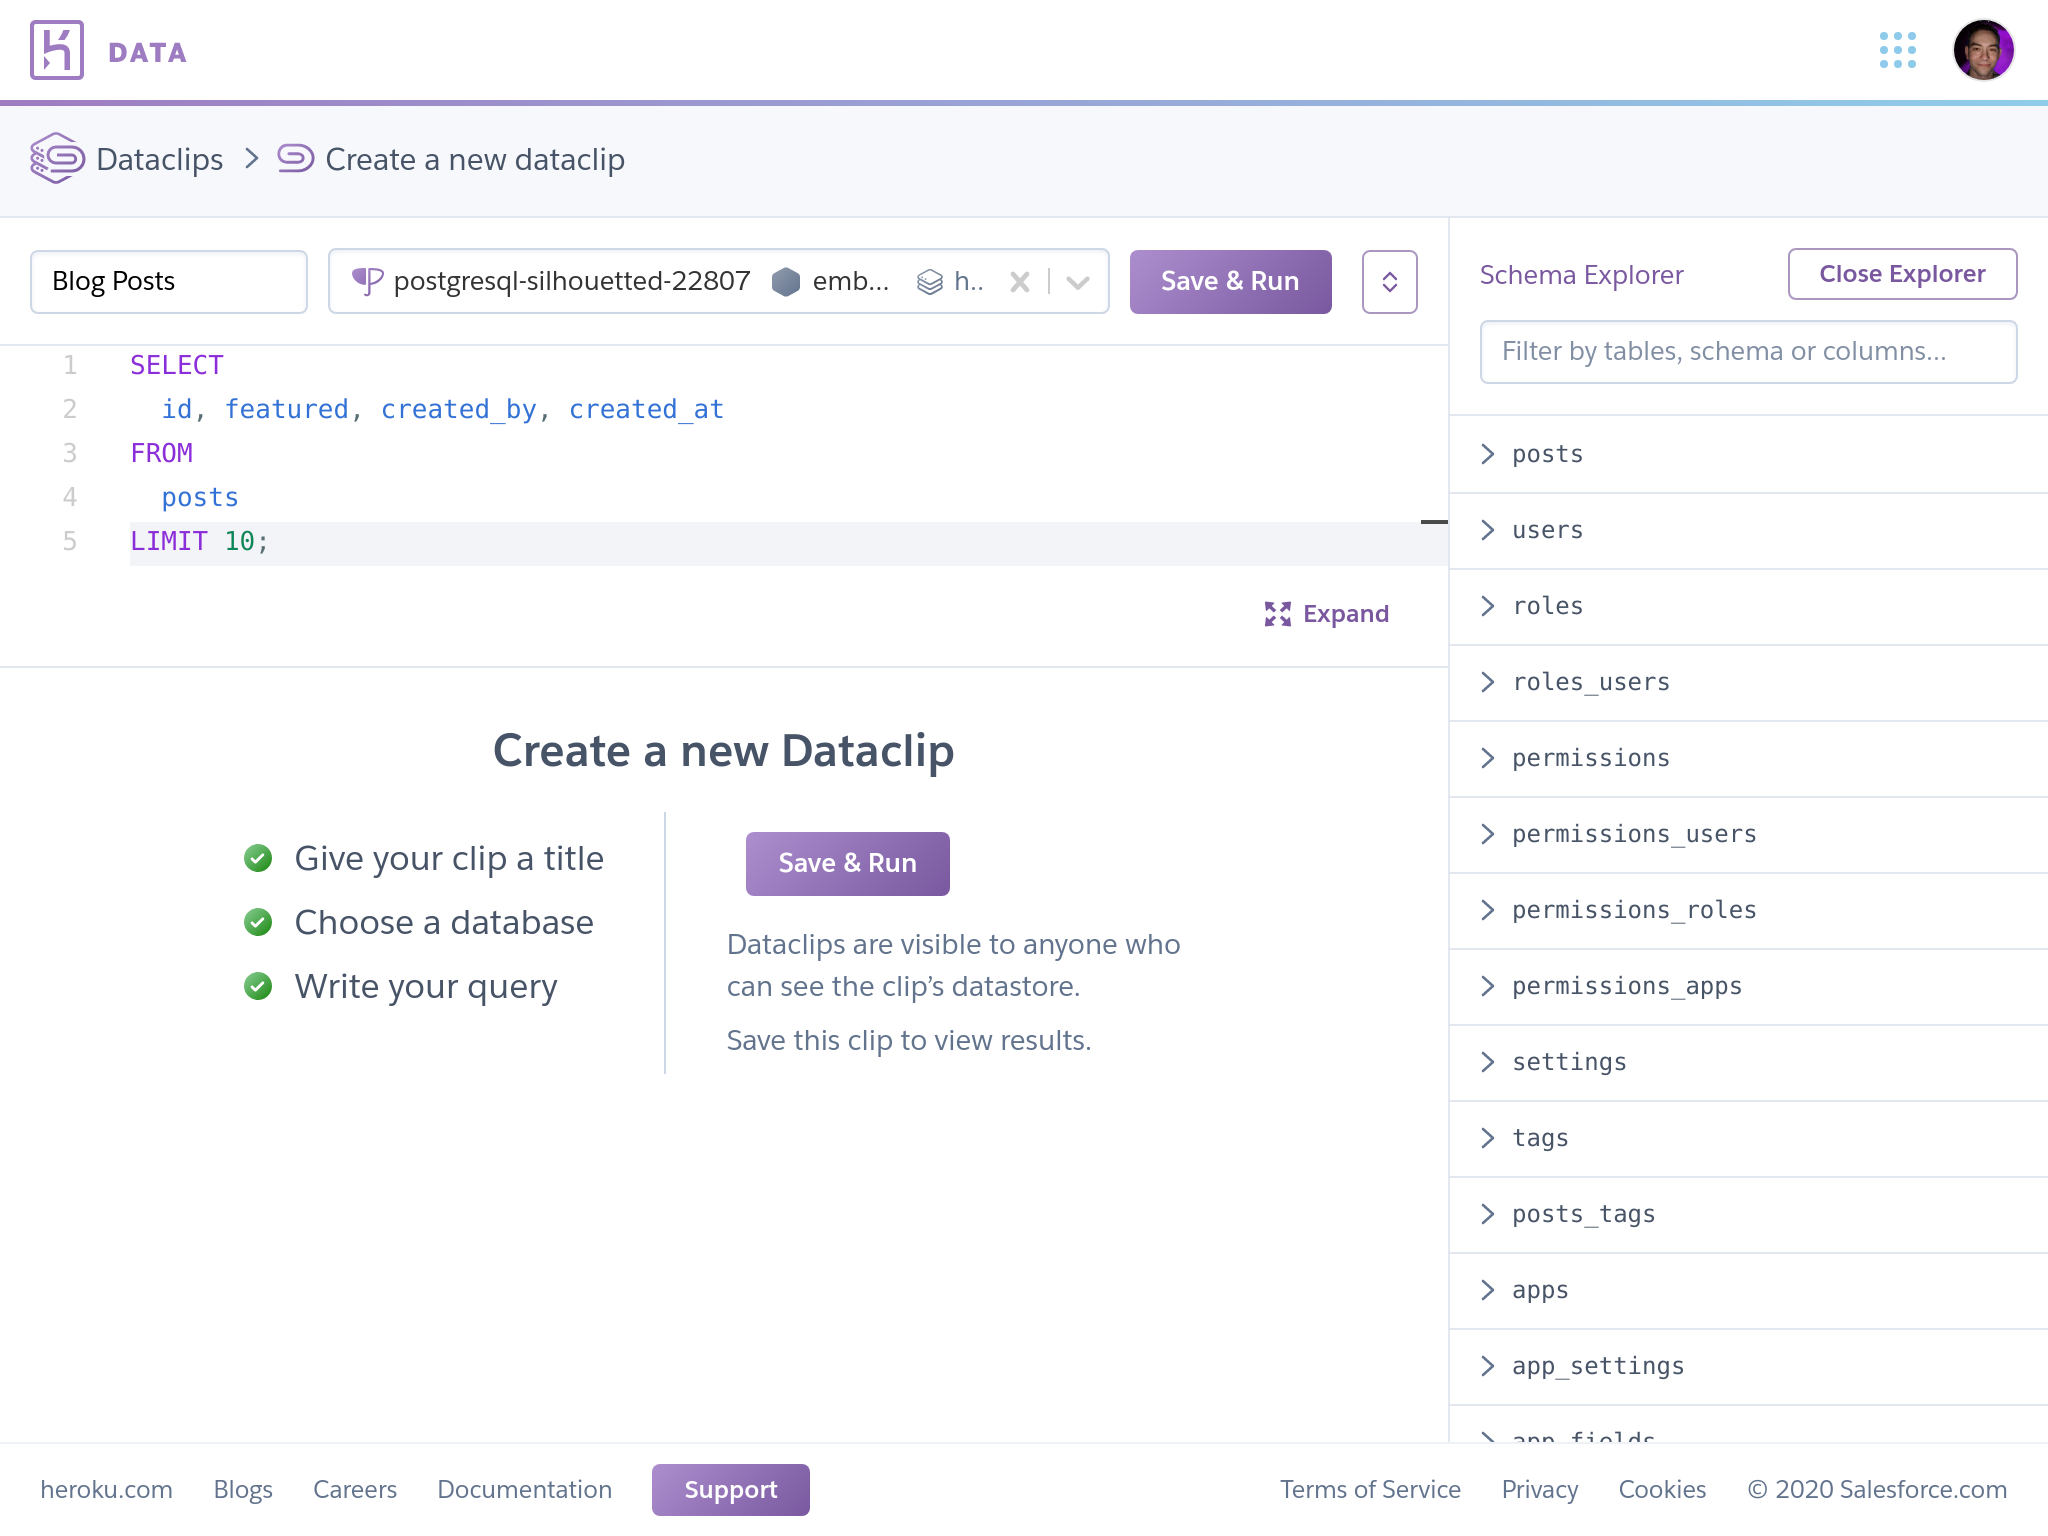
-
Click
Save & Run. The query’s results appear in a table below the query.
Creating Dataclips
The Schema Explorer
The Schema Explorer displays table and column information for your dataclip’s associated database, including the data type for each column:

For larger schemas, you can filter the information displayed by typing in the text box at the top of the Schema Explorer.
The Schema Explorer automatically updates to reflect the schema of whichever database is selected for the dataclip.
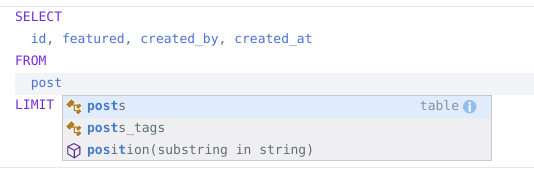
Editor Autocomplete
The query editor offers autocompletion suggestions as you type. These suggestions are based on the schema of the selected database, as well as the syntax and functions of the Postgres SQL dialect:
Viewing Results
Whenever you save a dataclip with a valid query, the query is executed and its results are displayed in a table below the query:

Chart Display
If your dataclip’s results include both a column of date or timestamp data and a column of numeric data, you can display the results as a chart. The toggle above the results table activates when displaying a chart is possible:
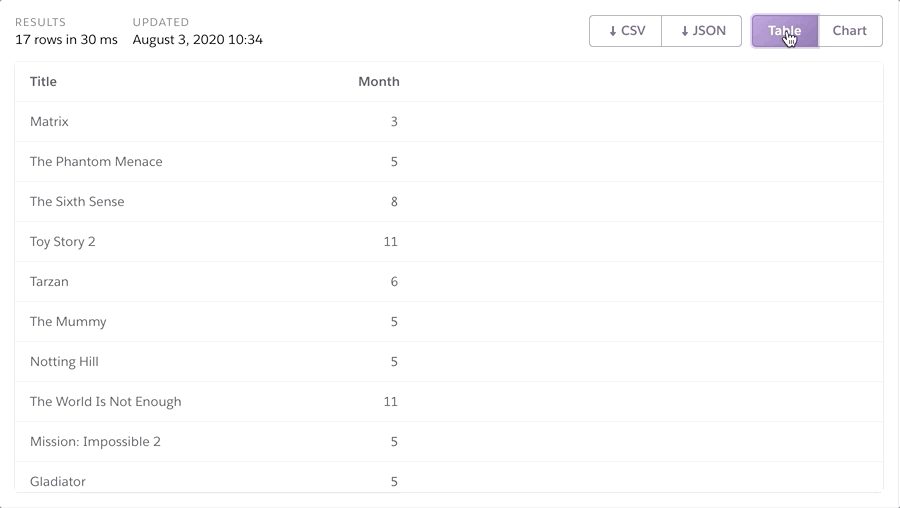
Chart display is possible when all of the following are true about the dataclip’s results:
- There are two or more columns.
- For timeseries data: One of the columns is a date or timestamp and another is numeric.
- For categorical data: One of the columns is a category (string) and the other is numeric.
- There are between 10 and 1,000 rows.
Dataclip Access and Visibility
All Heroku users who are collaborators on an app can access and edit dataclips that are created on the app’s associated database. You can view an app’s collaborators via either the Heroku CLI or the Heroku Dashboard.
If an Enterprise Team owns the app, a team member must also have the deploy or operate permissions for the app to receive access to dataclips.
In all cases, users must have access to the default credential for the database.
A Heroku Postgres database can be attached to a Heroku app that doesn’t own it. To view dataclips for a particular database, a Heroku user must have the necessary permissions for the app that owns the database. It’s insufficient to have permissions for an app that the database is only attached to.
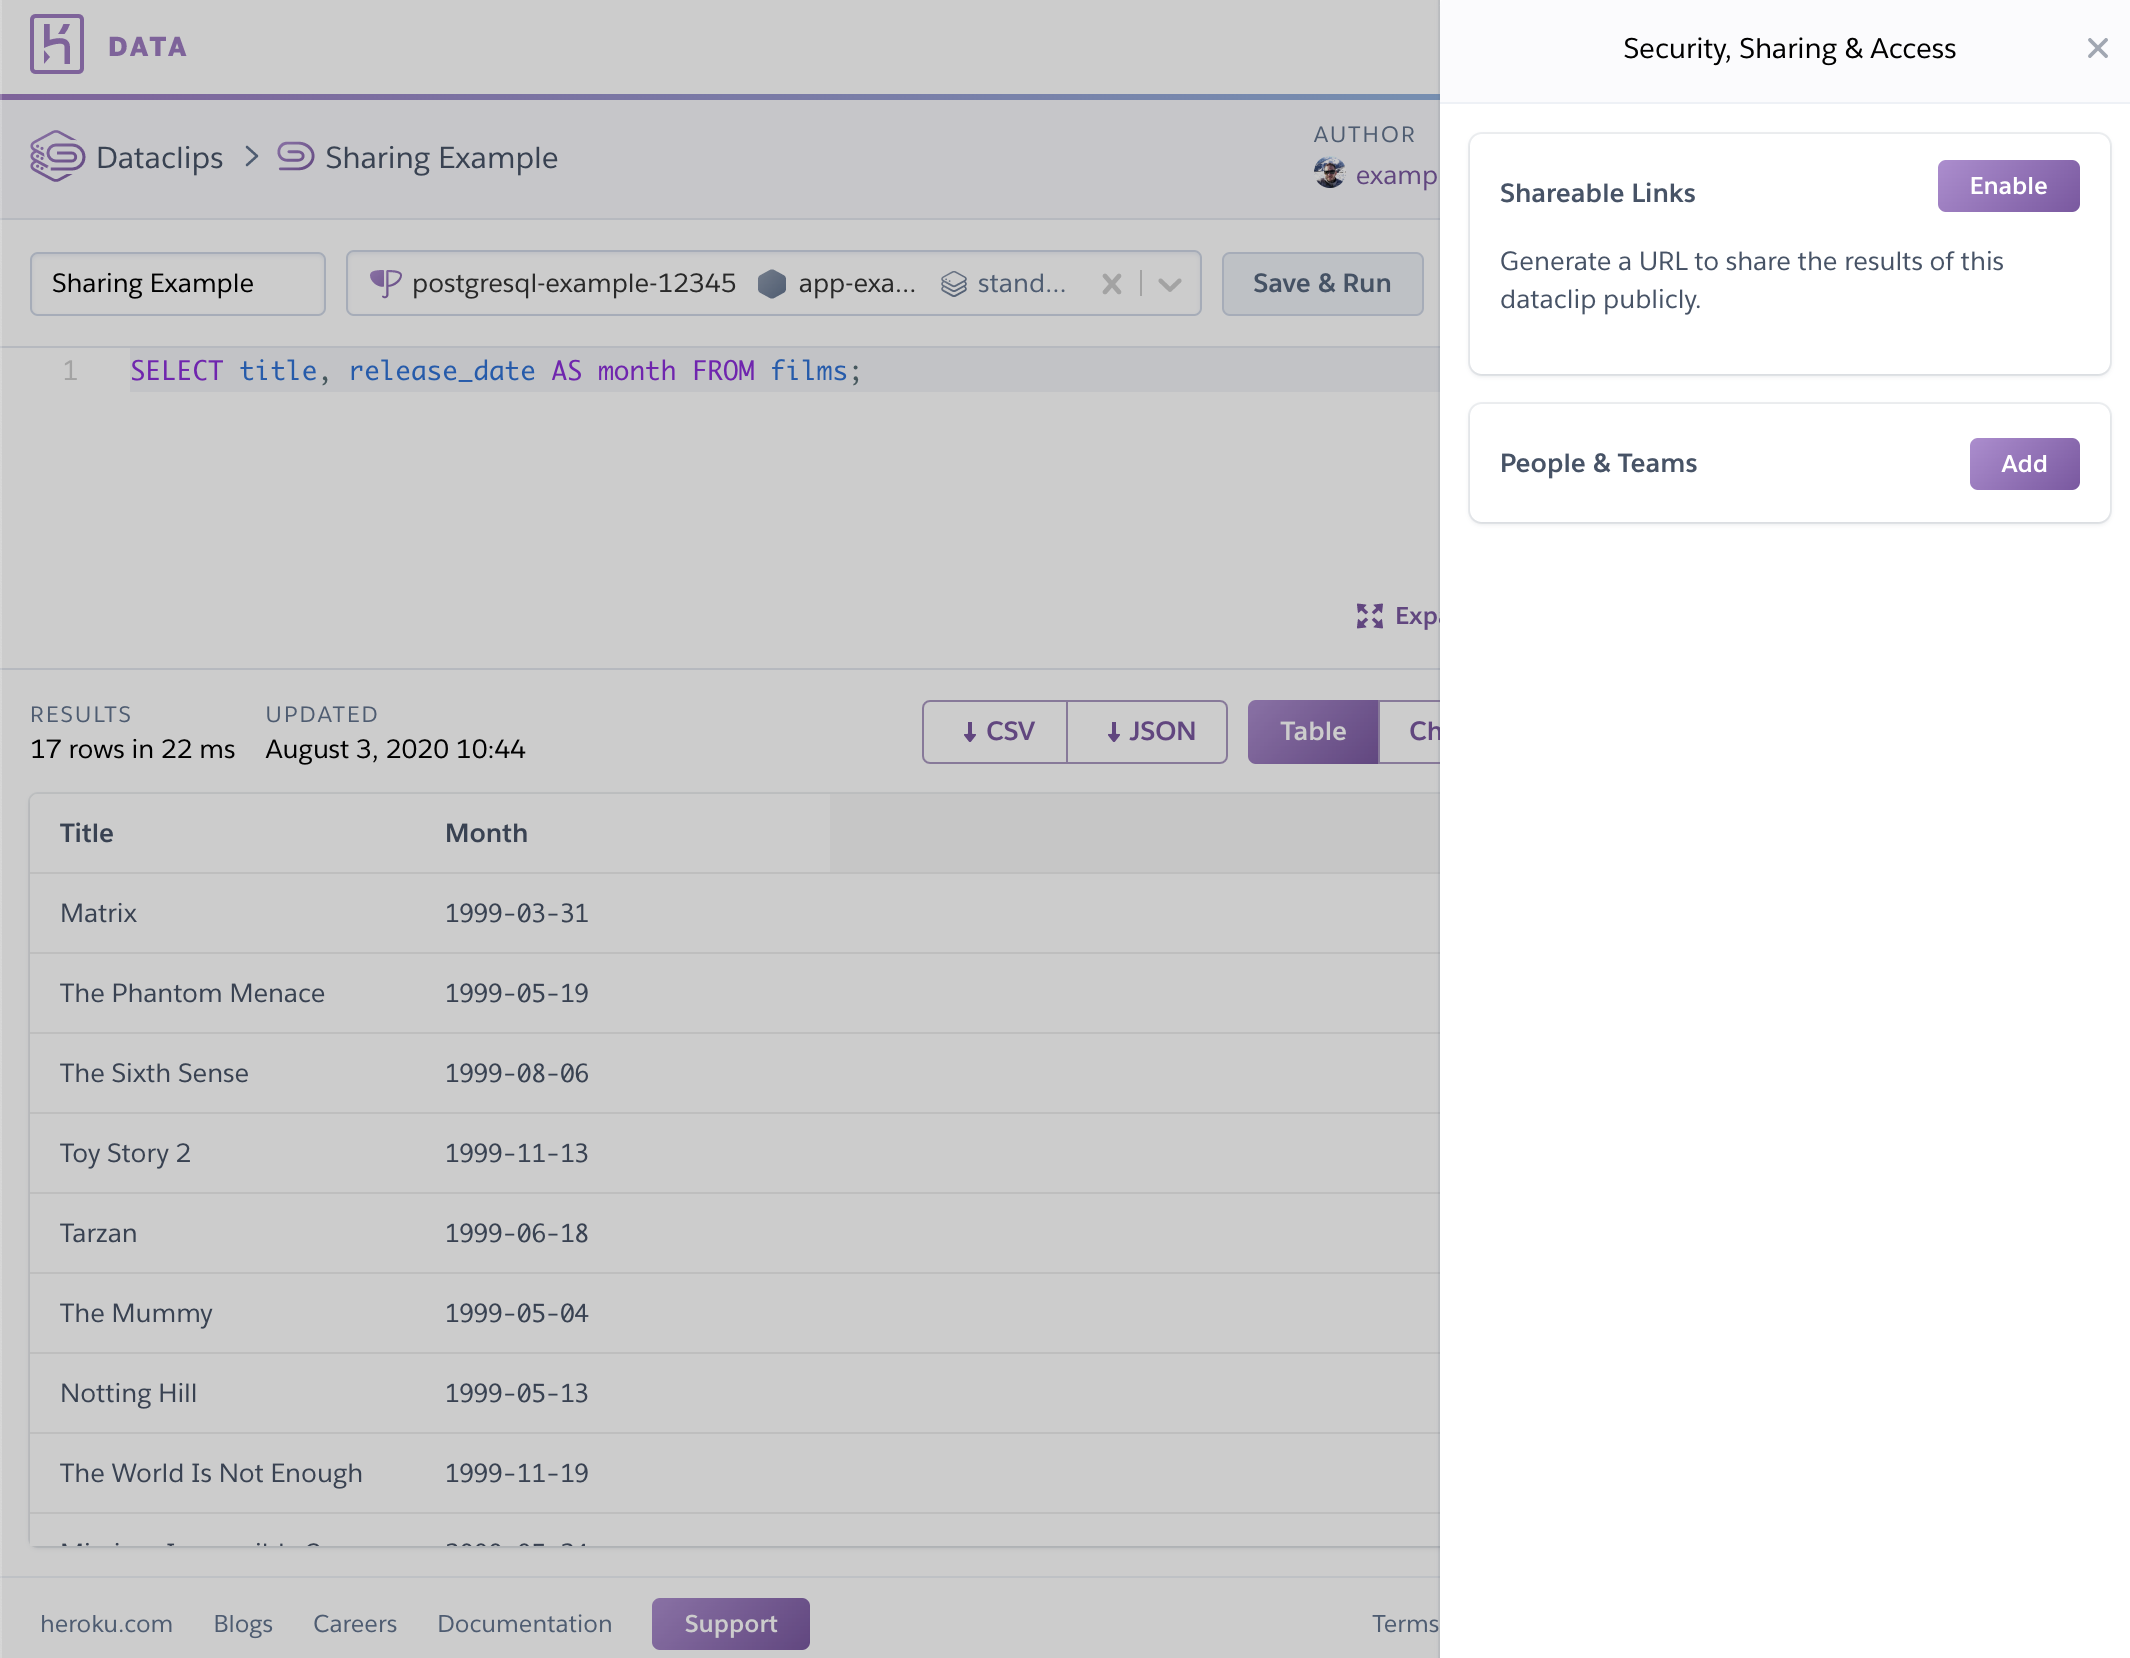
Sharing Dataclip Results
You can share a dataclip’s results with specific people, teams, or the general public. Sharing results this way doesn’t expose the dataclip’s query, or any other information about the underlying application (such as the app name, database details, or the dataclip creator’s email address).
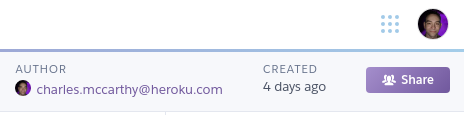
After you create a dataclip you want to share, click the Share button:
The sharing flyout appears:
Sharing with the Public
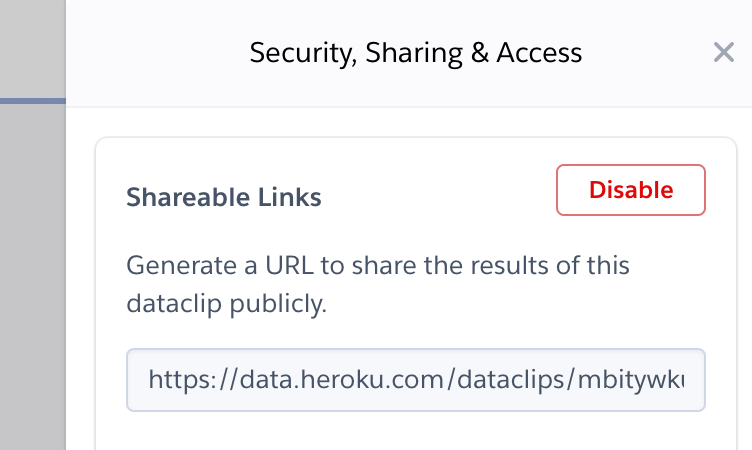
To share a dataclip with the public, click Enable next to Shareable Links to generate a unique URL:
An authenticated Heroku user session isn’t required to access this URL.
The shareable link URL differs from the URL you use to access the dataclip as a collaborator. Make sure to copy the URL from the text box in the sharing flyout, not from your browser’s address bar.
To revoke existing shareable links, click Disable. This revokes access for all visitors, including anyone who’s visited the URL in the past and exported URLs.
To replace existing Shareable Links, simply disable and re-enable it from the sharing flyout. A new URL is generated each time.
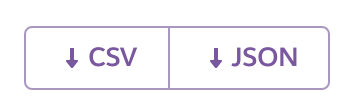
Exporting Dataclip Results
To enable a third-party application to consume the results, click Enable next to Shareable Links and copy either the CSV or JSON URL (whichever format the third-party application expects).
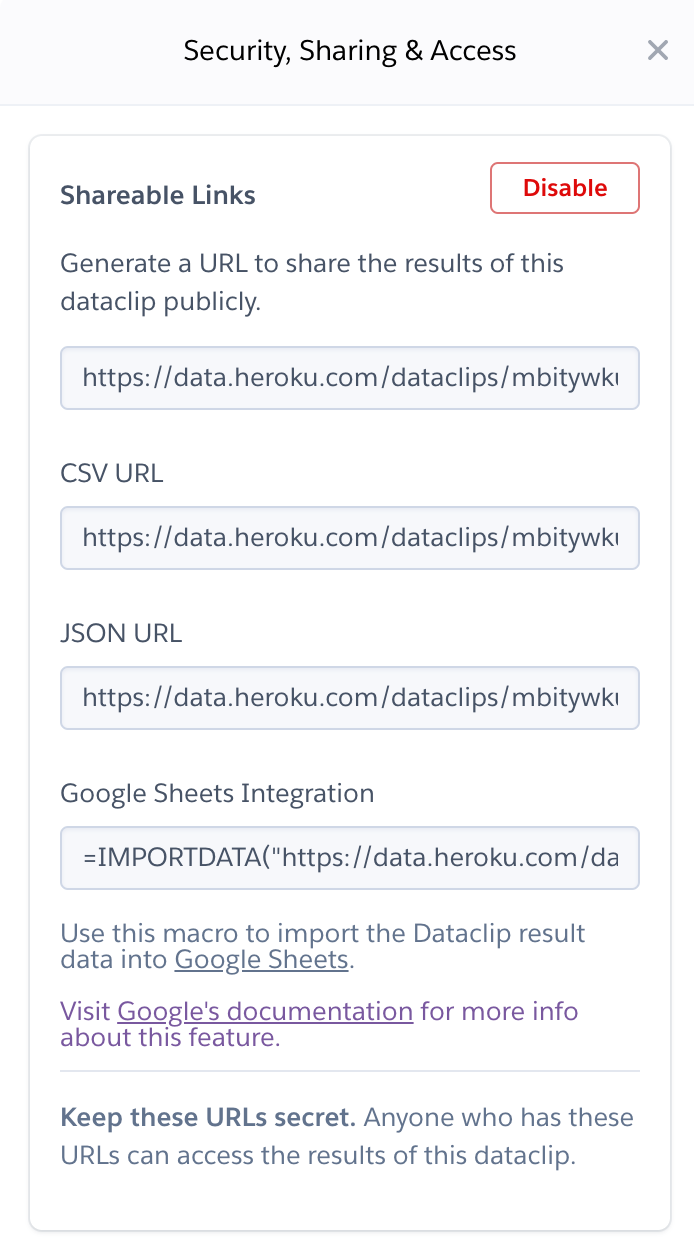
Keep these URLs secret. Anyone with the shareable URL can view your dataclip’s results without authenticating.
If you think that your dataclip’s shareable URL has been compromised. Disabling the URL invalidates the existing shareable links and you can generate new ones. All URLs with the old shareable links immediately stop working.
Google Sheets Integration
Importing the results of a dataclip into a Google Sheets spreadsheet is an excellent approach to further refinement of data for presentation, or to synthesize the output of multiple dataclips into dashboards and other artifacts.
To embed a dataclip’s results into a Google Sheets spreadsheet, paste the =IMPORTDATA(...) text from the Shareable Links dialog into cell A1 of the spreadsheet. The =IMPORTDATA(...) string contains the same public URL as the dataclip’s CSV and JSON URLs.
Google Sheets doesn’t hide the contents of the =IMPORTDATA(...) function from viewers. Anyone who can see the spreadsheet is able to copy and paste the CSV URL from the =IMPORTDATA(...) string. You must restrict access to the Google Sheet to ensure that only trusted parties can open it.
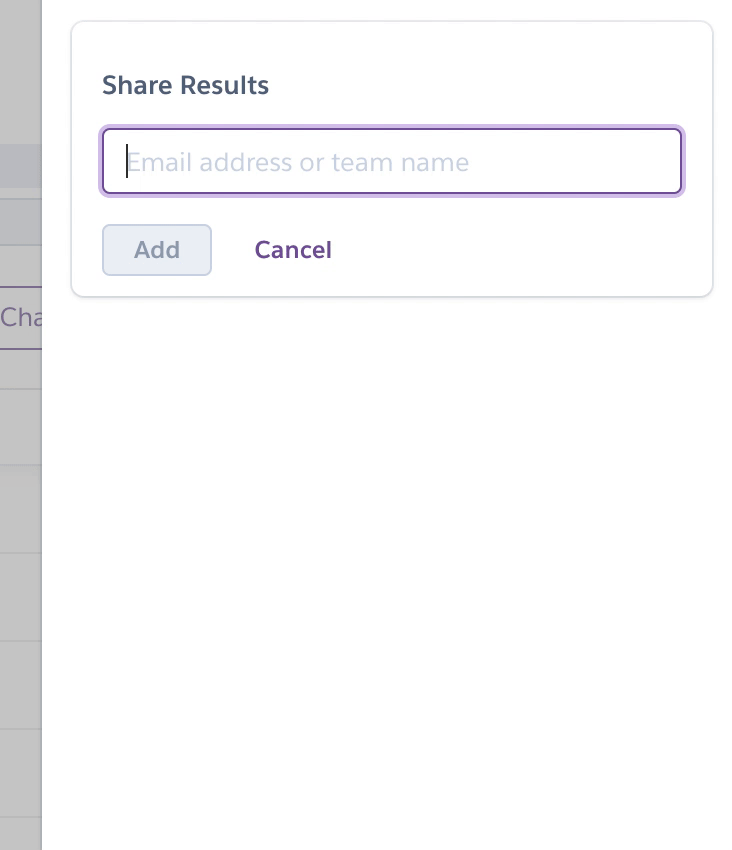
Sharing with Individuals and Teams
You can share dataclip results with individual Heroku users, along with Heroku Teams that you belong to. Click the Add button in the sharing flyout to display the following form:
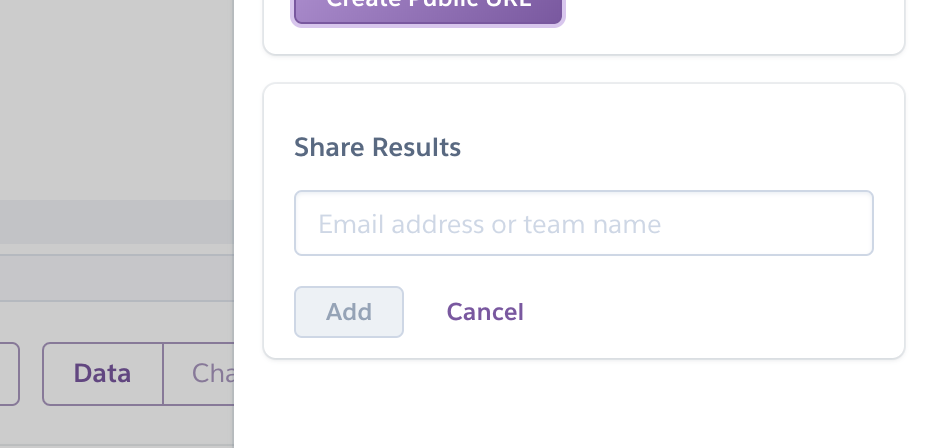
To share with an individual, specify their email address and click Add.
You can share dataclip results with any email address. However, that email address must be associated with a Heroku account for the recipient to be able to access the dataclip’s results.
To share with a Heroku Team that you belong to, begin typing the team’s name and select it from the dropdown options that appear:
All members of the selected team can view the dataclip’s results.
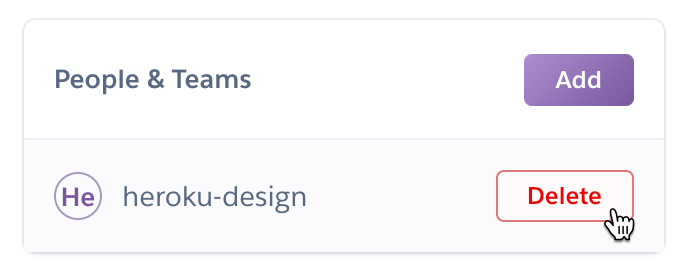
To revoke sharing access, click the Delete button next to whichever individual or team you want to revoke access for:
Downloading Results
Dataclip results can be downloaded in CSV and JSON formats. To download the results to your local machine as a CSV or JSON file, click the corresponding button in the results section.
Dataclip Execution and Data Freshness
There’s an important distinction between dataclip execution — the moment when a query is run against your database — and viewing results.
Whenever a dataclip is viewed or downloaded, Heroku executes its query if it hasn’t done so in the last sixty seconds. However, the dataclip doesn’t wait for the new query execution to complete. Instead, it immediately returns the results of its most recently completed execution.
If a dataclip is viewed or downloaded at least one time in the past seven days, Heroku automatically executes its query and updates its results. Heroku does this action about one time per hour whether the results are viewed or downloaded. After seven days of inactivity, Heroku doesn’t execute the query at all until the dataclip is accessed again.
If you keep a dataclip open in your browser, its query is executed every one to two minutes. When a new execution completes, a banner appears on the page to indicate that updated results are available.
Dataclip Recovery
When a database is migrated to a different instance of Heroku Postgres (for example, as a result of upgrading), the dataclips associated with the old database become orphaned and require recovery. These dataclips are shown with the following notice in red in your dataclip list view:

To attach an orphaned dataclip to a new database, visit the dataclip’s detail page:
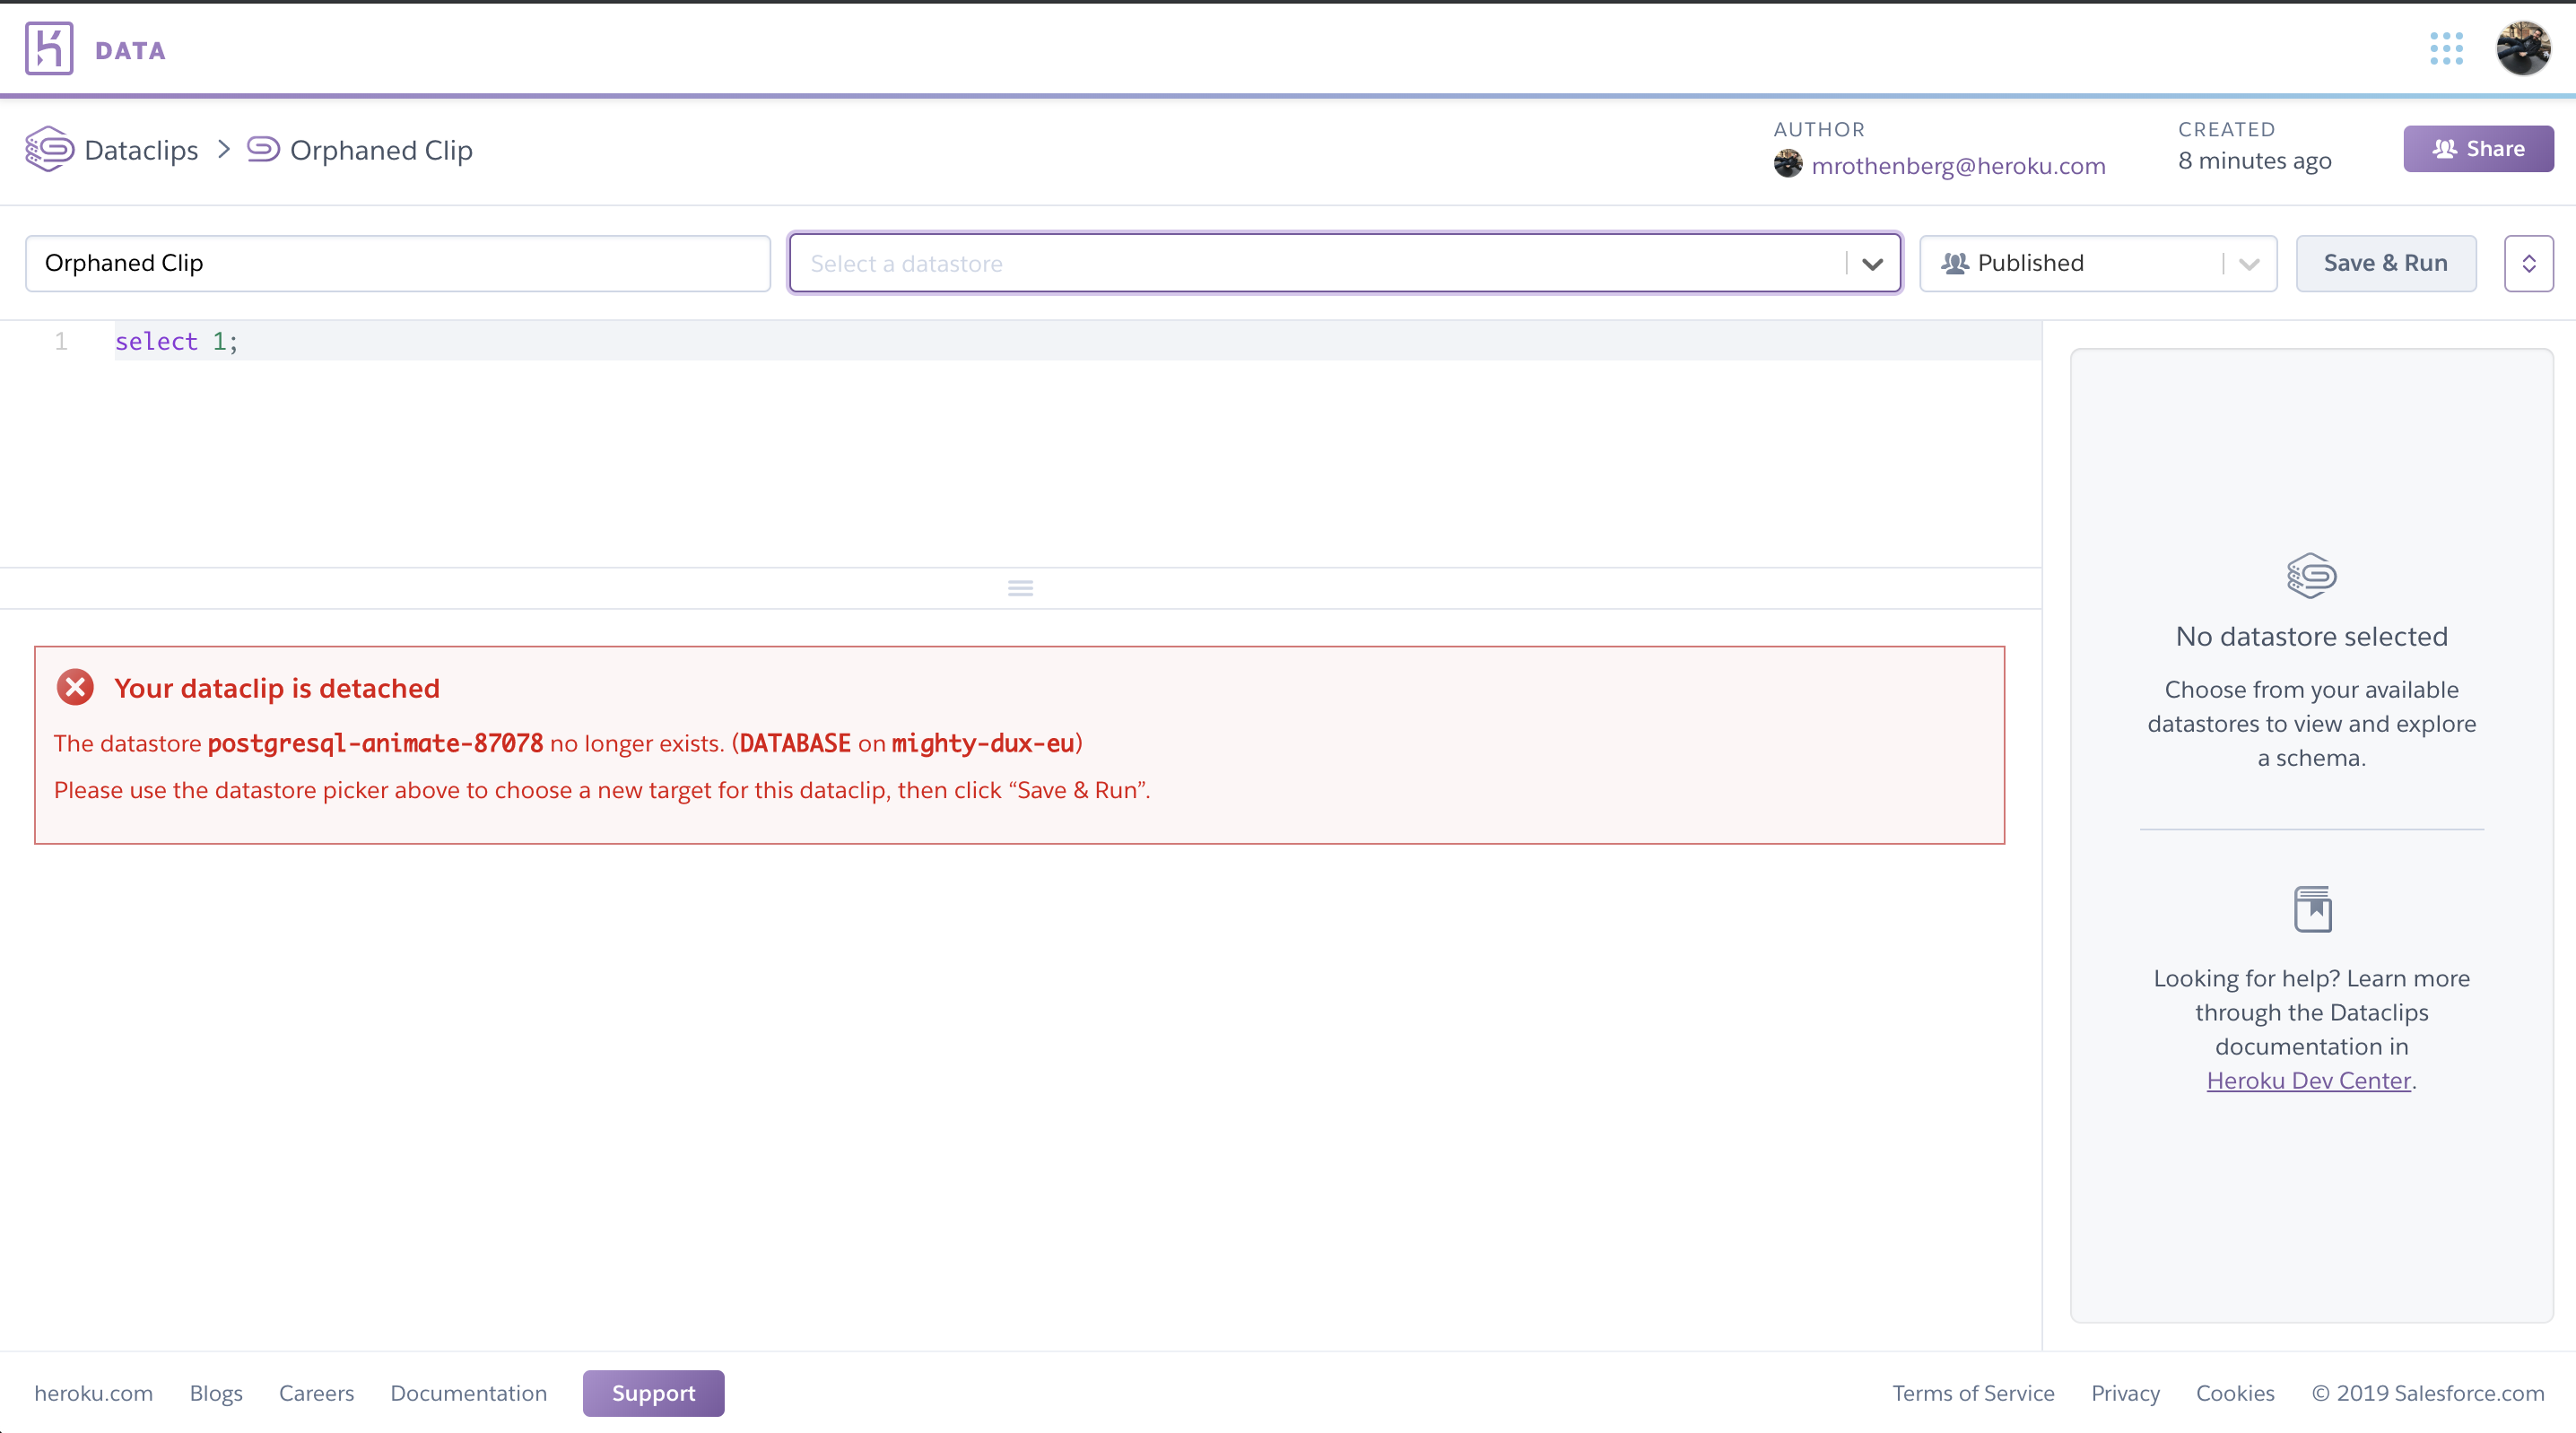
Select a new database from the dropdown menu that says Select a datastore, then click Save & Run. The dataclip attaches to the specified database and executes your query.
If you must recover a large number of dataclips, open a support ticket.
Limits and Restrictions
- You can create dataclips for any Heroku Postgres databases except Shield-tier plans and Advanced (Limited GA) databases on Shield networking.
- A dataclip can return up to 100,000 rows.
- A dataclip’s results can be at most 104,857,600 bytes in size.
- Dataclip results that are larger than 26,214,400 bytes in size are downloadable, but you can’t explore the results in your browser.
- Dataclip queries time out after ten minutes.
- You can’t share dataclip results with Heroku Teams that you don’t belong to.
- Unauthenticated users retrieving results from the
.csvor.jsonendpoints are limited to 30 requests per minute per IP.