Last updated December 02, 2024
This article was contributed by Tute Costa
Tute is a developer at thoughtbot NYC. You can find him on twitter @tutec .
Many web apps require the user to upload images and other files for storage and processing. Paperclip is a cleanly abstracted Ruby library that reduces the complexity of file uploading and processing.
Using Paperclip with an external storage service such as Amazon S3 or Rackspace CloudFiles allows you to scale your application’s files and codebase independently. Such an architecture is required in highly elastic environments that distribute your application across multiple instances, such as Heroku.
This guide describes how to set up a Ruby on Rails application with image uploading via Paperclip and Amazon S3.
Prerequisites
- AWS S3 Account for storing images in the cloud.
- Heroku CLI to create and deploy web applications to Heroku.
- ImageMagick for resizing images.
Note: Mac users can install ImageMagick with Homebrew brew install imagemagick. Windows users can use the Windows binary release.
Overview
Paperclip is an easy file attachment library for ActiveRecord. It treats files like model attributes. This means they aren’t saved to their final locations, nor are they deleted if set to nil, until ActiveRecord::Base#save is called. It can validate based on file size and presence. It can transform its assigned image into thumbnails if needed, and the only prerequisites are database columns and ImageMagick. Attached files are referenced in the browser by an understandable specification with sensible defaults.
Reference Application
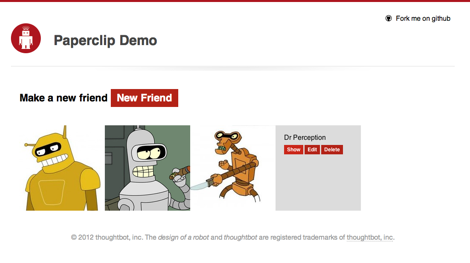
The reference application allows a user to manage a list of their friends.
- Each friend will have an
avatarwith Paperclip providing the image upload and resizing functionality. - The app will demonstrate how to generate scaled down thumbnails, and display the resized images.
- The application will also gracefully degrade to display a default image
missing.pngfor friends without an avatar.
Download the source code from GitHub.
Configuration
Paperclip requires the following gems added to your Gemfile.
# Gemfile
gem 'paperclip'
gem 'aws-sdk', '~> 2.3'
Run bundle install and restart the Rails server after modifying the Gemfile.
We’ll also need to specify the AWS configuration variables for the production Environment.
# config/environments/production.rb
config.paperclip_defaults = {
  storage: :s3,
  s3_credentials: {
    bucket: ENV.fetch('S3_BUCKET_NAME'),
    access_key_id: ENV.fetch('AWS_ACCESS_KEY_ID'),
    secret_access_key: ENV.fetch('AWS_SECRET_ACCESS_KEY'),
    s3_region: ENV.fetch('AWS_REGION'),
  }
}
To test S3 uploads locally in development mode these settings must also be added to the development environment.
Additionally, we’ll need to the set the AWS configuration variables on the Heroku application.
$ heroku config:set S3_BUCKET_NAME=your_bucket_name
$ heroku config:set AWS_ACCESS_KEY_ID=your_access_key_id
$ heroku config:set AWS_SECRET_ACCESS_KEY=your_secret_access_key
$ heroku config:set AWS_REGION=your_aws_region
International users (additional configuration)
If you are having issues uploading images please read the following two configuration sections.
If you continue to have issues please see the Paperclip documentation page for detailed configuration options.
To override the default URL structure and place the bucket’s name “domain-style” in the URL (e.g. your_bucket_name.s3.amazonaws.com). These options can be placed in the paperclip_defaults configuration hash shown above, or into an initializer.
# config/initializers/paperclip.rb
Paperclip::Attachment.default_options[:url] = ':s3_domain_url'
Paperclip::Attachment.default_options[:path] = '/:class/:attachment/:id_partition/:style/:filename'
If you are seeing the following error: “The bucket you are attempting to access must be addressed using the specified endpoint. Please send all future requests to this endpoint.” Try setting the specified endpoint with the s3_host_name config var.
# config/initializers/paperclip.rb
Paperclip::Attachment.default_options[:s3_host_name] = 's3-us-west-2.amazonaws.com'
Define the file attribute in the Model
To add attachment functionality to the Friend model use the Paperclip helper method has_attached_file and a symbol with the desired name of the attachment.
class Friend < ActiveRecord::Base
  # This method associates the attribute ":avatar" with a file attachment
  has_attached_file :avatar, styles: {
    thumb: '100x100>',
    square: '200x200#',
    medium: '300x300>'
  }

  # Validate the attached image is image/jpg, image/png, etc
  validates_attachment_content_type :avatar, :content_type => /\Aimage\/.*\Z/
end
The has_attached_file method also accepts a styles hash that specifies the resize dimensions of the uploaded image. The > and # symbols will tell ImageMagick how the image will be resized (the > will proportionally reduce the size of the image).
Update database
A database migration is needed to add the avatar attribute on Friend in the database schema. Run the following rails helper method to generate a stub migration.
$ rails g migration AddAvatarToFriends
Paperclip comes with the migration helper methods add_attachment and remove_attachment. They are used to create the columns needed to store image data in the database. Use them in the AddAvatarToFriends migration.
class AddAvatarToFriends < ActiveRecord::Migration
  def self.up
    add_attachment :friends, :avatar
  end

  def self.down
    remove_attachment :friends, :avatar
  end
end
This migration will create avatar_file_name, avatar_file_size, avatar_content_type, and avatar_updated_at attributes on the Friend model. These attributes will be set automatically when files are uploaded.
Run the migrations with rake db:migrate to update your database.
Upload form
Images are uploaded to your application before being stored in S3. This allows your models to perform validations and other processing before being sent to S3.
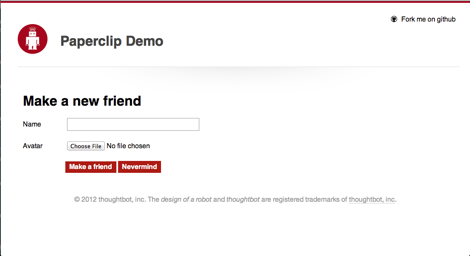
Add a file input field to the web form that allows users to browse and select images from their local filesystem.
Make sure the form has multipart: true added to it.
<%= form_for(@friend, multipart: true) do |f| %>
  <div class="field">
    <%= f.label :name %>
    <%= f.text_field :name %>
  </div>
  <div class="field">
    <%= f.label :avatar %>
    <%= f.file_field :avatar %>
  </div>
  <div class="actions">
    <%= f.submit 'Make a friend' %>
    <%= link_to 'Nevermind', friends_path, class: 'button' %>
  </div>
<% end %>
When the form is submitted and the backing models are successfully persisted to the database, the file itself will be uploaded to S3.
Upload controller
With Rails 4 we’ll need to specify the permitted params. We’ll permit :name and :avatar in the params.
class FriendsController < ApplicationController
  # Other CRUD actions omitted

  def create
    @friend = Friend.new(friend_params)

    if @friend.save
      redirect_to @friend, notice: 'Friend was successfully created.'
     else
       render action: 'new'
    end
  end

  private

  def friend_params
    params.require(:friend).permit(:avatar, :name)
  end
end
Large files uploads in single-threaded, non-evented environments (such as Rails) block your application’s web dynos and can cause request timeouts and H11, H12 errors. For files larger than 4mb the, use the direct upload method instead.
Image display
Files that have been uploaded with Paperclip are stored in S3. However, metadata such as the file’s name, location on S3, and last updated timestamp are all stored in the model’s table in the database.
Access the file’s url through the url method on the model’s file attribute (avatar in this example).
friend.avatar.url #=> https://your_bucket_name.s3.amazonaws.com/...
This url can be used directly in the view to display uploaded images.
<%= image_tag @friend.avatar.url(:square) %>
The url method can take a style (defined earlier in the Friend model) to access a specific processed version of the file.
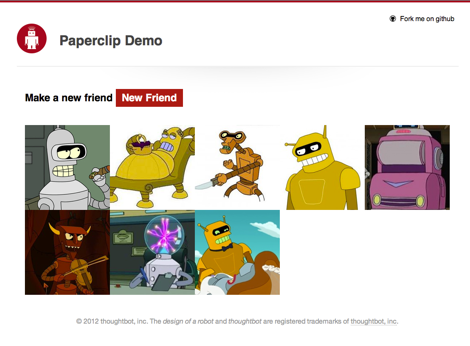
As these images are served directly from S3 they don’t interfere with other requests and allow your page to load quicker than serving directly from your app.
Display the medium sized image by passing :medium to the url method.
<%= image_tag @friend.avatar.url(:medium) %>
Deploy
Once you’ve updated your application to use Paperclip commit the modified files to git.
$ git commit -m "Upload friend images via Paperclip"
On deployment to Heroku you will need to migrate your database to support the required file columns.
$ git push heroku master
$ heroku run bundle exec rake db:migrate