Last updated January 23, 2026
This add-on is operated by Stratis, LLC
Quickly build or use prebuilt AI agents to support & monitor your apps & systems
Stratis AI is an add-on that brings conversational AI to your Heroku applications. With Stratis AI, you can enable natural language interactions with your data, websites, and documents, to provide users access to knowledge and insights.
Adding Stratis AI to your Heroku app can:
- Turn Websites Into Knowledge: Make your website’s information accessible through conversational interactions.
- Search Documents Instantly: Integrate AWS S3 documents for instant AI-powered search.
- Build Custom Agents: Create agentic experiences tailored to your business needs.
- Bring the Conversation Anywhere: Deploy chat functionality to any Heroku app, Slack workspace, or mobile device.
- Converse in Any Language: Create agentic experiences in any language around the globe.
📝 Getting Started: Core Concepts
Here are some Stratis AI concepts to get familiar with:
- An Agent is a combination of one of more Actions that powers a digital assistant or chatbot.
- An Action determines what your agents can do with a Knowledge Source.
- Knowledge Sources are where an agent retrieves information from. You can create knowledge sources from documents, such as a S3 drive, and web content, such as website URLs.
- Connections represent external systems you connect to Stratis AI agents so they can perform meaningful contextual work on your behalf.
- Credentials securely store protected values such as OAuth tokens to support the Connections you create.
- Slack Deployments connect your agents to Slack workspaces, enabling users to interact via direct messages, channel mentions, and slash commands.
In just a few minutes, you can create an agentic digital assistant equipped with your documents, web content, and various other systems. After provisioning our add-on, see the Building Your Agents section where we’ll do the following:
- Create two Knowledge Sources: an uploaded PDF and a specified website
- Create two Actions: a doc action and a web action
- Create an Agent and add the two Actions to it
- Create a digital assistant or chatbot Deployment via web embed, Slack, or mobile and see our new Agent in action.
- Optionally, deploy our Agent to a sample Heroku app using the included Heroku Button so we can test it live.
🚀 Provisioning the Add-on
Attach Stratis AI to a Heroku application via the CLI:
Reference the Stratis AI Elements Page for a list of available plans and regions.
$ heroku addons:create stratisai:PLAN --app example-app
Creating stratisai on ⬢ example-app... free
All set! To get started, run `heroku addons:open stratisai -a example-app`.
After provisioning Stratis AI, the STRATISAI_ORG_ID config var is available in the attached app’s configuration. It contains the unique identifier for the Stratis organization created for your Heroku app. You can ignore this config var for now, but it can come in handy when referencing it during troubleshooting or a support issue. View the config var via the heroku config:get command:
$ heroku config:get STRATISAI_ORG_ID --app example-app
f9b807aa-84ba-4b00-b234-00806c5f0155
🖥️ Accessing the Admin Dashboard
After provisioning the add-on, access the admin dashboard via the browser or CLI.
Via Browser
- Navigate to the
Resourcestab of your app in the Heroku Dashboard. - Select the
Stratis AIresource to open the Stratis AI dashboard in a new window.
Via Command Line
Access the dashboard via the CLI:
$ heroku addons:open stratisai --app example-app
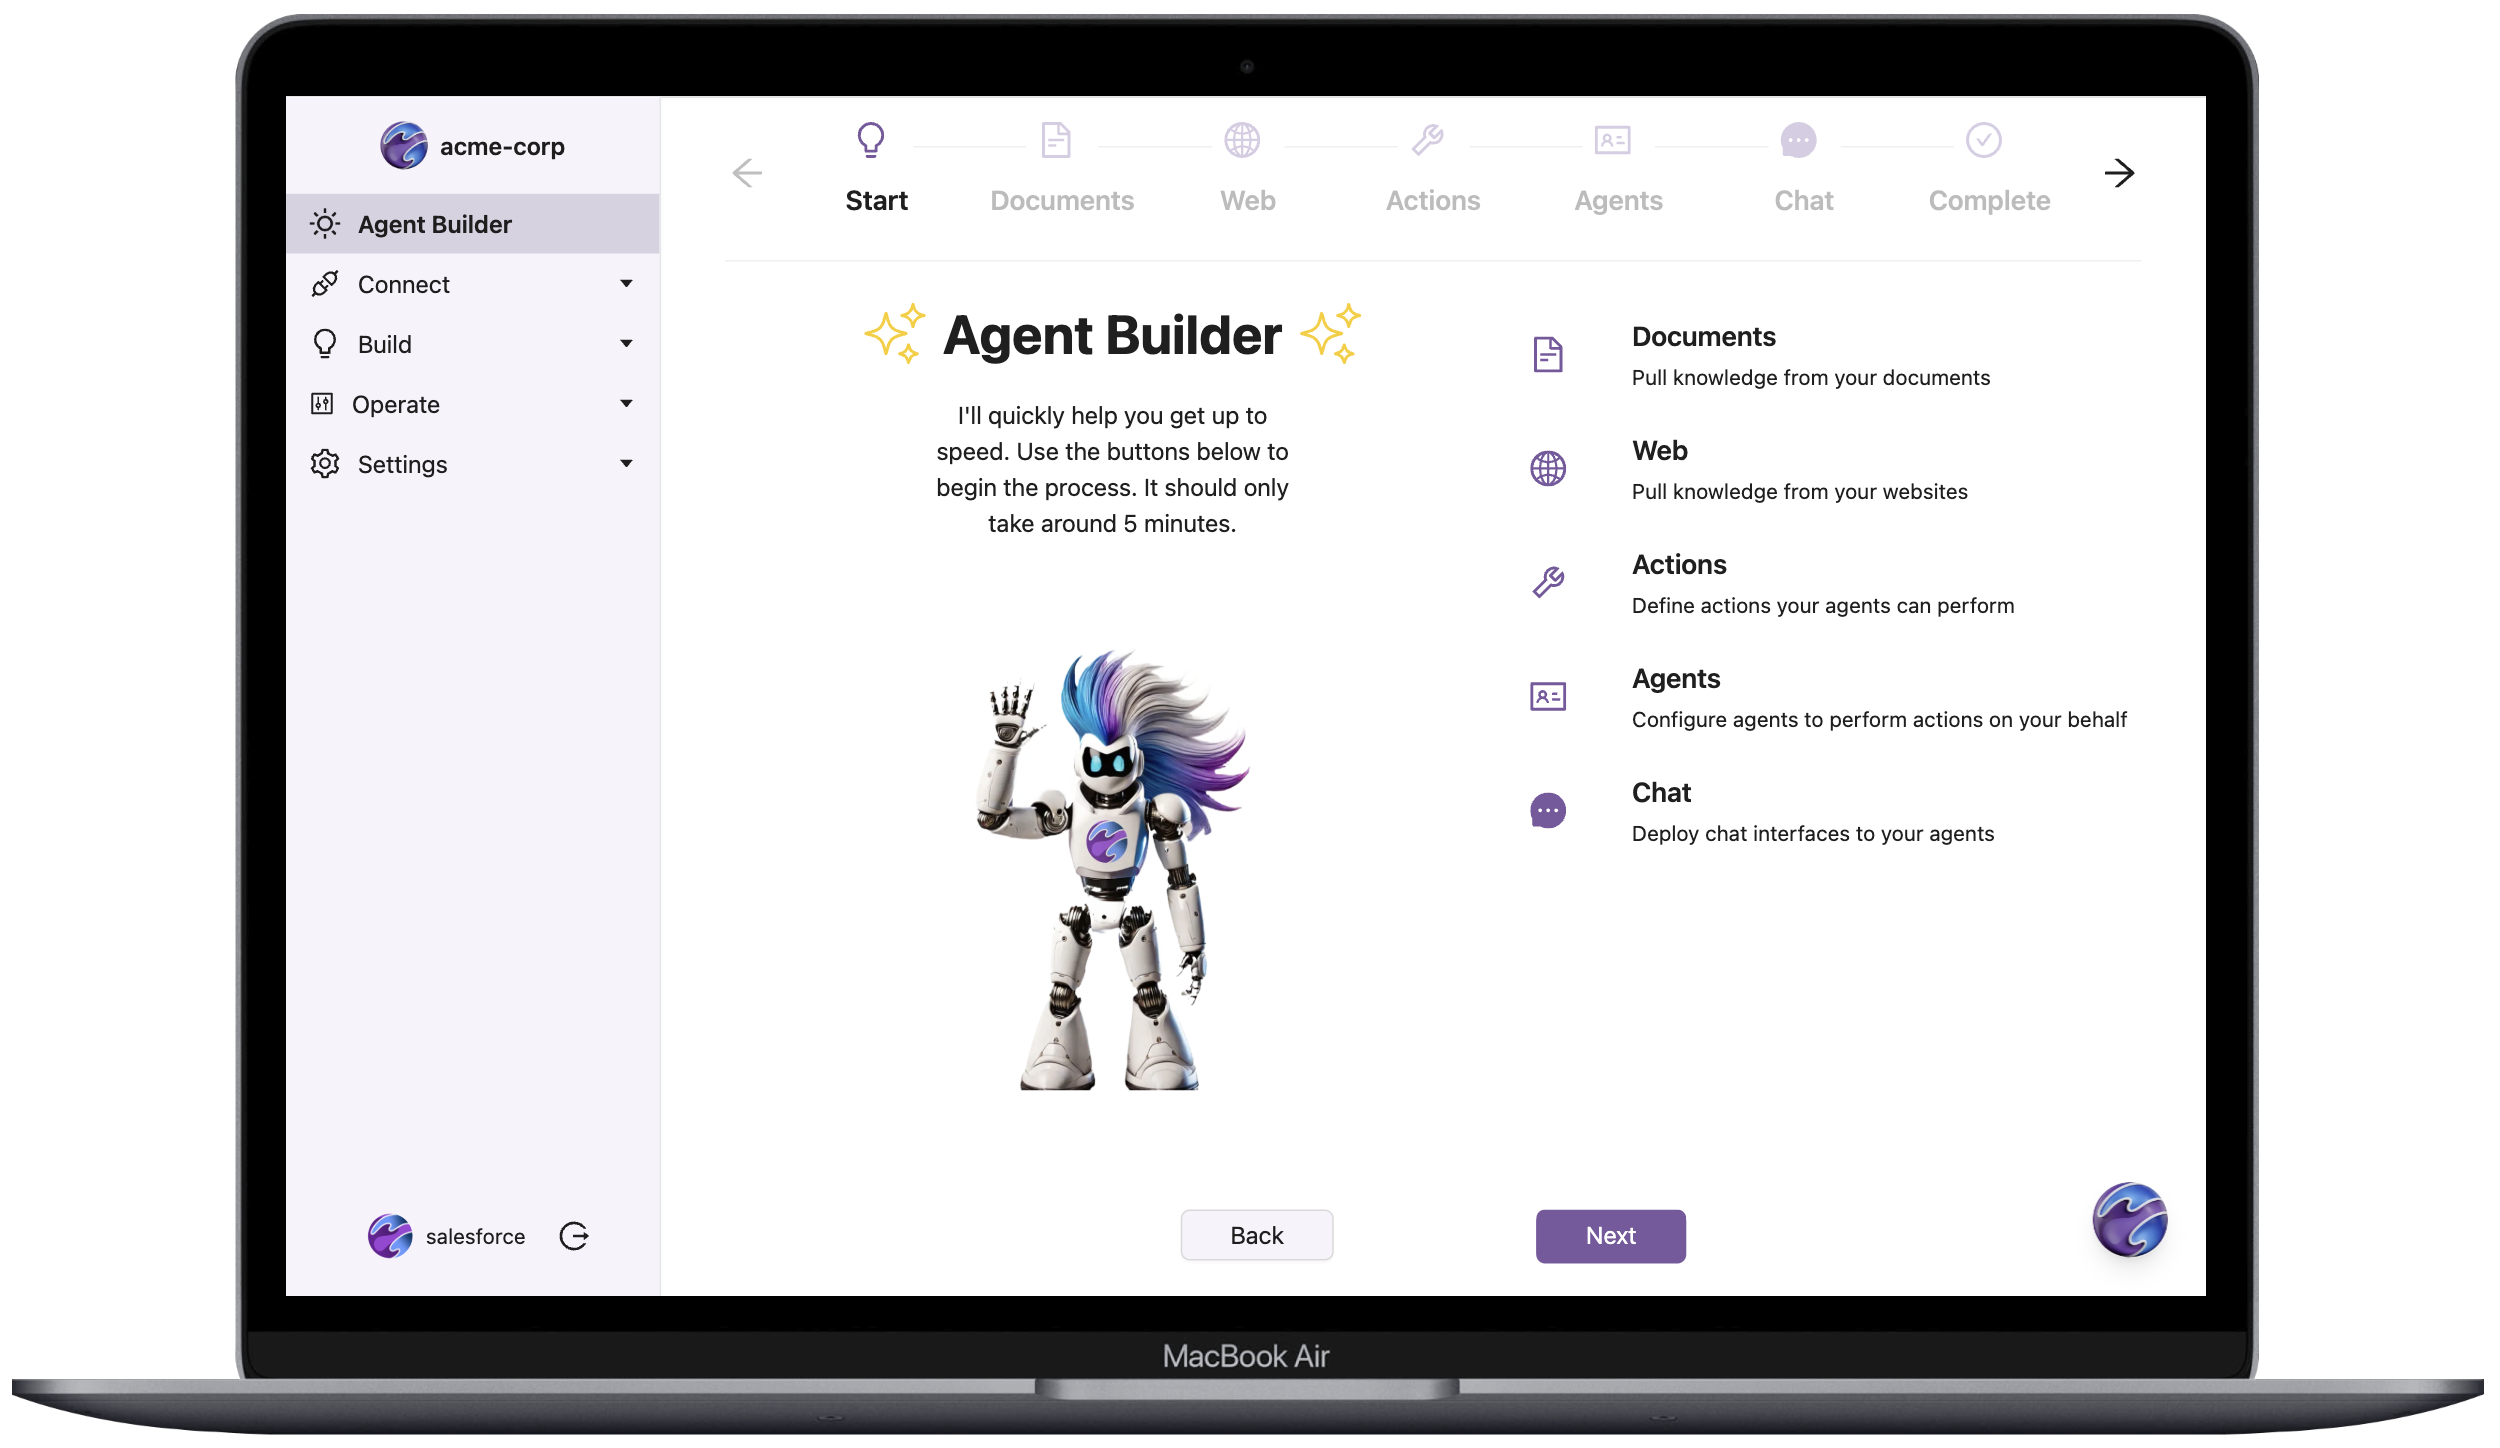
🛠️ Building Your Agents
The Setup Wizard guides you through configuring and deploying your conversational agents in four steps. This process ensures an easy experience, even for users with limited technical expertise.
- Connect Your Knowledge and Systems
- Define Your Actions (Tools)
- Assemble Agents
- Deploying Conversational Agents
Connect Your Knowledge Sources
Stratis AI supports multiple knowledge sources, including the following:
- AWS S3 Buckets: add and schedule periodic ingestion from your S3 documents.
- Websites: enable web ingestion for real-time data updates.
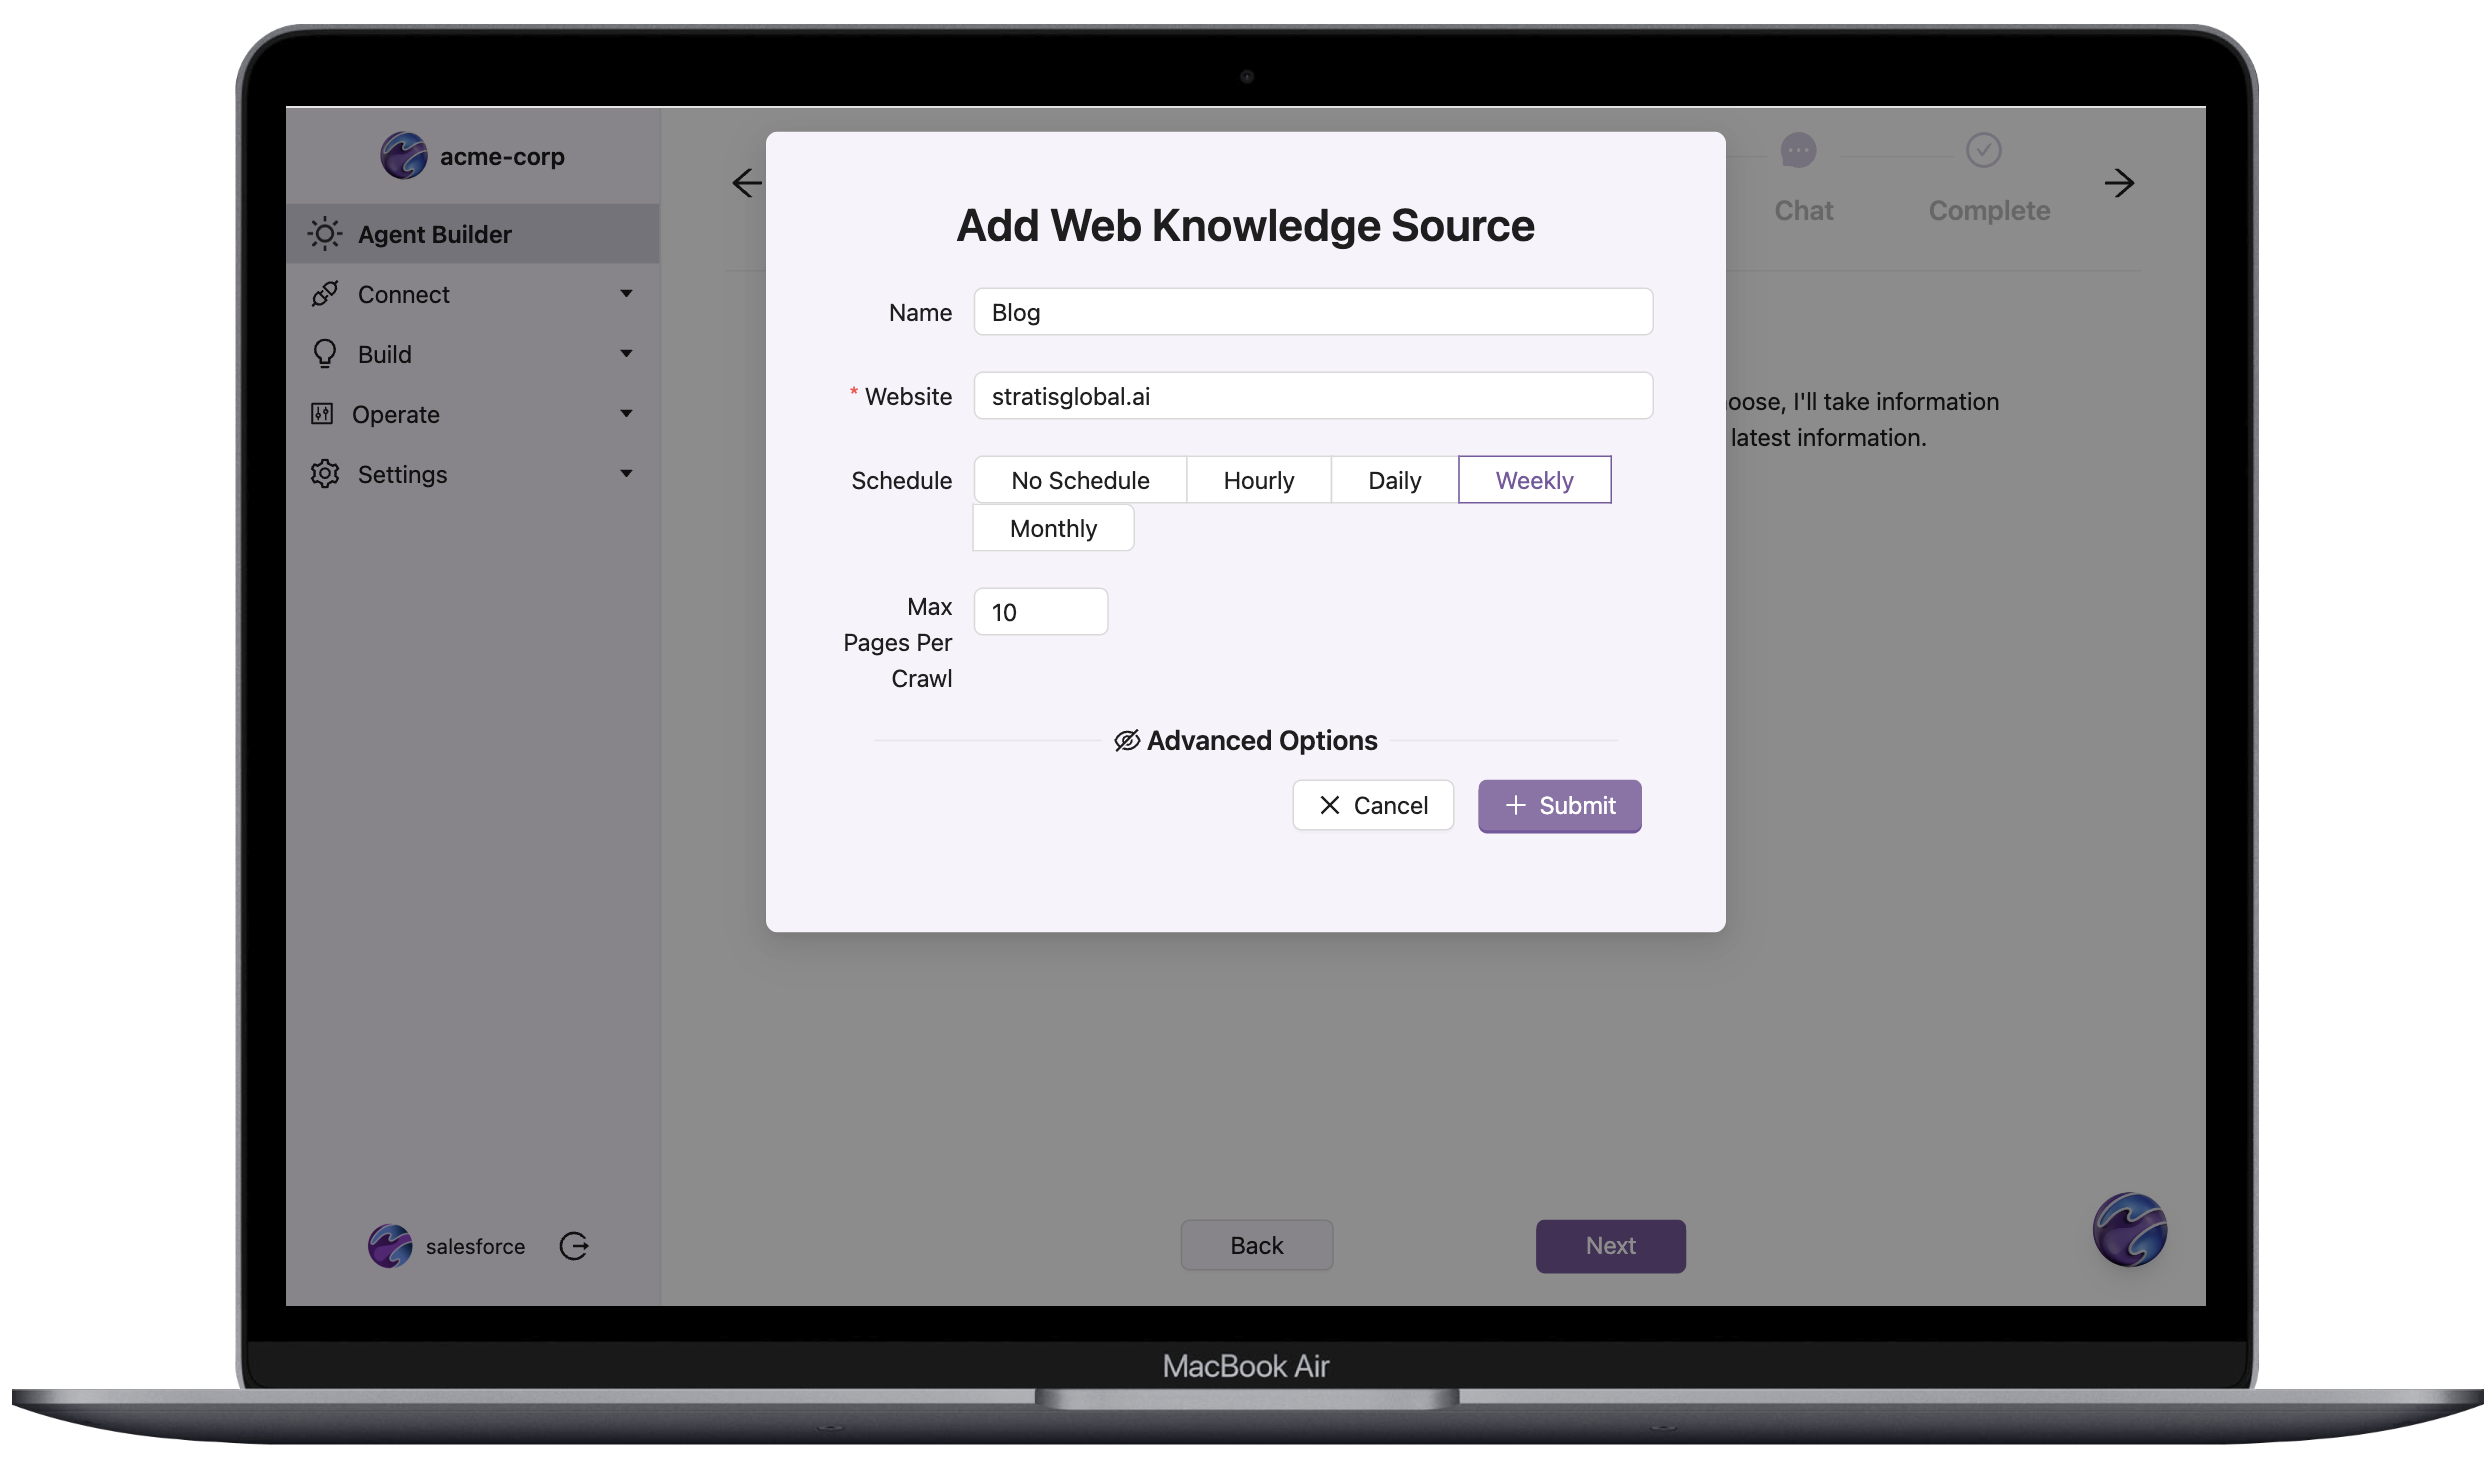
To create a knowledge source:
- Select the type of source, for example, AWS S3 or website.
- Enter the required credentials, for example, S3 keys or API URLs.
- Choose a synchronization schedule, for example, daily, weekly, or monthly.
- Click
Submit.
The following example shows the configuration for creating a web source with an hourly sync schedule.
Allow the Stratis Web Crawler
If your website blocks automated access or you receive crawler validation errors, add the following entry to your website’s robots.txt file (typically located at https://www.example.com/robots.txt):
User-agent: *
Allow: /
This configuration allows the Stratis Crawler (Stratis Crawler <dev@stratisglobal.com>) to access your website content for indexing.
For more information about robots.txt configuration, see the robots.txt guide.
You can view and edit your web sources via the list view after creating them.
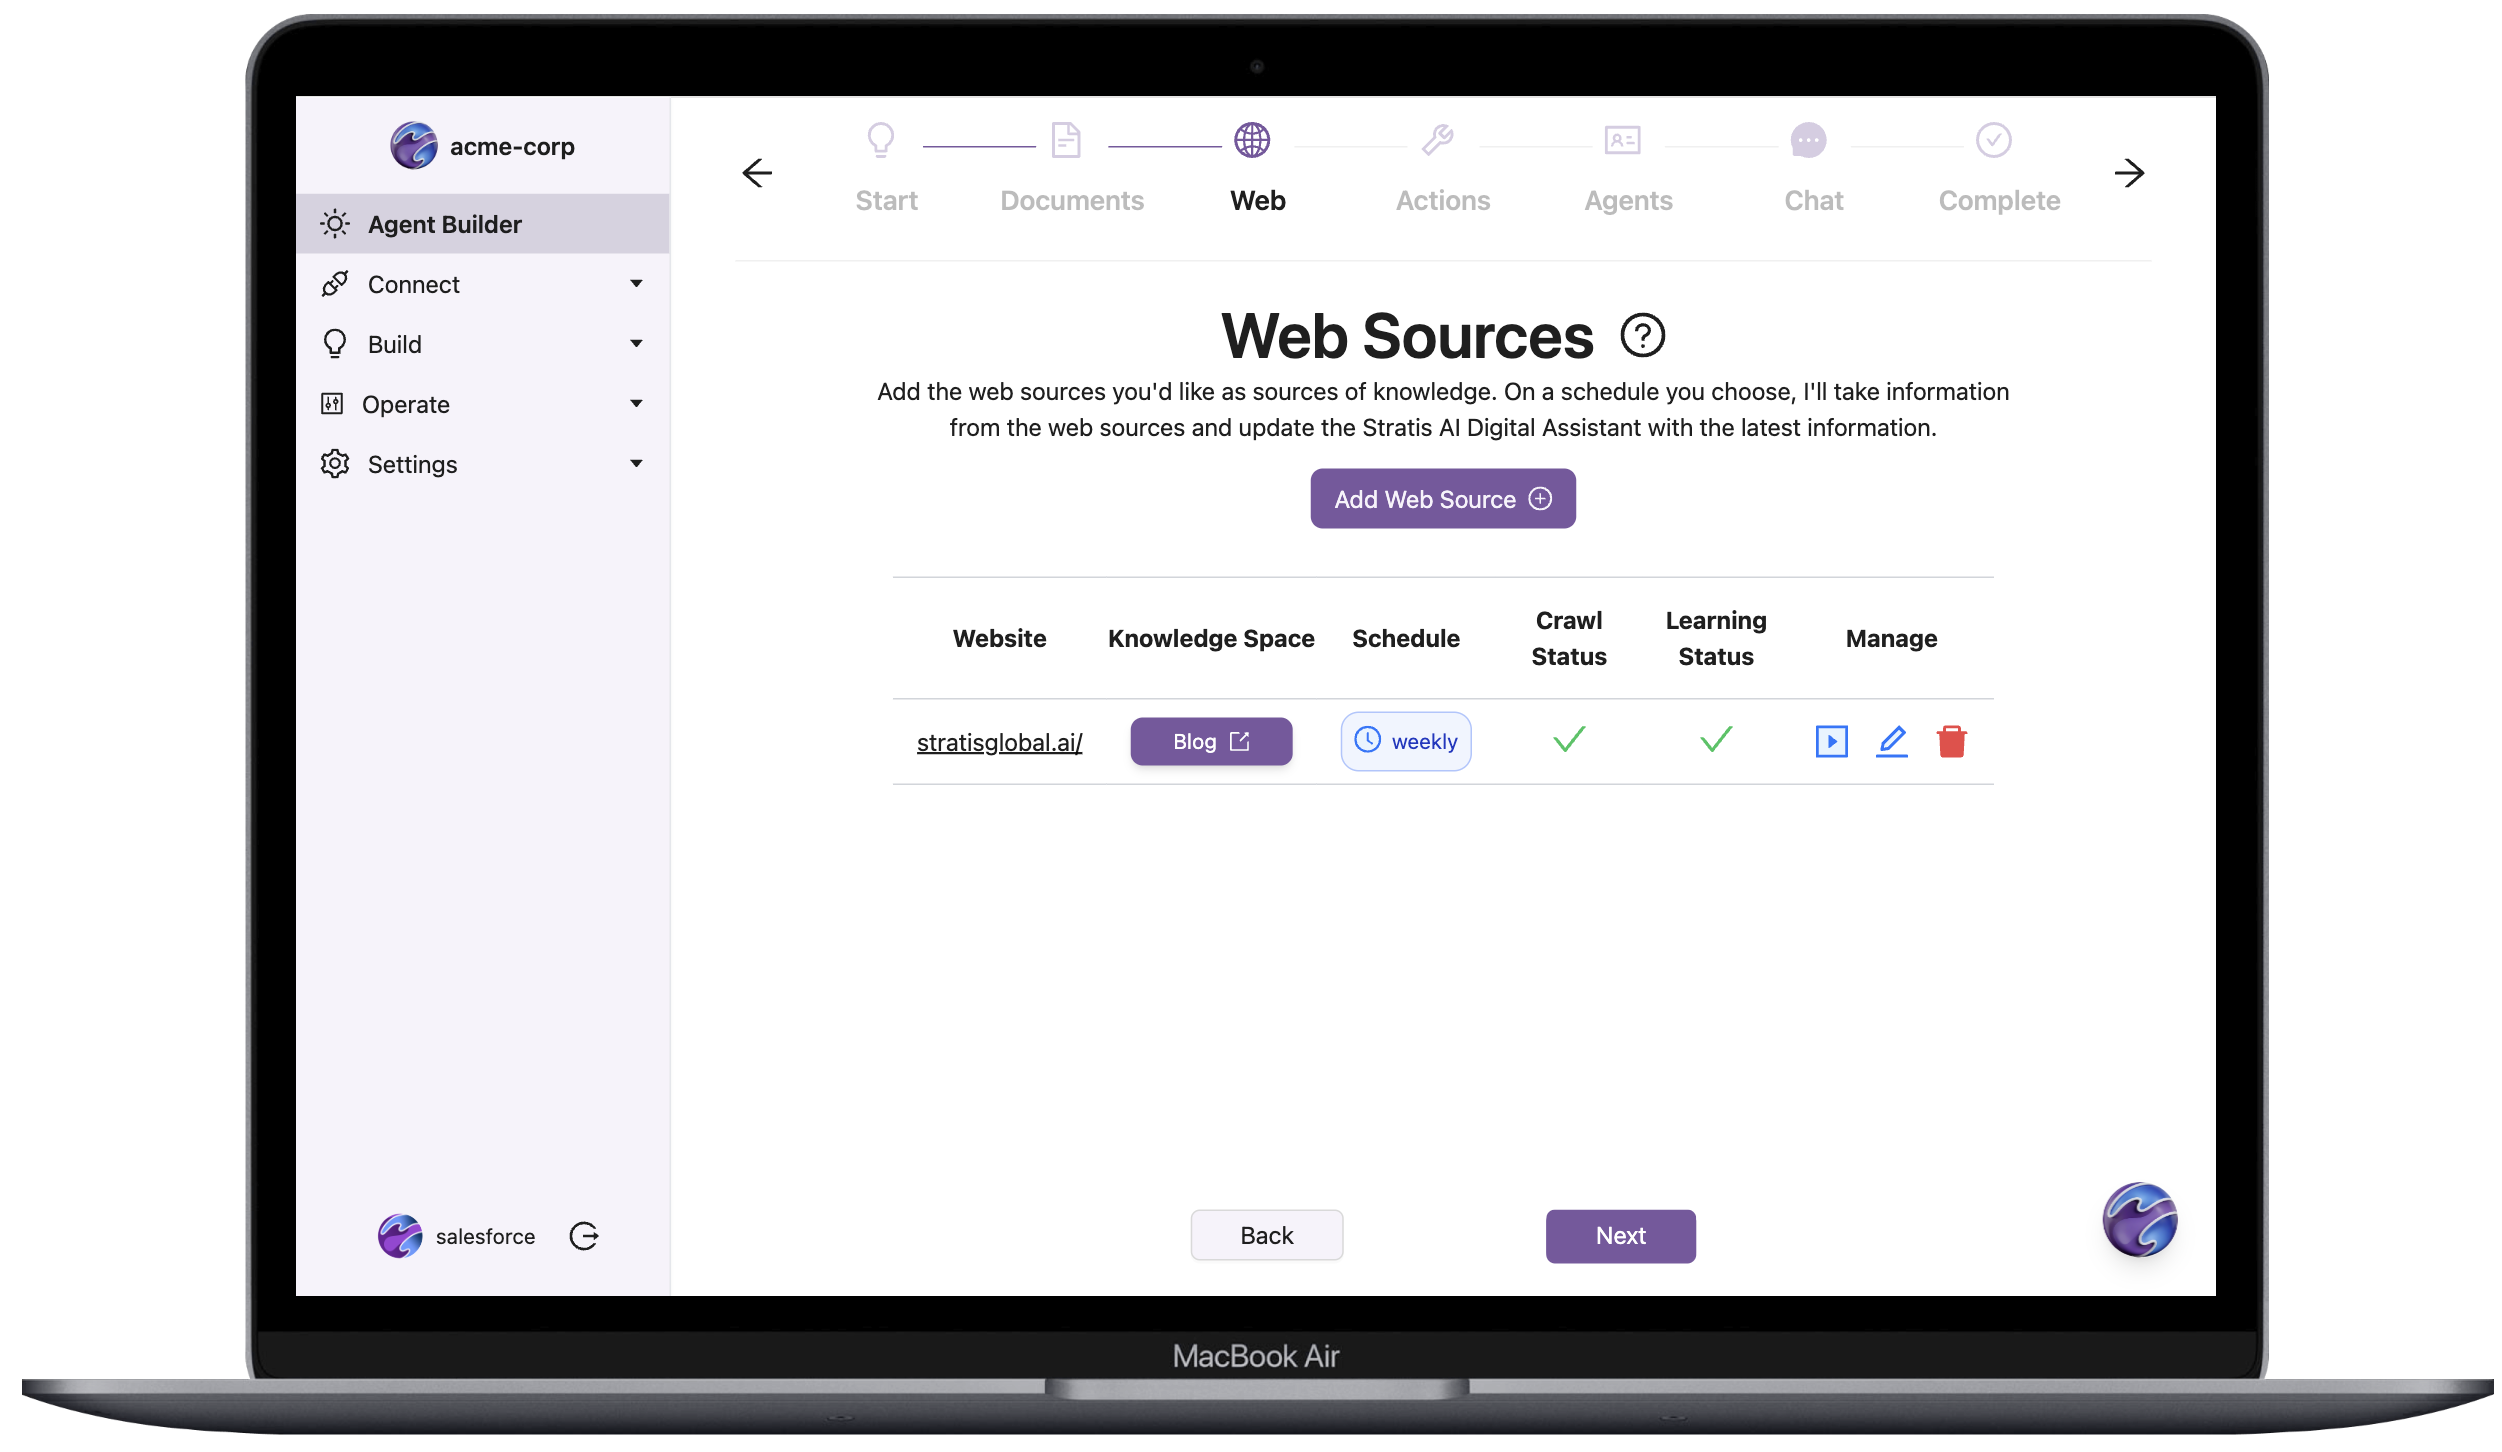
After configuring your knowledge sources, an automatic process triggers to crawl the source and then vectorize the information into pgvector. During this process, you can select the knowledge source and view the progress. The crawl completes quickly, and depending on the size of the source, the vectorization follows shortly.
Connect Additional Systems
Based on your chosen plan, you can connect several additional systems to enable your agents to perform meaningful work on your behalf. These systems include Heroku Postgres databases, Own data backups, Salesforce organizations, and more.
To connect a new system:
- Navigate to
Settings→Credentialsin the side-bar menu. - Click
Add Credential. - Select the desired credential provider. Based on the credential provider, you either enter a standard OAuth flow or are prompted for manual entry of credential information. Regardless of the process, your credential and token data is encrypted in transit and at rest in the database.
- Upon successful completion of the credential flow, navigate to the appropriate sub-page under the
Connectmenu item in the side bar to verify the new connection(s) created from the credential.
Connections do not count against any of your plan quotas until you put them to use via Agent Actions.
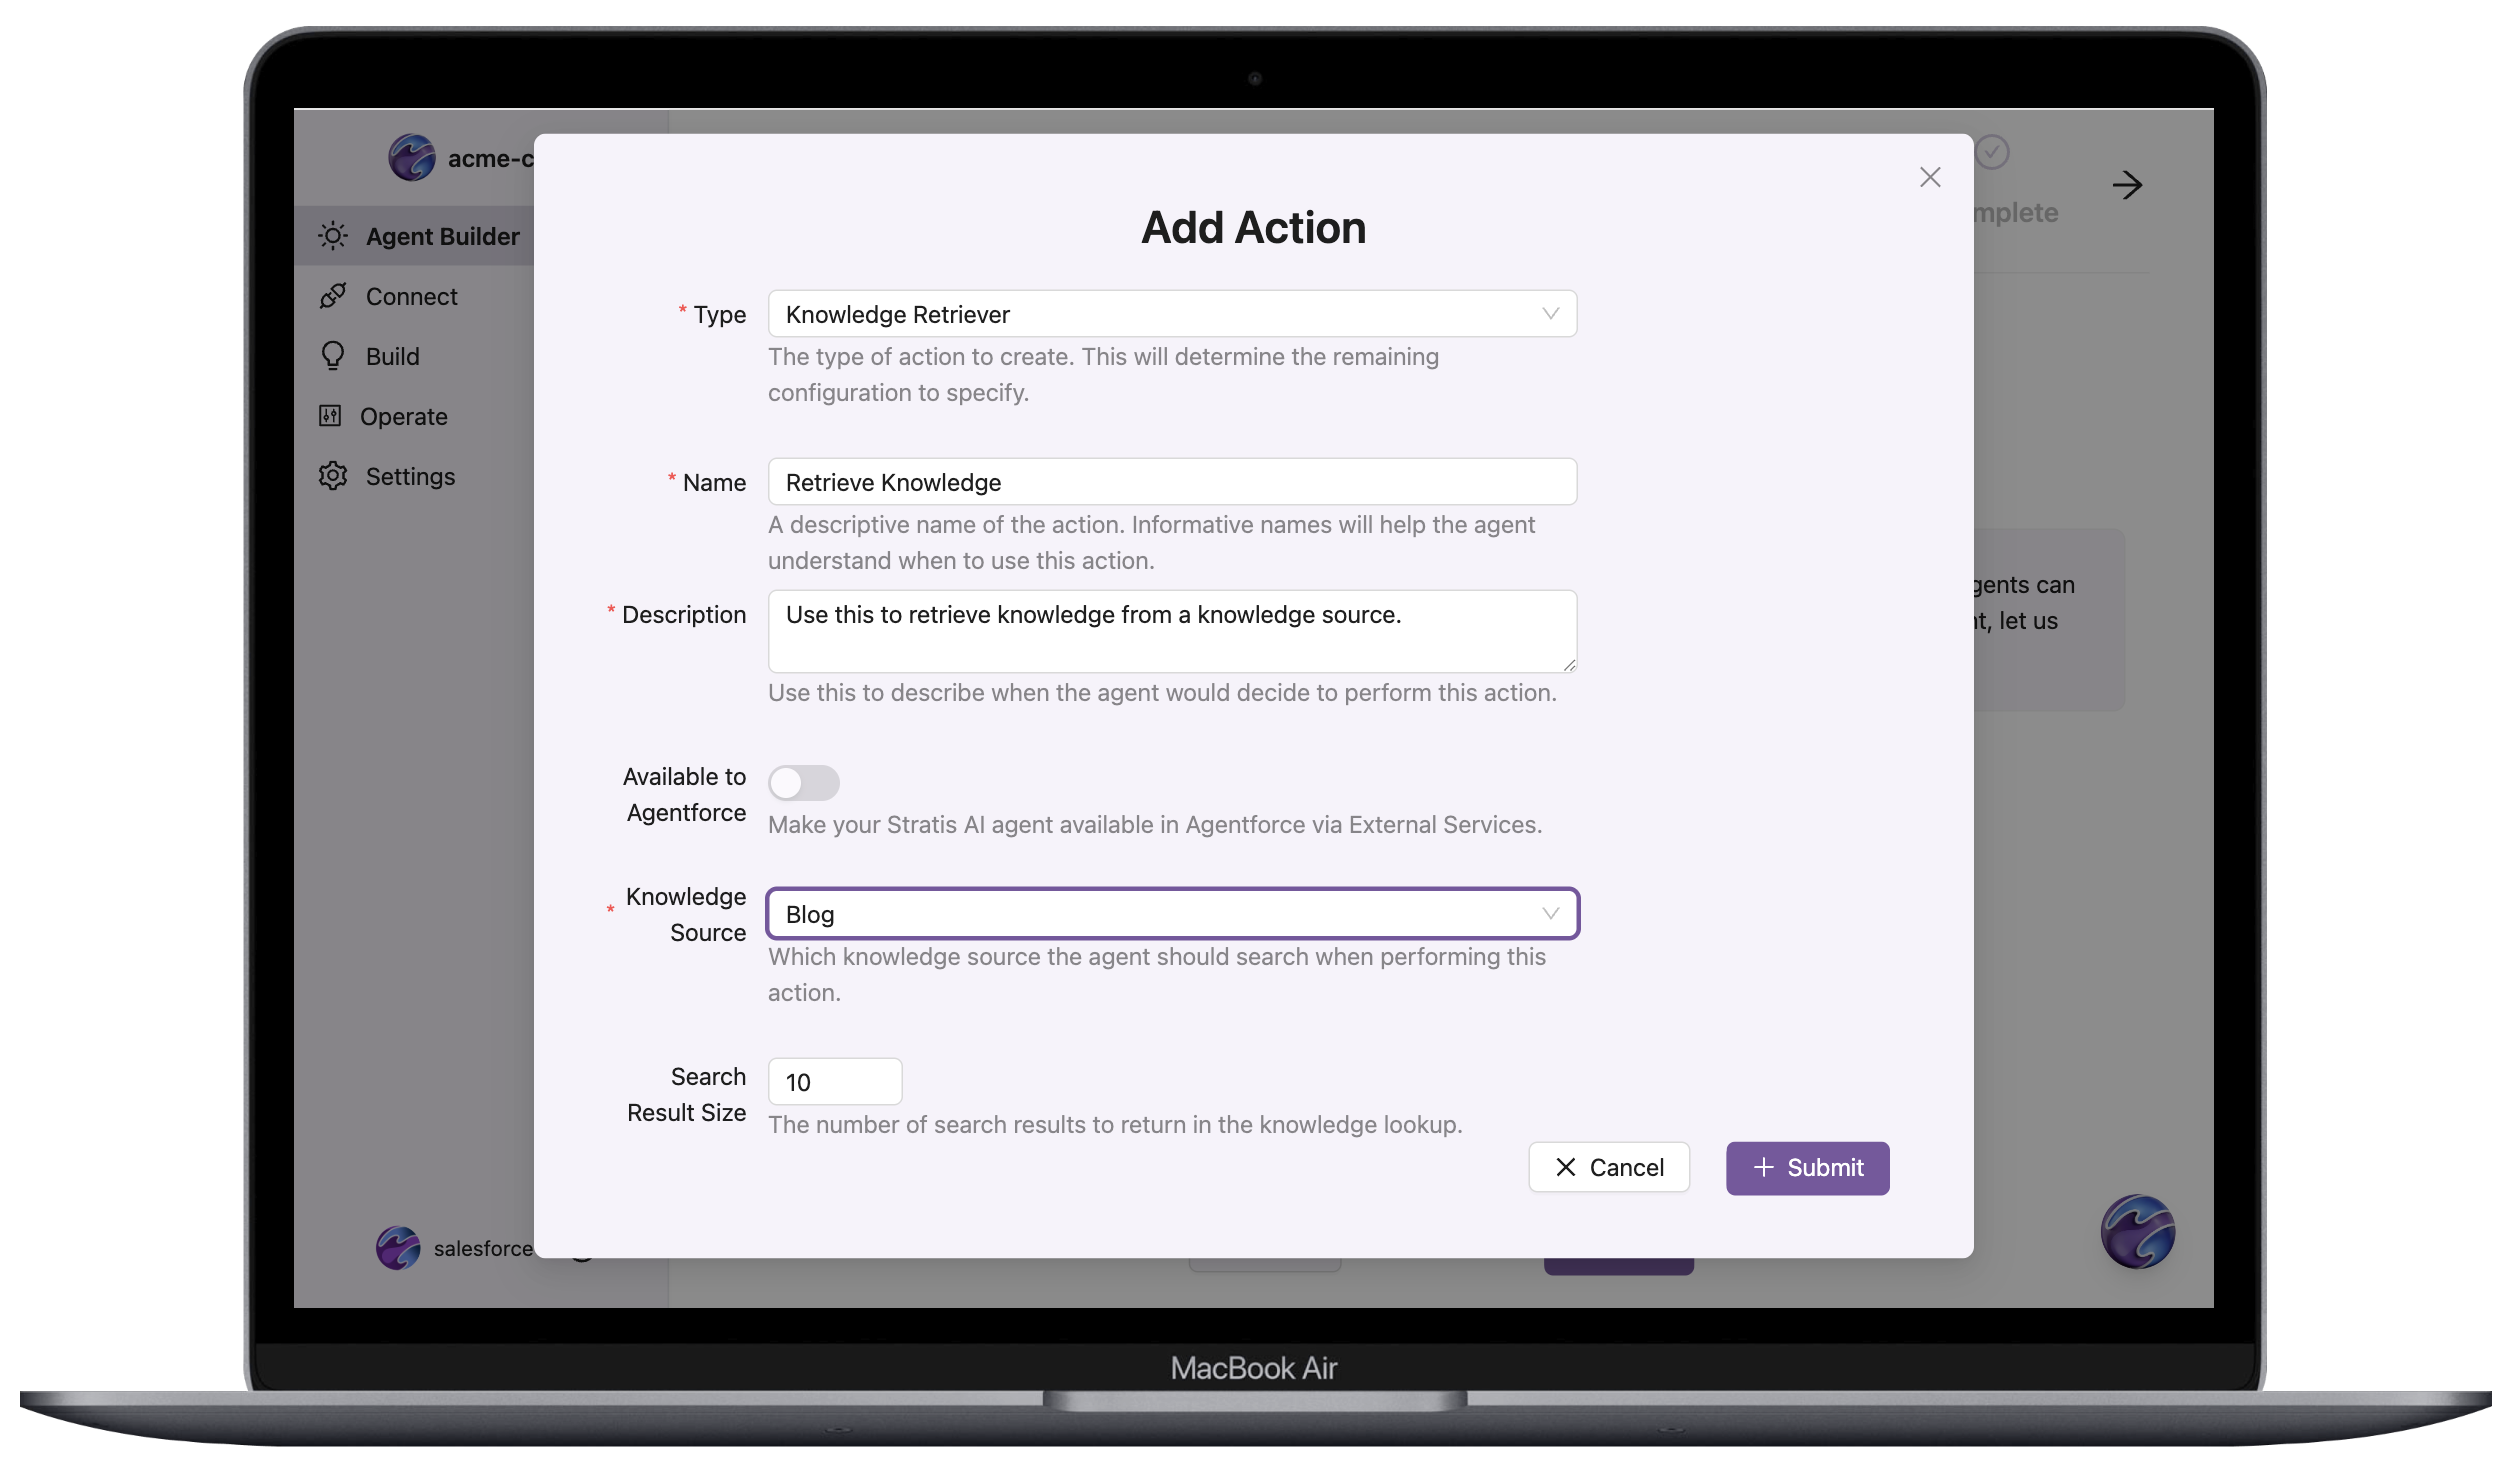
Define Your Actions (Tools)
Actions are the building blocks of your agents. They determine what your agents can do with the configured data sources. For example:
- Retrieving specific documents from AWS S3.
- Searching website content.
To create an action in the setup wizard:
- Select a knowledge source you created.
- Select the specific additional configuration, such as the query or function the action performs if applicable.
- Add a meaningful name and description to help agents use it.
- Click
Submit.
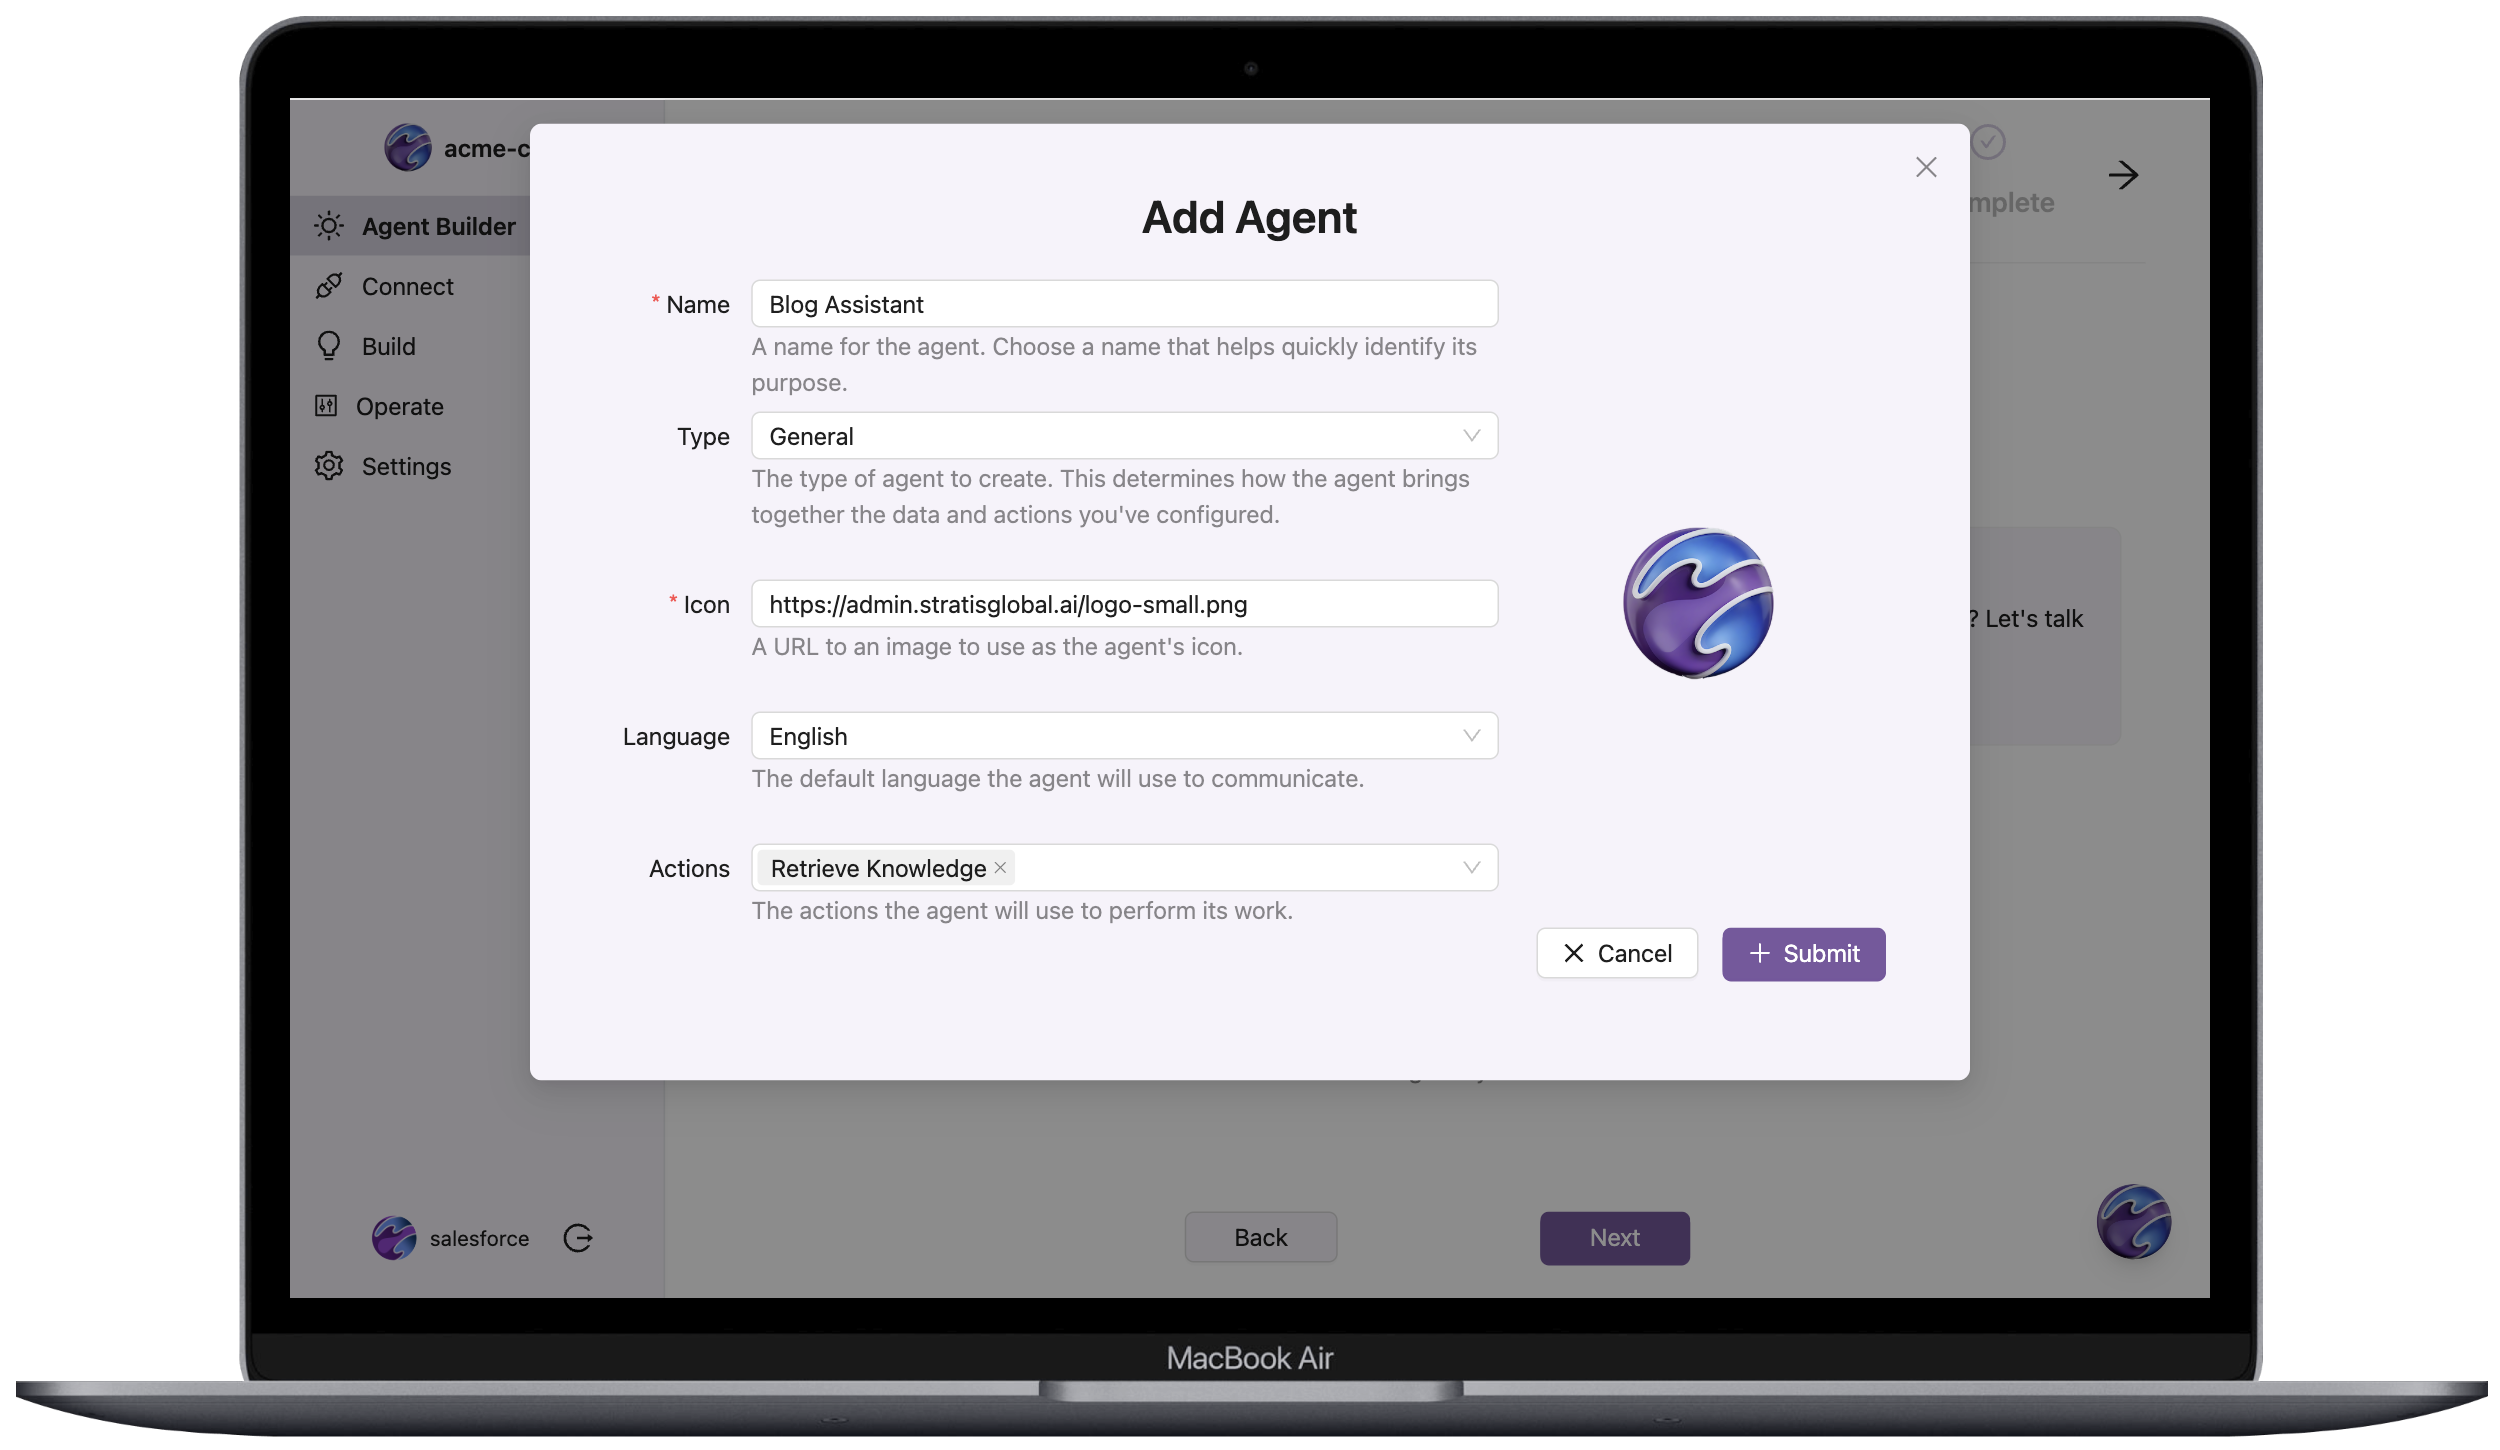
Assemble Agents
Agents combine specific actions to perform meaningful tasks. You can customize agents to fit different workflows or business needs.
To create an agent in the wizard:
- Assign one or more actions you created to the agent.
- Select a language or processing capabilities for the agent.
- Add optional details like a custom persona or branding logo.
- Click
Submit.
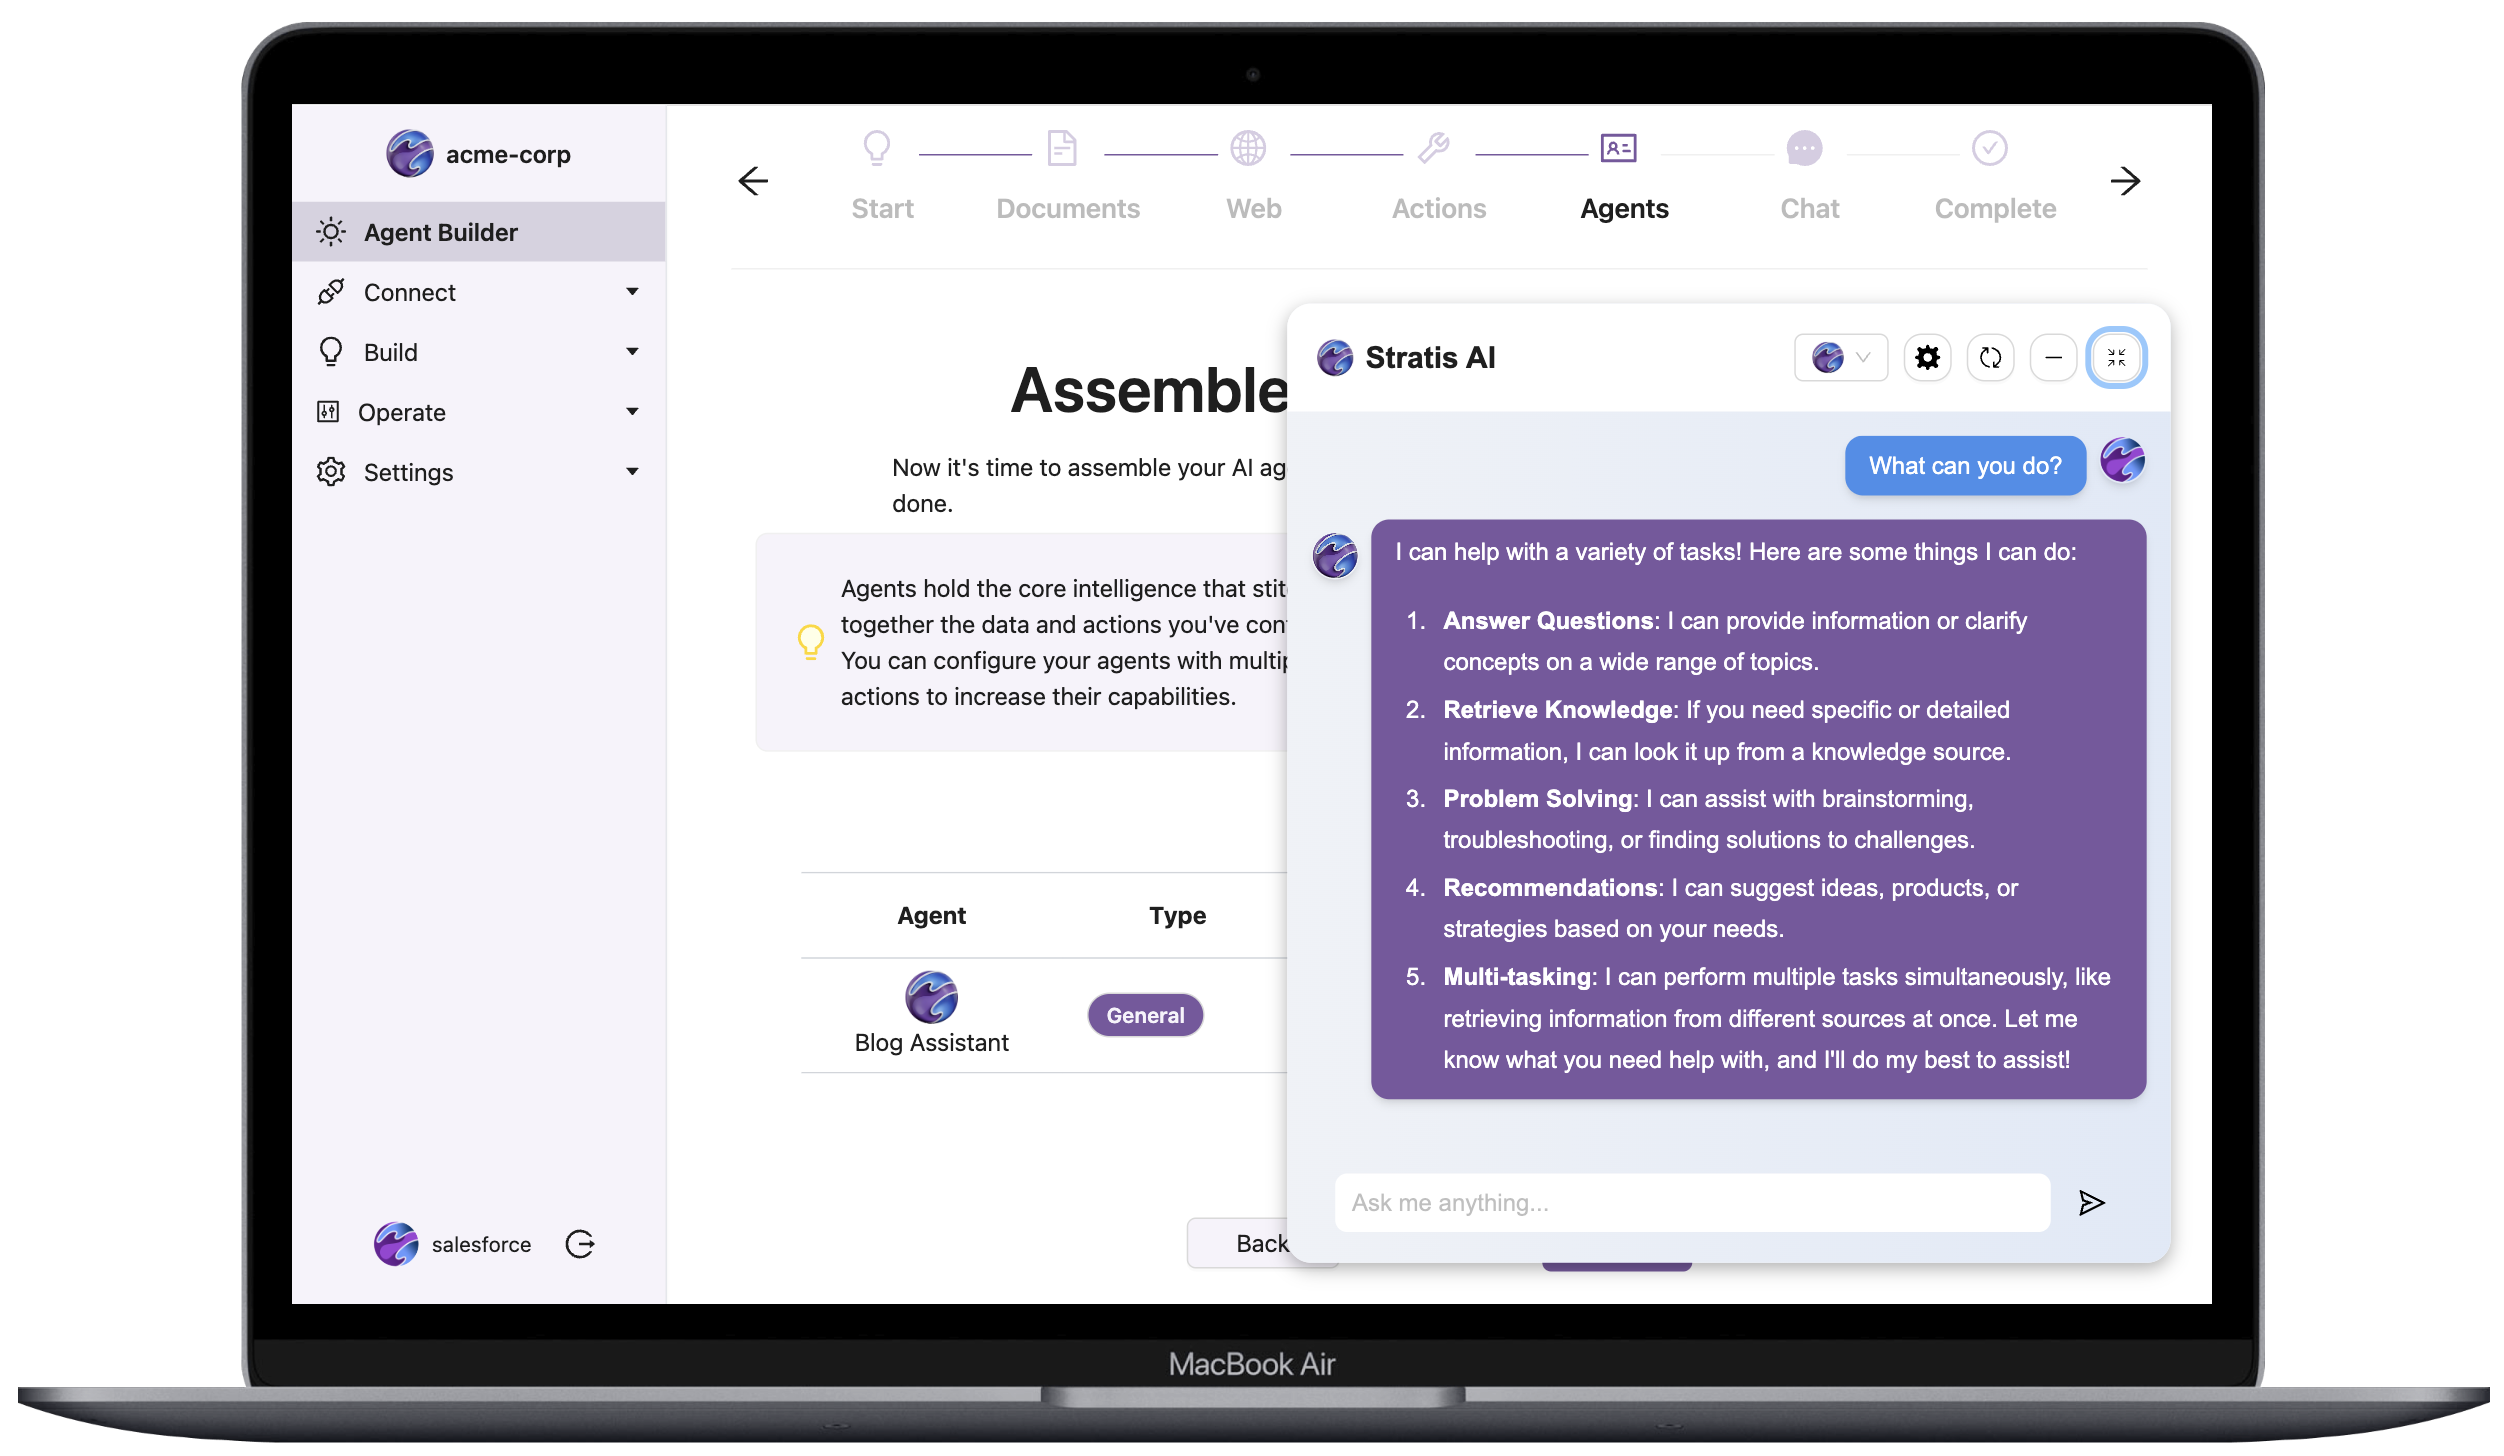
In the Agents page, you can test an ad-hoc conversation with the agent by clicking the message icon. Use this feature to validate your agent before making it available to a deployed chat interface.
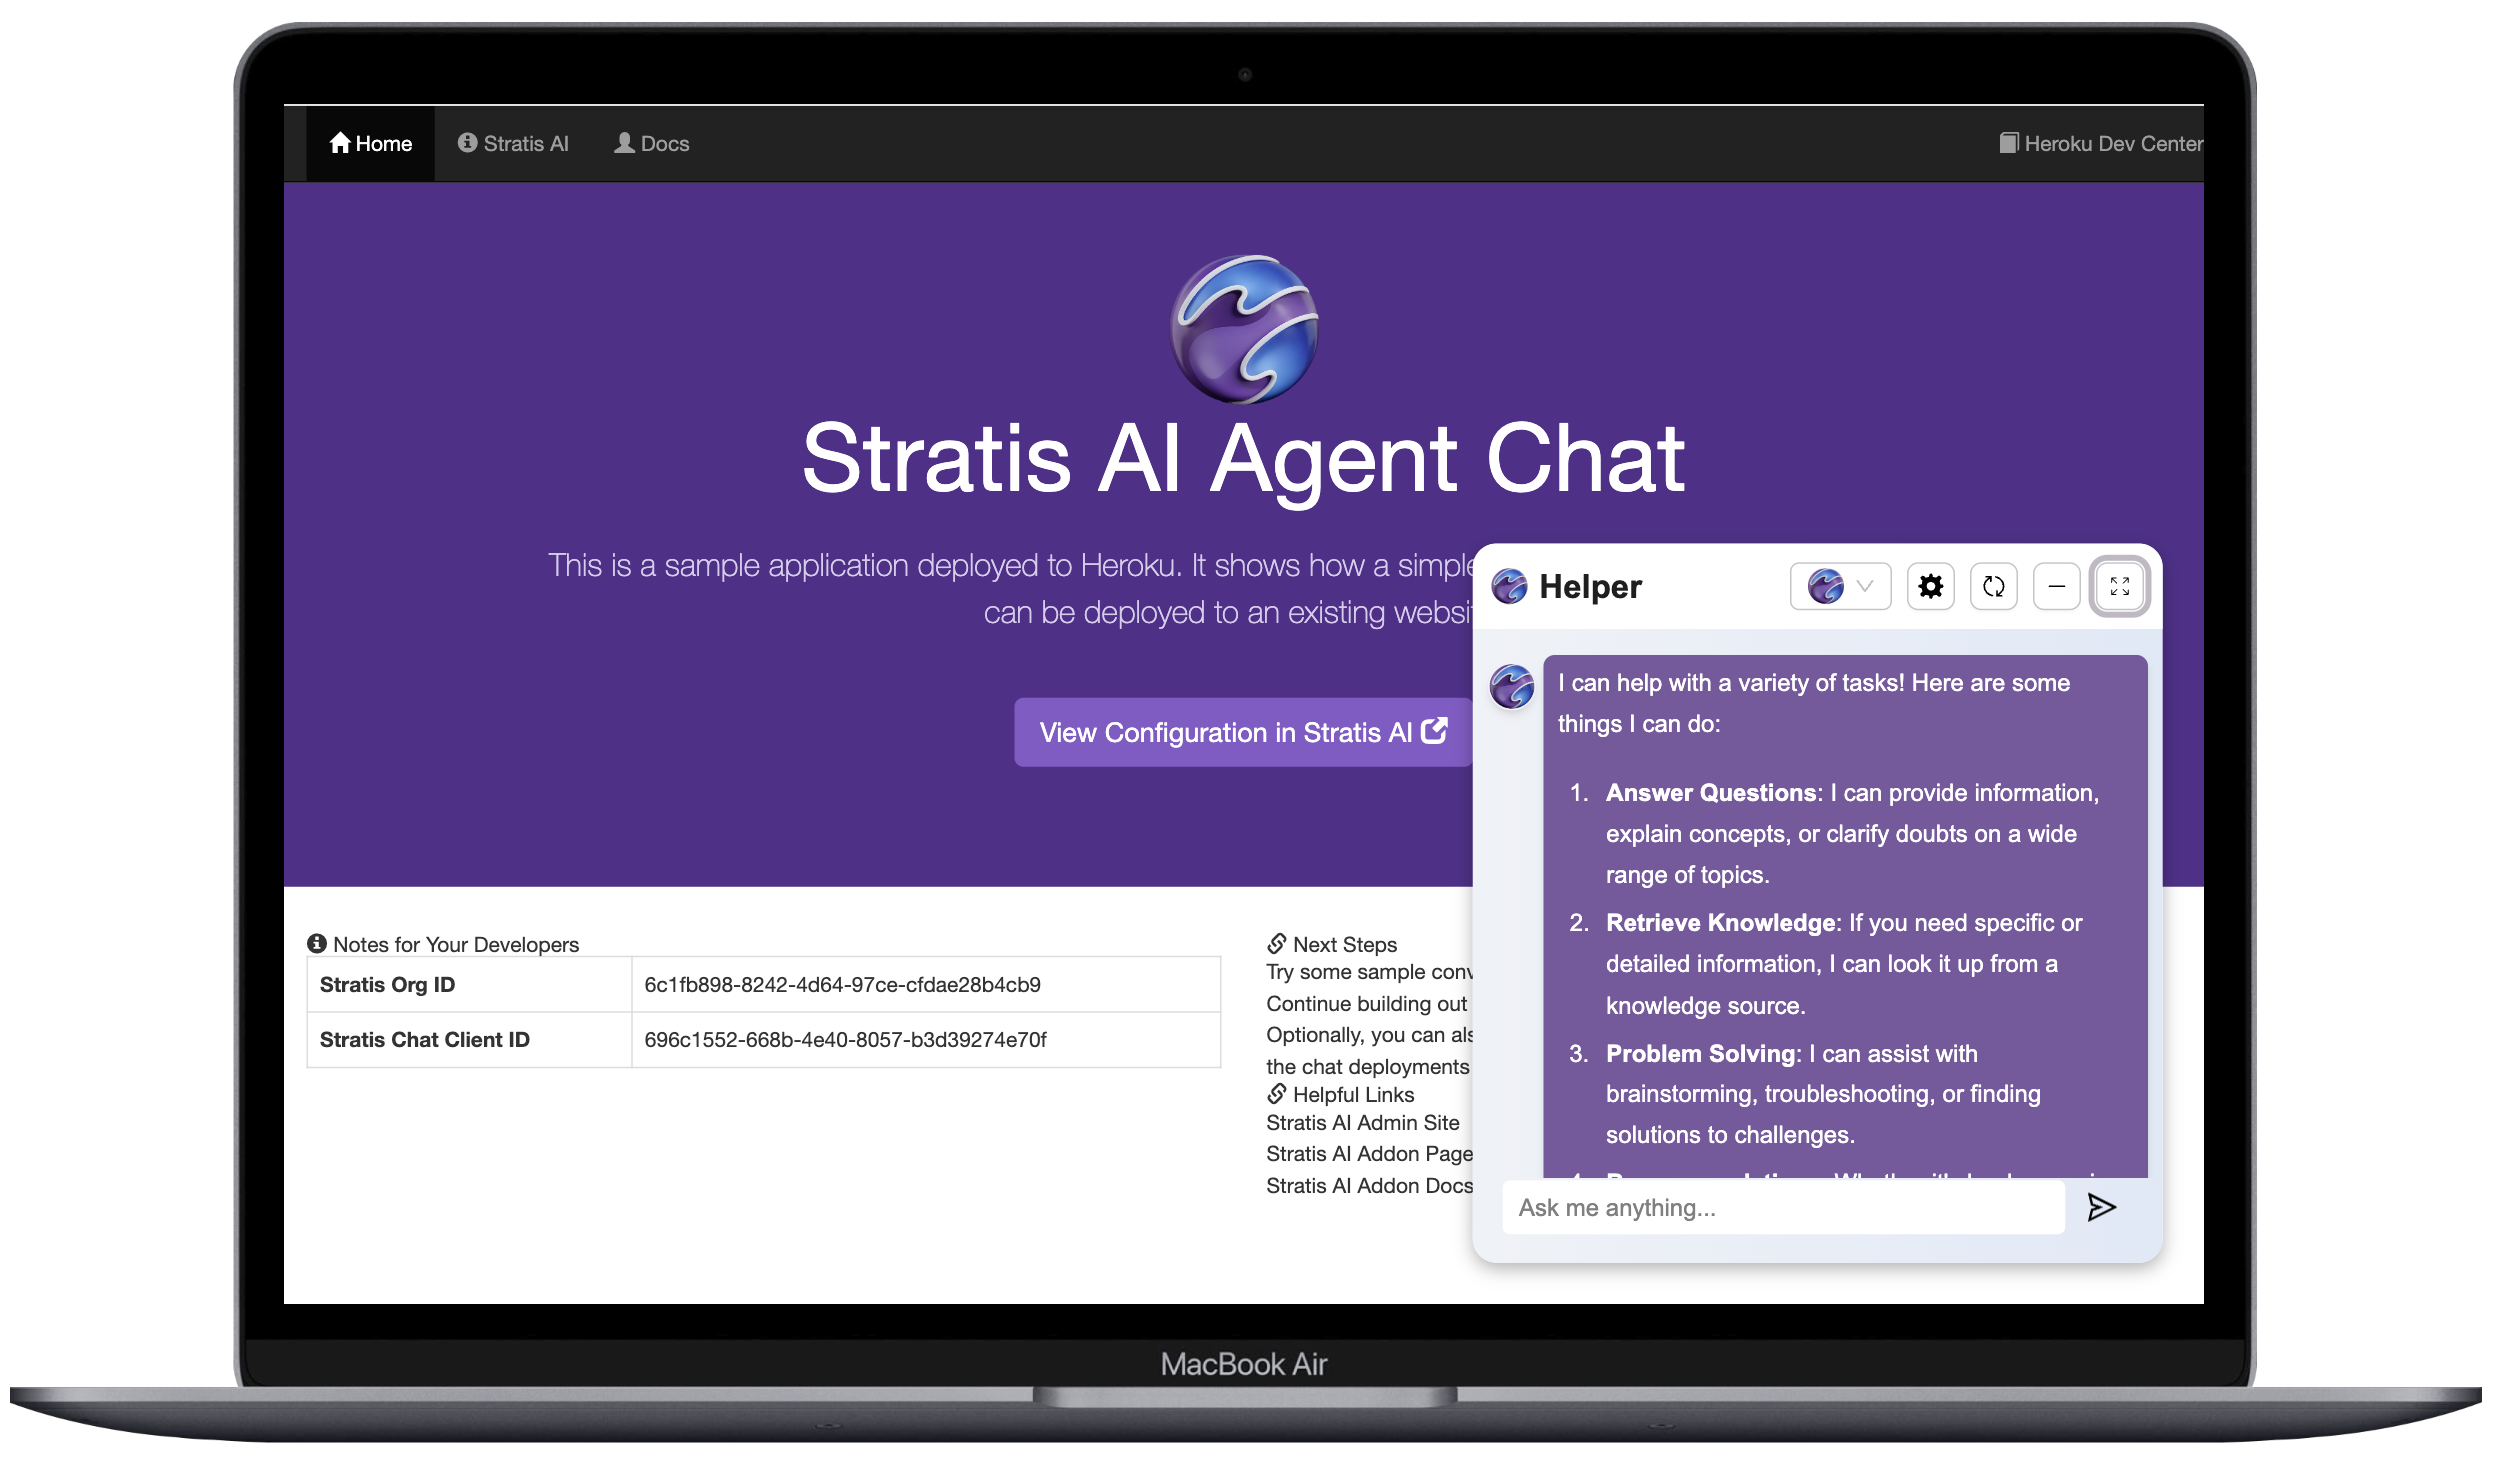
🚀 Deploying Conversational Agents
Deploy your agents to interact with users via Conversational Agents. You can embed these interfaces into your website via manual code insertion or a Heroku Button.
You can deploy your conversational agents by placing a small JavaScript snippet the Stratis AI add-on provides into your web or mobile app. If you have any questions on where to place this snippet, reach out at support@stratisglobal.com.
To simplify this process, a sample site deployment method is available that includes your created agent using a Heroku Button. To see your agent running on this sample site, click the Heroku Button on the Deploy Agent Chat Interfaces page, or from Operate → Deployments in the Admin UI.
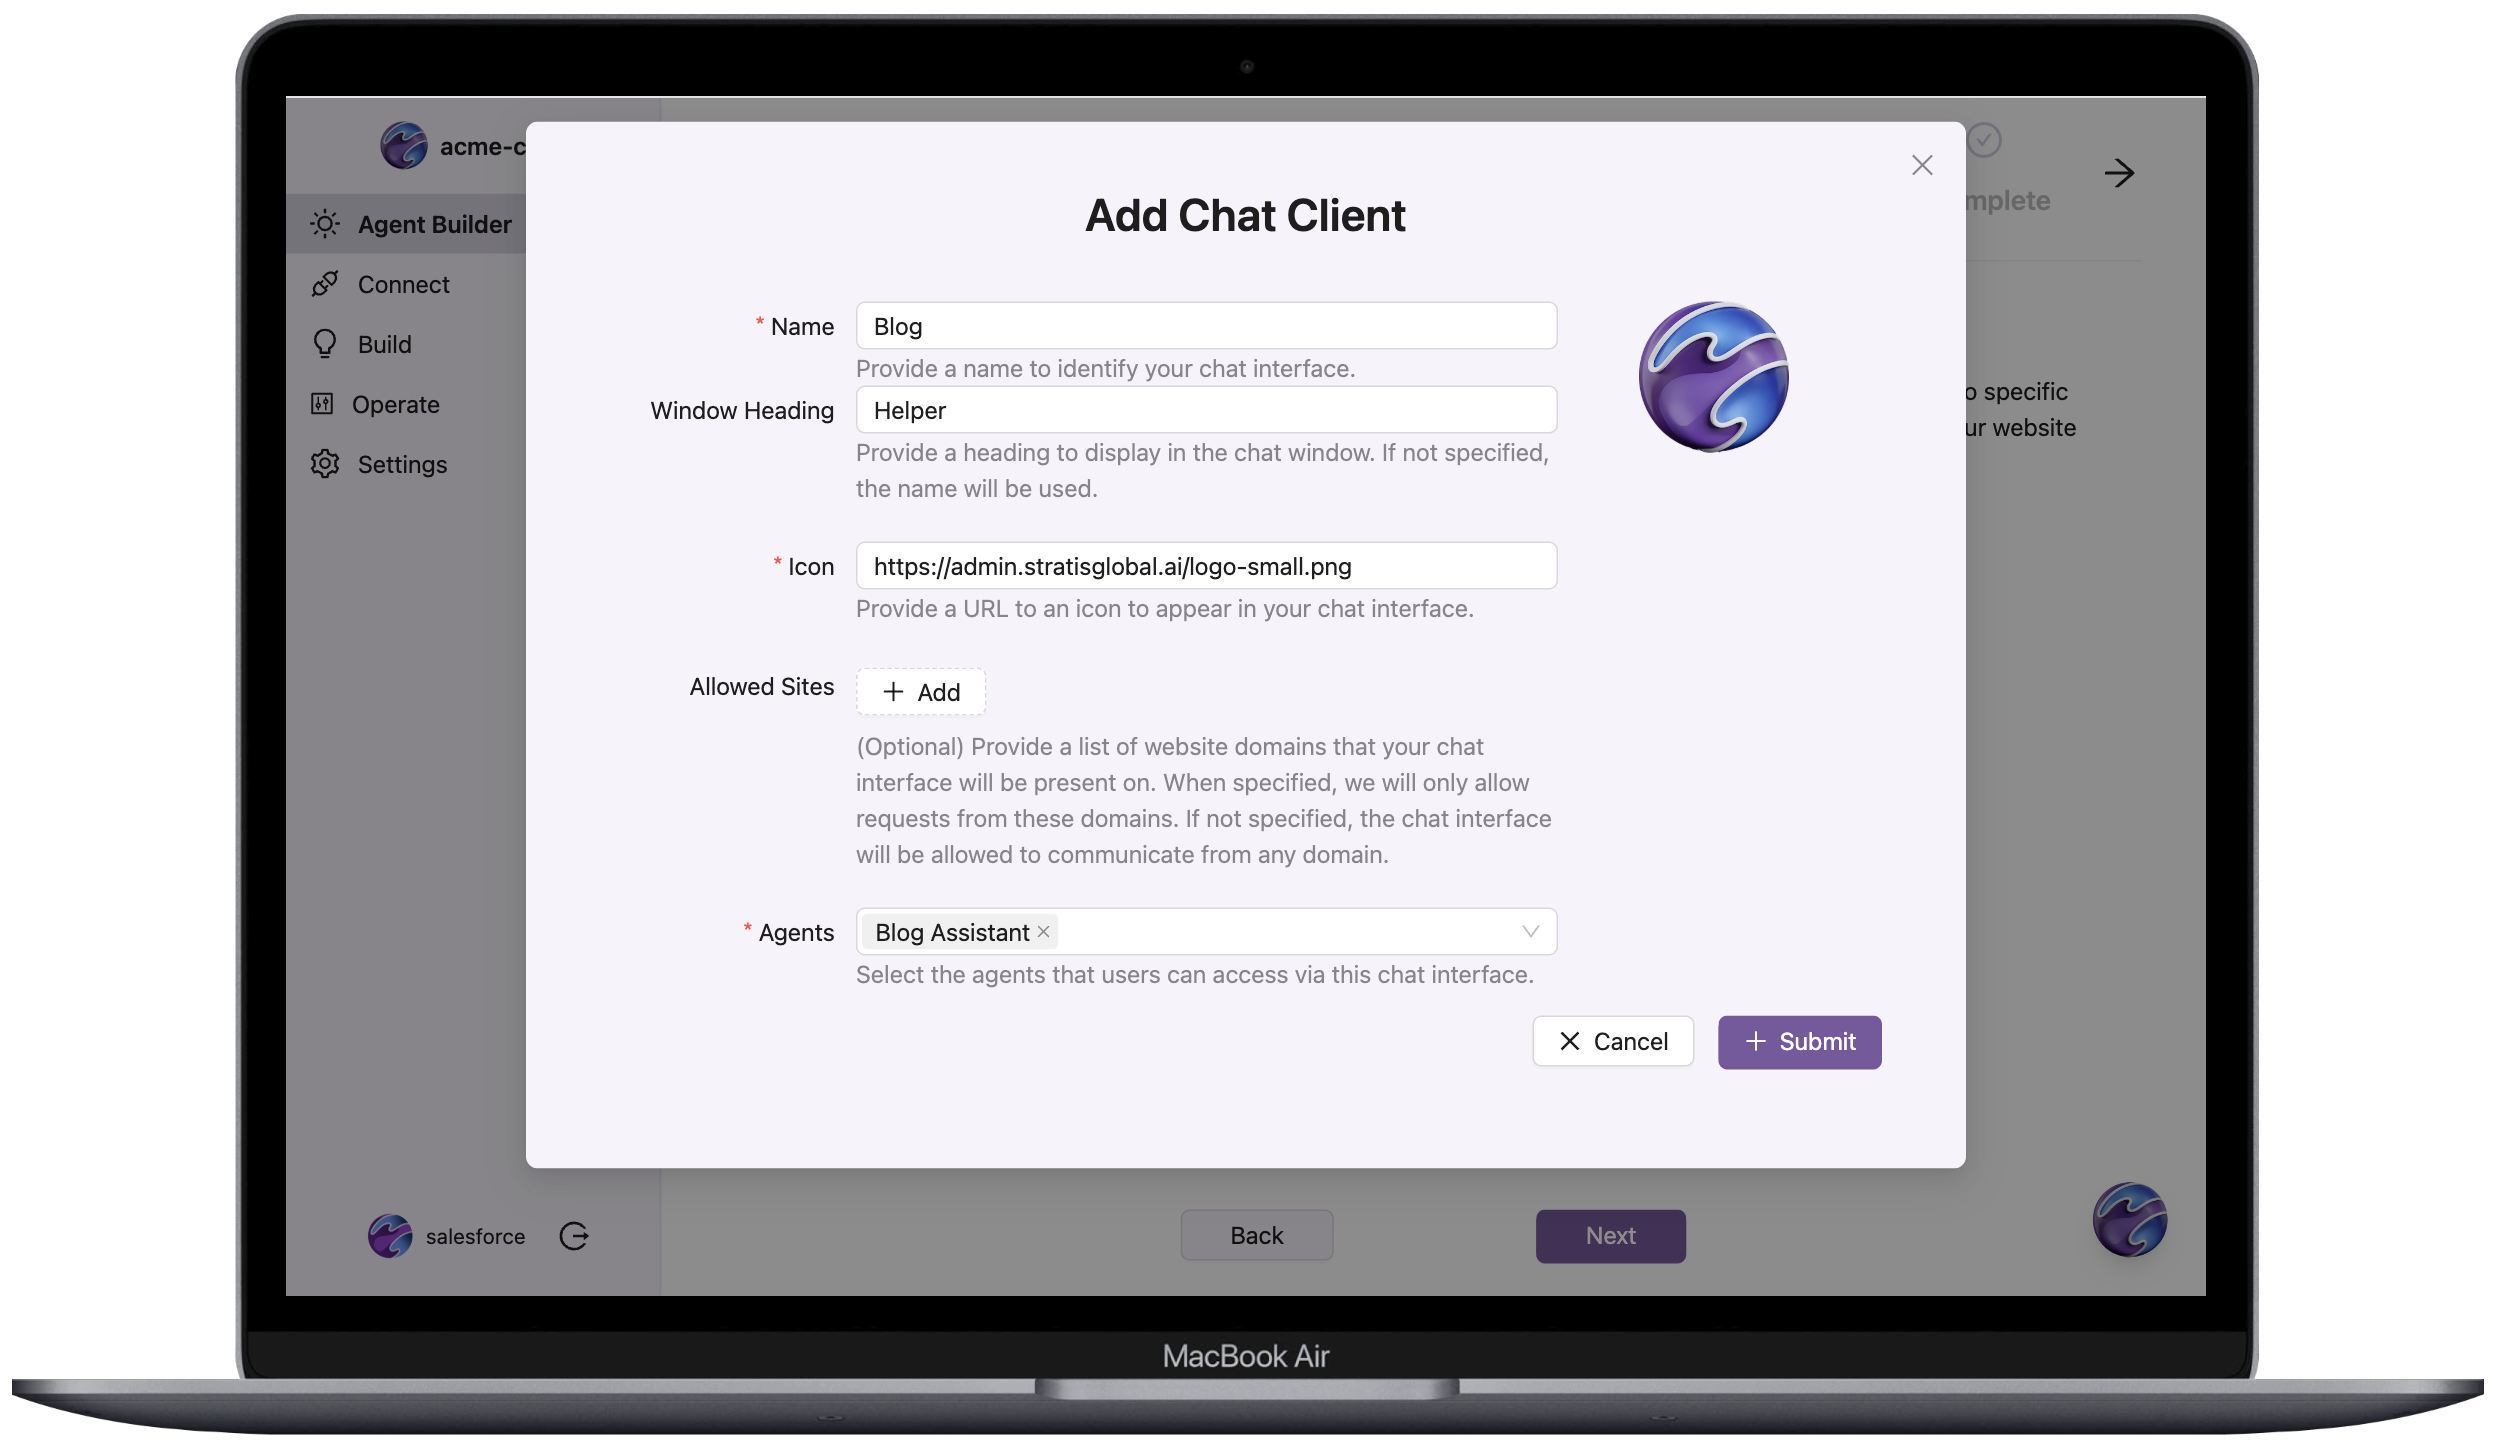
Either way, begin by creating the conversational agent in the setup wizard:
- Add a meaningful name and icon for your chat interface.
- Assign one or more agents you created to the chat interface.
- Optionally, provide a list of website domains your chat interface can be on.
- Click
Submit.
👩🏼💻 Deploy via Code Change
To deploy via a code change:
- Grab the generated code snippet from the
Setup Wizardby clicking the copy icon under theMessagecolumn on the chat interface’s row. You can also visually inspect the code snippet by clicking the pencil icon. - Insert the code snippet into your website’s code, specifically inside the
<body>of the HTML. This step varies based on your chosen web framework. Reach out at support@stratisglobal.com for help.
💻 Deploy via Heroku Button
To deploy via a Heroku Button, click the Deploy to Heroku button on the chat interface row you want to deploy. This button opens a new page where you enter a name for your app and click Deploy.
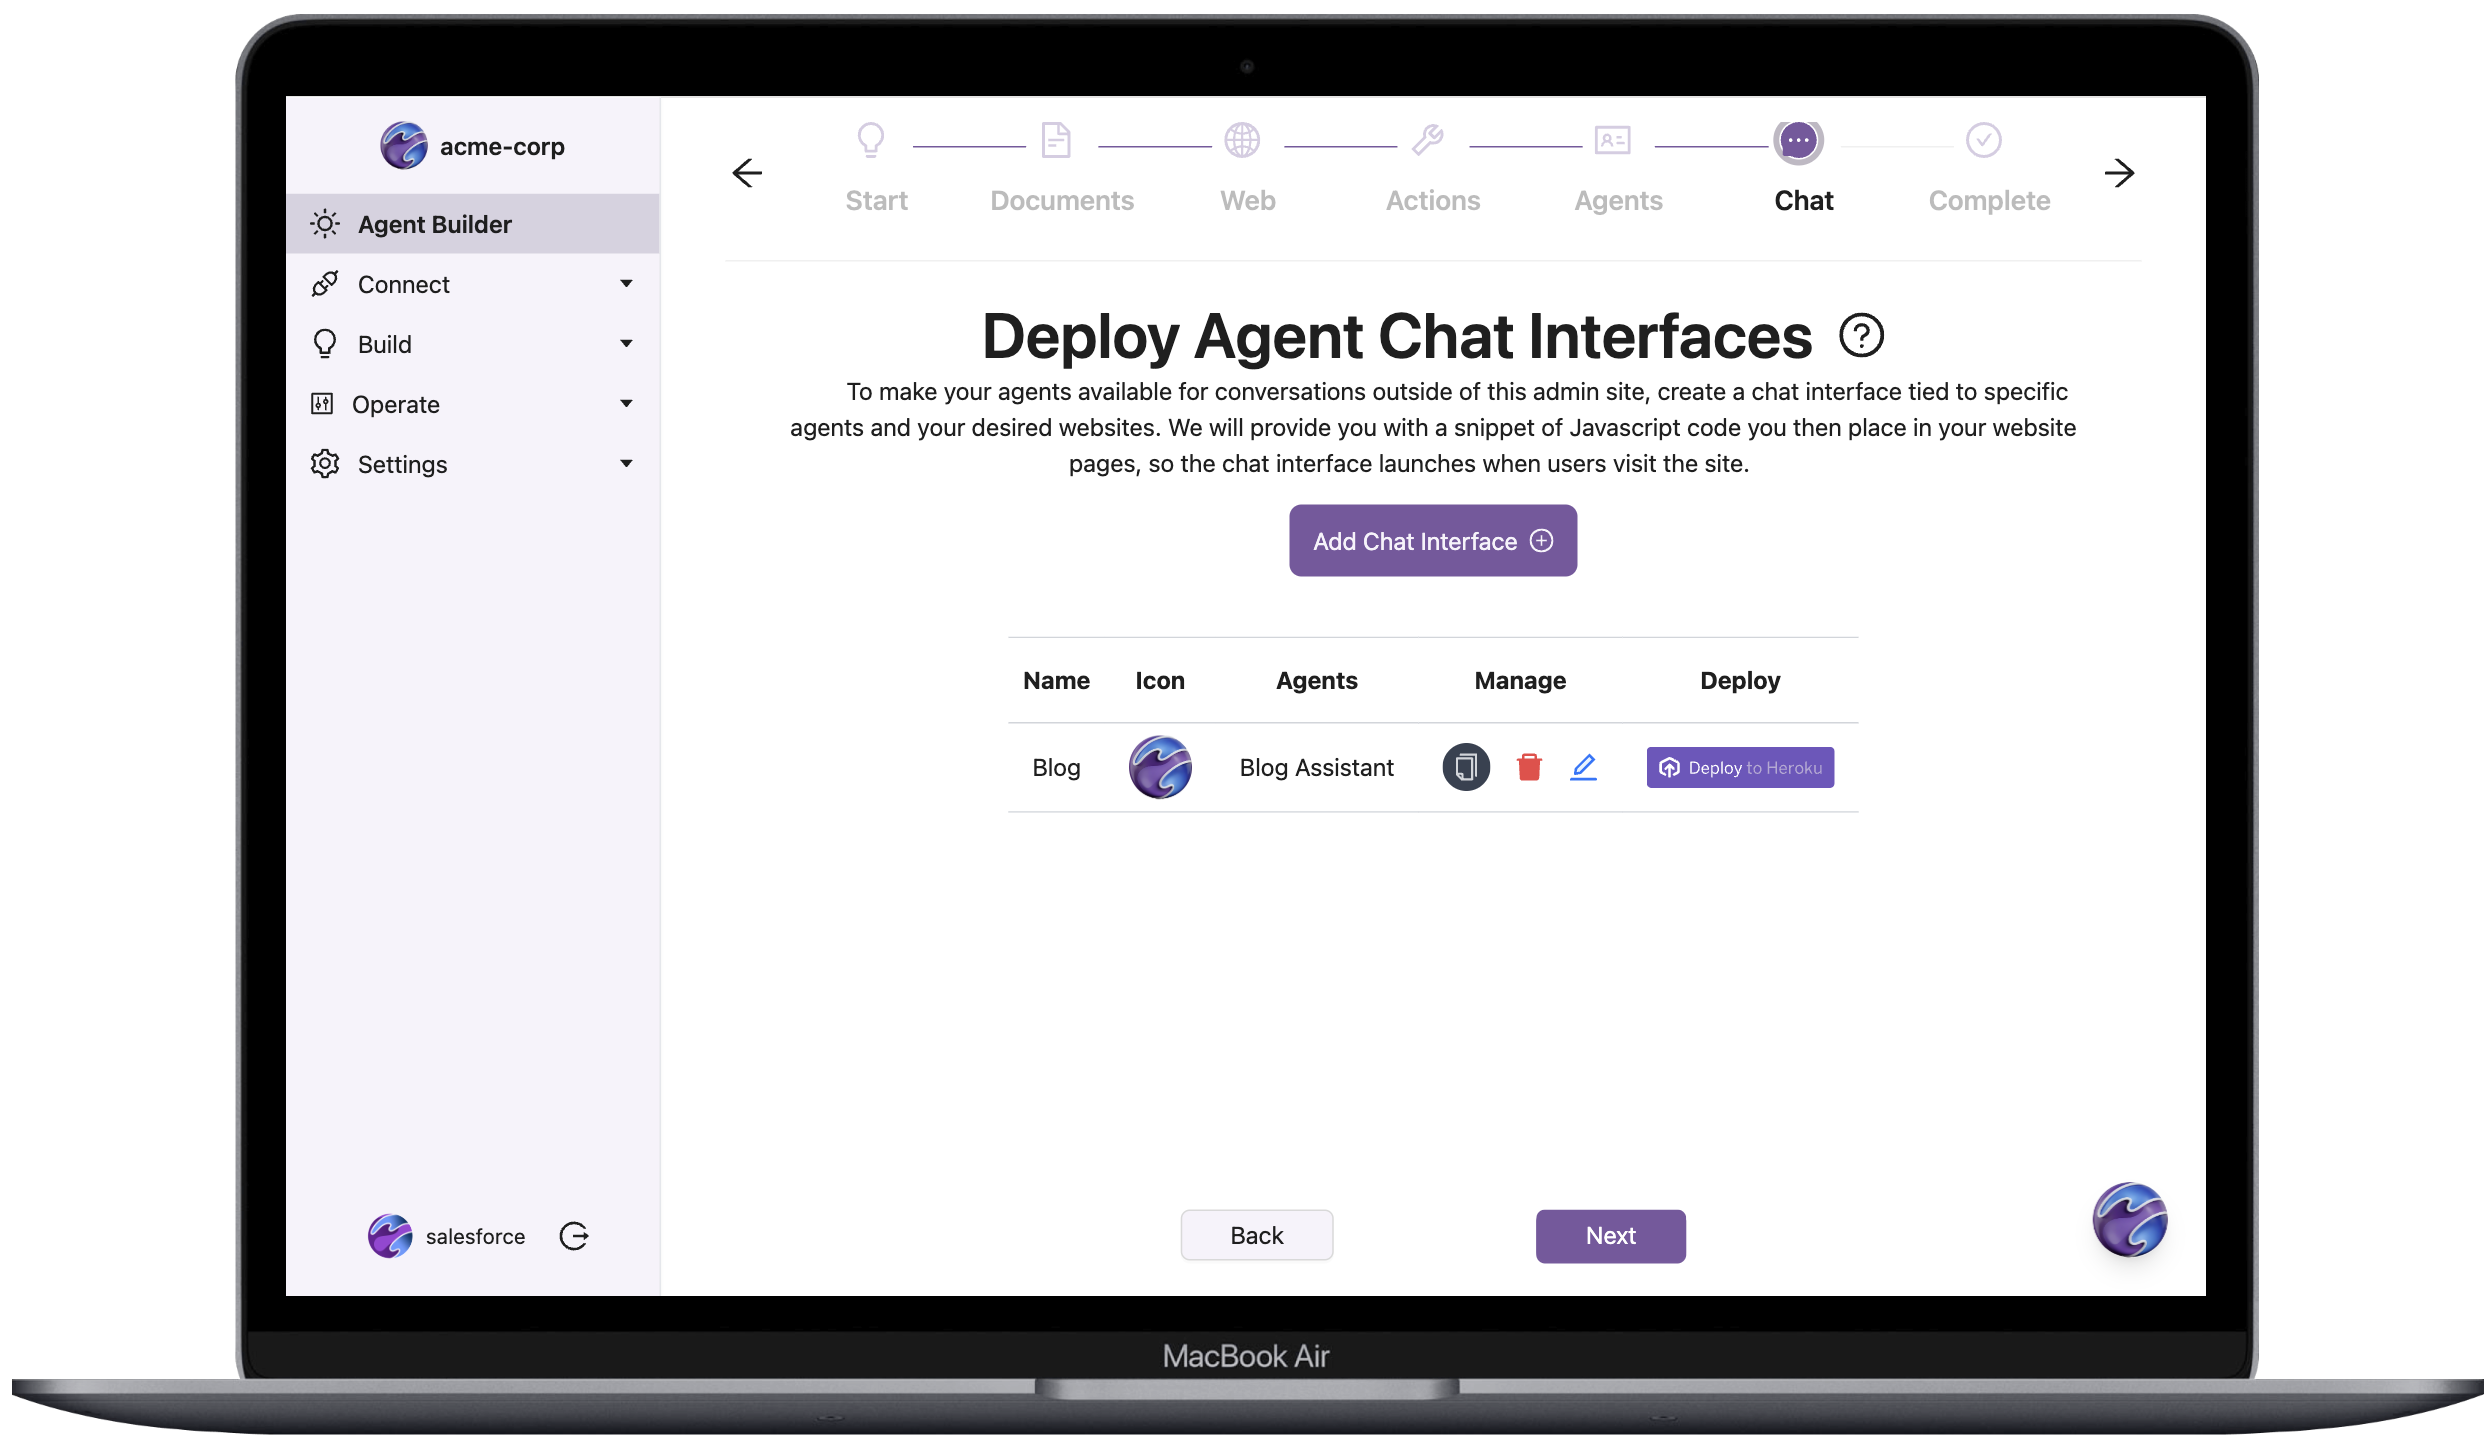
After the new app deploys, click View to chat with your agent.
📱 Share via Mobile
To deploy via mobile or share a temporary usage link with others, select the Mobile tab in the Launch menu and configure access to an agent for the desired amount of time.
Use this method to show co-workers and friends the power of your agents. Be careful where you share the link. Anyone with these invite URLs can access your agents while the link is active. If you have concerns about excess access to one of your agents through an invite URL, deactivate the URL from this page in the Admin UI. Access to your agent is immediately cut off when the associated invite URL is deactivated.
For iOS, check out this walkthrough video to see how you can create a launch icon for an individual agent chat interface.
💬 Deploying Agents to Slack
Deploy your agents directly to Slack workspaces, enabling users to interact with AI assistants through direct messages, channel mentions, and slash commands.
Slack Deployment Capabilities
Slack-deployed agents support:
- Direct Messages: Chat privately with agents using Slack’s native assistant interface.
- Channel Mentions: @mention the bot in any channel to get agent responses.
- Slash Commands: Use
/sai [message]to quickly message your default agent. - Threaded Conversations: Maintain conversation context across message threads.
- Multi-Agent Selection: Deploy multiple agents and let users choose which to interact with.
Connect Your Slack Workspace
To connect a Slack workspace:
- Navigate to
Operate→Launchin the side-bar menu. - Select the
Slacktab. - Click
Deploy to Slack. - Authorize the Stratis AI bot in your Slack workspace when prompted.
- After authorization completes, the admin UI displays your connected workspace.
You need Slack workspace admin permissions to authorize the bot installation.
Configure Agent Deployment
After connecting your workspace, configure which agents to deploy:
- Click
Configurenext to your connected workspace. - Select one or more agents from the
Available Agentsdropdown. - Optionally, set a
Default Agentfor users who message without specifying an agent. - Click
Save.
Only activated agents appear in the available agents list. Activate agents in the Agents page before deploying to Slack.
Interact with Agents in Slack
Users can interact with deployed agents in three ways.
Direct Messages:
- Open a direct message with the Stratis AI app.
- Click
New Chatto start a conversation. - If multiple agents are deployed, select an agent from the dropdown.
- Type your message and receive responses in the thread.
Channel Mentions:
- @mention the Stratis AI bot in any channel:
@Stratis AI [your message] - The bot responds in a thread.
Multi-Agent Conversations
When multiple agents are deployed to a workspace:
- In Direct Messages: Select an agent once per conversation. Click
New Chatto switch agents. - In Channels: Each thread maintains its own agent selection. Start a new thread to use a different agent.
If no default agent is set, the bot prompts users to select an agent before responding.
⭐ Leveraging Specialized Agents
In addition to the open-ended agent builder, Stratis AI also provides specialized agents with targeted capabilities. Many aspects of these agents are managed for you to alleviate the maintenance burden and ensure high quality.
Reach out at support@stratisglobal.com to create even more specialized agents that make the most sense for you.
🗄️ Own Data Agents
Build agents that operate across your Own backup and restore services to provide assistance and insight related to the following:
- Performing Own + Salesforce backups
- Analyzing Own Security Posture and Vulnerabilities
- Submitting and tracking Data Privacy (GDPR) requests
To use Own with Stratis AI, provision the add-on with the own-agents plan.
Set Up the Own Agent
To create an Own agent:
- Obtain your Own refresh token from the
User Profilepage in your Own Data’s app portal. - Return to the Stratis AI admin portal.
- Navigate to
Settings→Credentialsin the side-bar menu. - Click
Add Credential. - Select
Ownas the credential provider. - Enter your Own refresh token when prompted. Allow the page to refresh to process the connection.
- Navigate to
Connect→Ownto verify your Own organizations are connected. - Create actions for your Own connection following the steps in Define Your Actions. For example, create actions like
Own: List ServicesandOwn: List Backupsto give your agent the ability to retrieve backup information. - Create an agent and assign your Own actions to it following the steps in Assemble Agents.
You can now deploy your Own agent using the same deployment methods described in Deploying Conversational Agents.
📝 Next Steps
After successfully creating and deploying your first conversational agent, iterate and improve it by:
- Adding knowledge sources
- Monitoring the crawling and vectorizing of those sources
- Adding more actions
- Adding configurations and parameters to how your agent performs
- Testing your agents for accuracy and performance
ℹ️ Removing the Add-on
Remove Stratis AI via the CLI:
This action destroys all associated knowledge source crawls and vectorizations, associated actions, and all agents. This action is irreversible.
$ heroku addons:destroy stratisai --app example-app
Destroying stratisai-trapezoidal-84750 on ⬢ example-app... done
📊 Monitoring
Monitor Stratis AI operational system status at any time at status.stratisglobal.ai.
💪🏼 Support
Submit all Stratis AI support and runtime issues via one of the Heroku Support channels. Any non-support-related issues or product feedback is welcome at support@stratisglobal.com.