Deep-dive on the Next Gen Platform. Join the Webinar!

Skip Navigation
Show nav
Dev Center
  • Get Started
  • Documentation
  • Changelog
  • Search
  • Get Started
    • Node.js
    • Ruby on Rails
    • Ruby
    • Python
    • Java
    • PHP
    • Go
    • Scala
    • Clojure
    • .NET
  • Documentation
  • Changelog
  • More
    Additional Resources
    • Home
    • Elements
    • Products
    • Pricing
    • Careers
    • Help
    • Status
    • Events
    • Podcasts
    • Compliance Center
    Heroku Blog

    Heroku Blog

    Find out what's new with Heroku on our blog.

    Visit Blog
  • Log inorSign up
Hide categories

Categories

  • Heroku Architecture
    • Compute (Dynos)
      • Dyno Management
      • Dyno Concepts
      • Dyno Behavior
      • Dyno Reference
      • Dyno Troubleshooting
    • Stacks (operating system images)
    • Networking & DNS
    • Platform Policies
    • Platform Principles
  • Developer Tools
    • Command Line
    • Heroku VS Code Extension
  • Deployment
    • Deploying with Git
    • Deploying with Docker
    • Deployment Integrations
  • Continuous Delivery & Integration (Heroku Flow)
    • Continuous Integration
  • Language Support
    • Node.js
      • Working with Node.js
      • Troubleshooting Node.js Apps
      • Node.js Behavior in Heroku
    • Ruby
      • Rails Support
      • Working with Bundler
      • Working with Ruby
      • Ruby Behavior in Heroku
      • Troubleshooting Ruby Apps
    • Python
      • Working with Python
      • Background Jobs in Python
      • Python Behavior in Heroku
      • Working with Django
    • Java
      • Java Behavior in Heroku
      • Working with Java
      • Working with Maven
      • Working with Spring Boot
      • Troubleshooting Java Apps
    • PHP
      • PHP Behavior in Heroku
      • Working with PHP
    • Go
      • Go Dependency Management
    • Scala
    • Clojure
    • .NET
      • Working with .NET
  • Databases & Data Management
    • Heroku Postgres
      • Postgres Basics
      • Postgres Getting Started
      • Postgres Performance
      • Postgres Data Transfer & Preservation
      • Postgres Availability
      • Postgres Special Topics
      • Migrating to Heroku Postgres
    • Heroku Key-Value Store
    • Apache Kafka on Heroku
    • Other Data Stores
  • AI
    • Working with AI
  • Monitoring & Metrics
    • Logging
  • App Performance
  • Add-ons
    • All Add-ons
  • Collaboration
  • Security
    • App Security
    • Identities & Authentication
      • Single Sign-on (SSO)
    • Private Spaces
      • Infrastructure Networking
    • Compliance
  • Heroku Enterprise
    • Enterprise Accounts
    • Enterprise Teams
    • Heroku Connect (Salesforce sync)
      • Heroku Connect Administration
      • Heroku Connect Reference
      • Heroku Connect Troubleshooting
  • Patterns & Best Practices
  • Extending Heroku
    • Platform API
    • App Webhooks
    • Heroku Labs
    • Building Add-ons
      • Add-on Development Tasks
      • Add-on APIs
      • Add-on Guidelines & Requirements
    • Building CLI Plugins
    • Developing Buildpacks
    • Dev Center
  • Accounts & Billing
  • Troubleshooting & Support
  • Integrating with Salesforce
  • Security
  • Identities & Authentication
  • Built-In Authenticators

Built-In Authenticators

English — 日本語に切り替える

Last updated June 16, 2023

Built-in authenticators, also called platform authenticators, verify a user’s identity through a biometric reader. A biometric reader can be a fingerprint, iris, or facial recognition scanner, which is built into a user’s computer or mobile device. In some cases, built-in authenticators confirm a user via a PIN or password that the user sets up in their device’s operating system.

This type of verification method streamlines the multi-factor authentication (MFA) requirement because it relies on built-in mechanisms rather than needing a separate authenticator app or physical security key. Depending on the browser and operating system that you use, built-in authenticators include Touch ID, Face ID, and Windows Hello.

Before Using Built-In Authenticators

Before using built-in authenticators, keep these considerations in mind.

  • Your device, operating system, and browser all must support the FIDO2 WebAuthn standard.
  • You must enable the built-in authenticator service, such as Touch ID, Face ID, or Windows Hello, and set it up to verify your identity via a biometric, PIN, or password.
  • To use biometric authentication, a device must include a fingerprint, iris, or facial recognition scanner that’s supported by the built-in authenticator service.

To learn more, see FIDO2 WebAuthn or the documentation for your device.

This type of verification method is bound to a specific device. If you access Heroku from multiple computers, such as a desktop workstation and a laptop, you must register a built-in authenticator on each system.

To ensure that you can log in to Heroku on other devices where a built-in authenticator isn’t present, we recommend that you register another verification method.

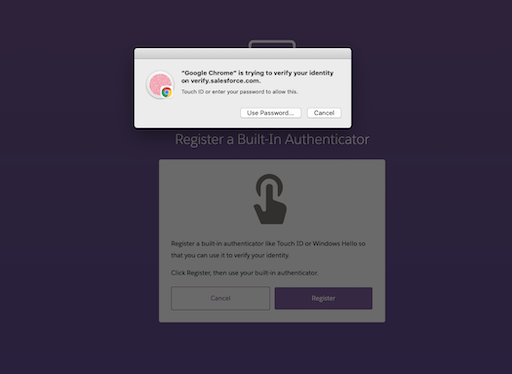
Registering a Built-In Authenticator

To register a built-in authenticator as an MFA verification method:

  • From Account Settings, select Setup Multi-Factor Authentication. Or if you already enabled other verification methods, select Manage Multi-Factor Authentication.
  • On the next page, choose Add Built-in Authenticator and follow the prompts to complete registration. Your registration experience can vary based on the specific device, OS version, and browser in use. In general, registration involves these steps.
  • To add a built-in authenticator, click Register.
  • When prompted, activate your built-in authenticator. For example, use Touch ID for fingerprint verification.
  • Name your authenticator, and complete registration.

Add Touch ID

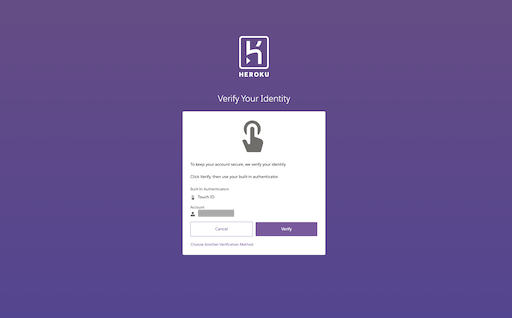
MFA Verification with a Built-In Authenticator

To log in with a built-in authenticator:

  • After entering your email and password, you’re prompted to verify your login request with your authenticator.
  • When prompted, activate your built-on authenticator. For example, use Touch ID for fingerprint verification.

Verify Touch ID

Keep reading

  • Identities & Authentication

Feedback

Log in to submit feedback.

Two-Factor Authentication (deprecated) Multi-Factor Authentication (MFA)

Information & Support

  • Getting Started
  • Documentation
  • Changelog
  • Compliance Center
  • Training & Education
  • Blog
  • Support Channels
  • Status

Language Reference

  • Node.js
  • Ruby
  • Java
  • PHP
  • Python
  • Go
  • Scala
  • Clojure
  • .NET

Other Resources

  • Careers
  • Elements
  • Products
  • Pricing
  • RSS
    • Dev Center Articles
    • Dev Center Changelog
    • Heroku Blog
    • Heroku News Blog
    • Heroku Engineering Blog
  • Twitter
    • Dev Center Articles
    • Dev Center Changelog
    • Heroku
    • Heroku Status
  • Github
  • LinkedIn
  • © 2025 Salesforce, Inc. All rights reserved. Various trademarks held by their respective owners. Salesforce Tower, 415 Mission Street, 3rd Floor, San Francisco, CA 94105, United States
  • heroku.com
  • Legal
  • Terms of Service
  • Privacy Information
  • Responsible Disclosure
  • Trust
  • Contact
  • Cookie Preferences
  • Your Privacy Choices